Tutorials
Mastering the Art of Laser Engraving on Slate
Nov
Estimated reading time: 8 minutes
Key Takeaways
- Proper Preparation is Crucial: The single most important factor for achieving crisp, high-contrast results is meticulous slate preparation, including selecting smooth pieces, thorough cleaning with soap and water, and ensuring the slate is completely dry before engraving.
- Test Your Settings: There are no universal settings for slate. Always run a power/speed test grid on a scrap piece to find the optimal combination for your specific laser and material, aiming for the brightest white mark without melting the stone.
- High Speed is Key: For slate, a combination of high speed and moderate-to-high power generally produces the best results. This delivers a quick burst of energy that fractures the surface rather than a slow burn that melts it.
- Finishing Enhances Contrast: Applying a food-safe mineral oil or wood butter after cleaning the engraved slate is the final professional touch. It deepens the color of the un-engraved slate, making the light-colored engraving pop dramatically.
Table of Contents
- Preparing Slate for Flawless Engraving
- Dialing in the Perfect Laser Settings for Slate
- The Engraving Process and Professional Finishing Touches
- Conclusions
- Frequently Asked Questions
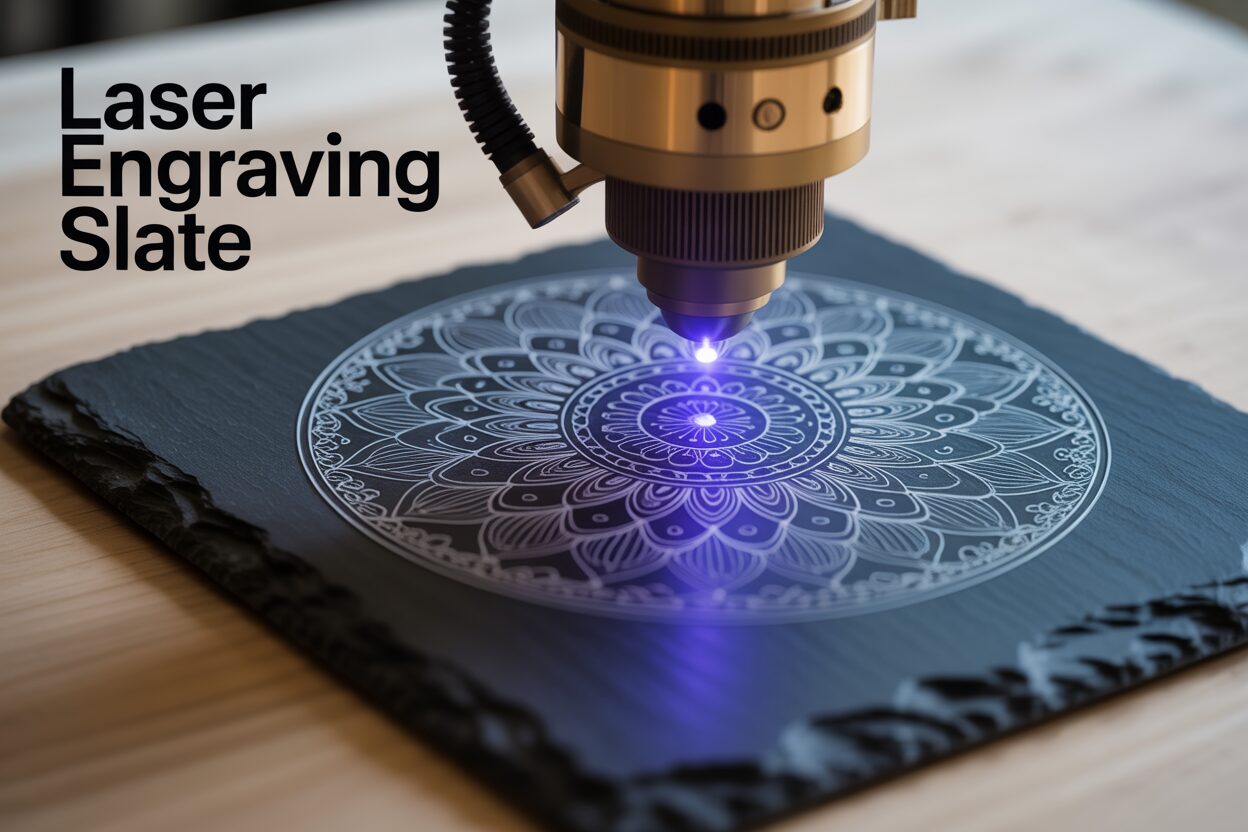
Laser engraving on slate produces stunning, high-contrast results perfect for coasters, signs, and personalized gifts. This guide provides a comprehensive walkthrough of the entire process. We will explore everything from selecting and preparing the material to dialing in the perfect settings and applying finishing touches, ensuring you can confidently master the art of laser engraving slate for your projects.
Interested in more Signs? Check out our Signs laser file designs: Click here!
Preparing Slate for Flawless Engraving
The journey to a breathtaking slate engraving begins long before the laser fires. Just as a painter primes a canvas, a laser artist must meticulously prepare the slate. This foundational step is not merely a suggestion; it is the single most important factor in achieving the crisp, high-contrast results that make engraved slate so striking. Skipping or rushing this stage can lead to inconsistent engravings, blurred details, and disappointing outcomes. By investing a little time upfront in selection, cleaning, and preparation, you set the stage for a masterpiece.
Choosing Your Canvas: Selecting High-Quality Slate
Not all slate is created equal. The natural, laminated structure of this stone means its quality can vary significantly. Your first task is to become a discerning selector. Look for pieces with a relatively uniform thickness across the entire surface. Drastic variations in thickness can cause issues with the laser’s focal point. If one part of the slate is significantly higher or lower than another, the laser beam will be out of focus in that area, resulting in a blurry or weak engraving. Run your hand over the surface. The ideal piece will feel smooth and consistent, free from excessive ridges or flaky layers. While a bit of natural texture is characteristic of slate, you want to avoid deeply riven or rough surfaces, as these can disrupt the laser path and cause parts of your design to be skipped or engraved unevenly. You can find suitable slate coasters, tiles, and plaques at craft stores, home improvement centers, and online suppliers specializing in laser materials.
The Essential Cleanse: Washing and Inspection
Once you have your slate, the next step is a thorough cleaning. Slate often arrives from the supplier covered in dust, debris, and sometimes even a fine layer of oil from the cutting process. These contaminants can interfere with the laser, absorbing its energy and preventing a clean mark. The cleaning process is simple but crucial.
- Wash the slate with warm water and a mild dish soap. Use a soft-bristled brush or a non-abrasive sponge to gently scrub the entire surface, including the edges.
- Rinse the slate thoroughly with clean water to remove all soap residue.
- Allow the slate to dry completely. This is critically important. Any moisture trapped in the porous surface can turn to steam when hit by the laser, potentially causing the slate to crack or resulting in a splotchy, uneven engraving. It’s best to let it air dry for several hours or overnight.
During this process, inspect the piece carefully. Look for hairline cracks, chips, or large, metallic-looking inclusions (often pyrite or “fool’s gold”). These imperfections can be weakened by the heat of the laser and may fracture during or after the engraving process. It’s better to set aside a flawed piece than to risk wasting your time on a project that is destined to fail.
The Pro-Trick: Applying a Coating for Ultimate Contrast
While natural slate engraves to a light gray, a popular technique for achieving a brilliant, almost pure white finish involves applying a clear coating before engraving. This optional step creates a barrier that, when ablated by the laser, results in a much brighter and more consistent mark. A thin, even coat of a clear matte or semi-gloss lacquer or acrylic spray paint works wonderfully. To apply it, work in a well-ventilated area. Hold the can approximately 8-12 inches from the slate and apply a very thin, even layer using light, sweeping motions. The goal is a minimal, consistent film—not a thick, glossy coat. A heavy application can result in a gummy mess, require excessive laser power, and produce less-defined edges. Let the coating cure completely according to the manufacturer’s instructions, which may take several hours. This simple pre-treatment transforms the slate, ensuring your design pops with stunning, professional-level contrast.
Dialing in the Perfect Laser Settings for Slate
With your slate perfectly cleaned and prepared, it’s time to interface with your machine. Finding the correct laser settings is an empirical process—part science, part art—and is the key to unlocking slate’s engraving potential. There is no single “magic number” for slate; the ideal settings depend on your specific laser’s power, the properties of the individual slate piece, and whether you applied a pre-treatment coating. The goal is not to engrave deeply but to apply just enough energy to fracture or “bruise” the surface, changing its color to that signature light gray or brilliant white. Too much power will melt the stone, resulting in a glassy, dark, and undefined mark, while too little will have no effect at all.
The Dance of Power and Speed
Power and speed are the two fundamental parameters you will control. They have an inverse relationship: increasing speed while keeping power constant delivers less energy to the material, while decreasing speed delivers more. For slate, you are looking for a combination that delivers a quick, intense burst of energy. This is why a higher speed combined with moderate-to-high power often yields the best results. A slow speed, even at low power, allows heat to build up and spread, which can lead to melting rather than the desired micro-fracturing.
- Power: This setting determines the output intensity of your laser beam. For slate, you’ll generally be in the mid-to-high range of your machine’s capabilities.
- Speed: This dictates how fast the laser head moves across the material. Faster speeds are generally preferred for slate to keep the heat localized and create a crisp mark.
Think of it like quickly striking the surface with a tiny, hot needle. A fast, sharp tap will create a clean white dot, whereas a slow press will melt the area around it. Your task is to find the perfect combination of these two variables for your machine.
Finding the Sweet Spot: The Power/Speed Test Grid
The most reliable method for dialing in your settings is to create a test grid on a scrap piece of slate—ideally from the same batch as your final project piece. Most laser software, like LightBurn, has a built-in feature to easily generate these grids. A test grid is an array of small shapes (usually squares) where each square is engraved with a unique combination of power and speed. This allows you to see a wide range of results at a glance.
When you examine your finished test grid, you are looking for the square with the brightest and most consistent white color, coupled with the sharpest edges. Disregard squares that are dark, glassy, or have flaky, chipped edges. For hobbyist-grade diode lasers, here are some recommended starting points for your test grid:
- 10W Diode Laser: Try speeds from 1000 mm/min to 4000 mm/min and power levels from 50% to 100%.
- 20W Diode Laser: You can use a higher speed range, from 2000 mm/min to 6000 mm/min, with power levels from 40% to 90%.
For more powerful CO2 lasers, your settings will be drastically different, involving much higher speeds and lower power percentages. For a 40-60W CO2 laser, you might start a test grid with speeds from 200 mm/s to 500 mm/s and power from 12% to 25%. Once you find the square that looks best, use those settings for your project.
Perfecting the Details: Focus and Resolution
Beyond power and speed, two other settings are crucial. Focus is paramount. An out-of-focus laser beam will be wider and less concentrated, resulting in a fuzzy, weak engraving. Because slate can have an uneven surface, it’s best to set your focus to the average height of the engraving area rather than an obvious peak or valley. Use your machine’s focusing tool and ensure the beam is as small and precise as possible. Secondly, consider your resolution, measured in Dots Per Inch (DPI) or Lines Per Inch (LPI). For slate, a higher DPI is not always better. An extremely high resolution can cause the engraved lines to overlap too much, effectively over-exposing the stone and potentially darkening the result. A resolution between 250 and 300 DPI is typically the sweet spot, providing excellent detail without over-saturating the material with laser energy.
The Engraving Process and Professional Finishing Touches
With your design finalized and your laser settings dialed in from the test grid, you have arrived at the most exciting stage: the engraving itself. This is where your preparation pays off. Begin by placing your prepared slate piece onto the laser bed. For larger, heavier pieces, the weight of the slate itself is often enough to keep it perfectly still during the engraving process. However, for smaller items like coasters, it’s wise to secure them with hold-down pins or a simple custom-made jig to ensure they don’t shift. Double-check your laser’s focus one final time on the surface of the slate. Frame the job to confirm your design is perfectly centered and aligned. With your safety glasses on and your ventilation system running, send the file to the laser and press start. Watch as the laser methodically traces your design, transforming the dark surface into a work of art.
Post-Engraving Cleanup: Revealing the True Design
Once the laser has finished, you will notice a fine layer of gray dust and residue covering the engraved area and the surrounding surface. This is a normal byproduct of the process, but it obscures the final result. The first cleaning step is to gently remove this debris. Do not wipe it with your hand, as the oils from your skin can stain the slate. Instead, use a soft-bristled brush (like a paintbrush or a soft toothbrush) to gently sweep away all the loose particles from the surface. After brushing, you will find that a very fine, stubborn layer of dust remains, clinging to the stone. To remove this, take a soft, lint-free cloth, dampen it slightly with clean water, and wring it out thoroughly—it should be damp, not wet. Gently wipe down the entire surface of the slate. The moisture will lift the remaining fine dust, revealing the crisp, clean engraving underneath. Allow the slate to air dry completely before moving on to the final step.
The Finishing Touch: Enhancing Contrast and Protection
This final step is the secret that elevates a good engraving to a professional one. While the cleaned engraving looks great, you can dramatically increase the contrast and give the slate a rich, finished luster by applying a sealer. The best options are food-safe mineral oil or a high-quality wood butter (a mix of mineral oil and beeswax). This is especially critical for functional items like laser engraving on slate coasters, as it also provides a layer of protection against moisture and stains. To apply, place a small amount of oil or wax onto a clean, lint-free cloth. Gently rub it over the entire surface of the slate, working it into both the engraved and un-engraved areas. You will instantly see the magic happen: the dark, un-engraved slate will absorb the oil, turning a deep, rich black, while the lighter, engraved areas will largely repel it, making them appear even brighter and whiter by comparison. The design will pop with incredible clarity. After you’ve applied a thin, even coat, take a separate, clean dry cloth and buff the entire piece to remove any excess oil, leaving a beautiful, satin finish that is ready to impress.
Conclusions
You now have the knowledge to create beautifully detailed items with laser engraving slate. By carefully preparing your material, testing for the optimal settings, and applying the right finishing touches, you can produce professional-quality products. Experiment with these techniques on projects like laser engraving on slate coasters to refine your skills and achieve consistently impressive results every time.
Frequently Asked Questions
Q: What is the most important step for getting a good slate engraving?
A: Preparation is the single most important factor. This includes selecting a smooth, uniform piece of slate, washing it thoroughly with soap and water, and allowing it to dry completely. A clean, dry surface is essential for a crisp, high-contrast mark.
Q: Why does my slate engraving look dark and melted instead of bright white?
A: A dark or glassy result is almost always caused by using too much laser energy. This happens when your power setting is too high or your speed setting is too low. The goal is to quickly fracture the surface, not melt it. Try increasing your speed or lowering your power.
Q: Do I have to apply a coating before engraving slate?
A: No, it is an optional step. Natural slate engraves to a light gray color. Applying a thin layer of clear lacquer or acrylic spray before engraving is a popular technique to achieve a much brighter, more consistent white finish, but it is not required.
Q: How do I make the final design “pop” and look professional?
A: After engraving and cleaning off all the dust, apply a thin coat of food-safe mineral oil or wood butter to the entire surface. This will darken the un-engraved slate to a rich black while making the engraved areas appear even whiter by comparison, dramatically enhancing the contrast and providing a protective finish.
Block "subscribe-popup" not found