Projects
Elevate Your Craft with Unique Laser Engraving Designs
Jun
Estimated Reading Time: 15 minutes
Key Takeaways
- Vast Resources & File Formats: A wealth of free laser engraving files (SVG, DXF, AI) are readily available online, requiring users to check usage licenses and understand vector formats for precise laser operation.
- Design & Customization Process: Translating creative ideas into engravable art involves initial sketching, proficient use of vector design software (like Inkscape or Adobe Illustrator), and careful adaptation of designs to specific material properties for clean, scalable files.
- Execution & Material Specifics: Successful laser engraving projects rely on meticulous material preparation (e.g., masking wood/acrylic), precise adjustment of laser settings (Power, Speed, DPI/LPI), and thoughtful post-processing steps (cleaning, finishing) tailored to materials like wood and slate to achieve optimal contrast and detail.
- Essential Software Tools: Proficiency in both dedicated vector design software (e.g., Illustrator, CorelDRAW, Inkscape, Affinity Designer) for creating original artwork and laser control software (e.g., LightBurn, RDWorks) for machine interface is critical for high-quality results.
- Limitless Creative Potential: By leveraging free resources, generating unique ideas, mastering design and execution techniques, and utilizing appropriate software, individuals can unleash significant creative potential in producing diverse, personalized laser-engraved items.
Table of Contents
Laser engraving offers a versatile and precise method for creating stunning designs on various materials. This article explores the diverse applications of Laser Engraving Designs, highlighting resources for free laser engraving files and inspiring laser engraving ideas. We’ll delve into finding unique laser engraving patterns and executing creative laser engraving projects for both hobbyists and professionals.
Finding and Using Free Laser Engraving Files
One of the most exciting aspects of starting with laser engraving is the vast amount of readily available resources to kickstart your creativity. Venturing into the world of free laser engraving files opens up a plethora of possibilities without an initial investment in design assets. Numerous websites and online communities are dedicated to sharing these files. Platforms like Thingiverse, Instructables, and specialized Facebook groups often have sections where creators share their work. Design marketplaces such as Creative Fabrica or Design Bundles frequently offer complimentary files, sometimes as weekly freebies or within a dedicated free section. Don’t overlook public domain vector repositories or open-source design projects either. When searching, use terms like “free CDR files,” “free SVG for laser,” “DXF download,” or specific project-related terms like “free coaster patterns” to narrow your results. Remember to always check the usage licenses; while many files are free for personal use, commercial use might require a license or be prohibited.
Understanding file formats is crucial for working with free laser engraving files. The most common and compatible formats for laser engraving software are vector-based.
- SVG (Scalable Vector Graphics): This is an XML-based vector image format for two-dimensional graphics with support for interactivity and animation. SVGs are excellent because they can be scaled to any size without losing quality, making them perfect for various Laser Engraving Designs, from tiny jewelry pieces to large signs. Most modern design software and laser control software (like LightBurn, RDWorks) can import SVGs directly.
- DXF (Drawing Exchange Format): Developed by Autodesk, DXF files are widely used in CAD (Computer-Aided Design) applications. They are particularly good for representing outlines and precise paths needed for cutting operations. Many mechanical parts, stencils, and geometric laser engraving patterns are available in DXF format.
- AI (Adobe Illustrator): This is the native file format for Adobe Illustrator. While powerful and capable of holding complex designs, you might need Illustrator itself or compatible software (like CorelDRAW or Affinity Designer) to fully open and edit AI files. Some laser software can import AI files, but compatibility can sometimes vary depending on the Illustrator version used to save the file.
Other formats like PDF (if vector-based) or even EPS can also often be used, but SVG and DXF tend to be the most universally accepted for free laser engraving files. The key is that vector files define paths mathematically, which the laser follows precisely, as opposed to raster files (like JPGs or PNGs) which are pixel-based and more suited for photo engraving (a topic often handled differently by laser software).
Evaluating and Customizing Your Free Finds
Once you’ve found a source for free laser engraving files, it’s important to evaluate their quality before sending them to your laser. A poorly designed file can result in a messy engraving or even damage to your material. Open the file in your preferred vector editing software (Inkscape, Adobe Illustrator, CorelDRAW, or even your laser control software’s editing tools) and zoom in to inspect the paths. Look for clean, continuous lines. Broken paths or unintentional gaps can cause the laser to stop and start unexpectedly or fail to cut through completely. Check for excessive nodes; too many nodes can make the laser’s movement jerky and slow down the engraving process. Some complex designs might also have overlapping shapes or hidden layers that could cause issues. Ensure the design isn’t overly intricate for your intended material or scale; fine details might be lost on wood grain or when shrunk down significantly. Customizing these files is where your unique touch comes in. Vector files are inherently editable. You can resize elements, add personalized text like names or dates, combine components from different free files, or remove sections you don’t need. For instance, you might download a floral laser engraving pattern and add a monogram in the center. You can also adjust line weights (though laser software typically cares more about path color for assigning operations like cut, score, or fill-engrave) or convert parts of a design from an engrave to a cut, and vice-versa, to suit your specific Laser Engraving Designs. This adaptability makes even simple free files incredibly versatile.
With a library of quality, customized free files, you can embark on a wide range of laser engraving projects. Simple geometric laser engraving patterns or elegant swirls are perfect for creating sets of personalized coasters, a popular and easy starting project. Animal silhouettes or cartoon characters, often found as free laser engraving files, can be used to make custom keychains, children’s puzzles, or decorative elements for nursery décor. Many online sources offer free templates for items like phone stands, small boxes, or ornaments; you can then embellish these structural designs with intricate laser engraving patterns or thematic laser engraving ideas you find separately. For example, a basic free box template can be transformed into a pirate treasure chest with skull and crossbones engravings, or a festive holiday gift box with snowflake patterns. Consider creating personalized name tags for events, bookmarks with inspiring quotes, or even custom signage for your home or workshop. The beauty of using free laser engraving files for these laser engraving projects is the ability to experiment with different laser engraving ideas on various materials without the upfront cost of purchasing designs, allowing you to refine your skills and discover your unique style.
Generating Unique Laser Engraving Ideas and Patterns
The journey to truly unique Laser Engraving Designs begins with cultivating your own wellspring of inspiration and developing a methodology for translating those sparks into engravable reality. Brainstorming original laser engraving ideas can be as simple as dedicated observation or structured creative exercises. Try mind mapping: start with a central theme (e.g., “gift for a cyclist”) and branch out with related concepts, materials, and imagery. Word association can also unlock unexpected avenues. Inspiration is abundant if you know where to look. Nature offers an endless supply of laser engraving patterns: the intricate venation of a leaf, the fractal branching of trees, animal silhouettes, or the subtle textures of stone and water. Geometric forms provide another rich vein – consider mandalas, tessellations, abstract line art, or even architectural blueprints. Typography, beyond just setting text, can become a central design element; explore custom lettering, calligraphic styles, or impactful quote layouts. Popular culture, from vintage aesthetics to contemporary trends (while always being mindful of copyright and intellectual property), can also fuel unique laser engraving ideas. The key is often to combine these sources – perhaps a geometric background framing a nature-inspired motif with a personalized typographic element.
Transforming Concepts into Engravable Art
Once an idea takes root, the next step is to translate it into a workable laser engraving pattern. Don’t underestimate the power of simple sketching. A quick pencil drawing, no matter how rough, can help you visualize composition, scale, and detail before committing to digital tools. This initial capture is invaluable for refining your laser engraving ideas. From there, design software is your primary tool. Vector graphics programs like Adobe Illustrator, CorelDRAW, Inkscape (a powerful free option), or Affinity Designer are essential for creating the clean lines and scalable paths that lasers require. You can scan your sketches and trace them digitally, allowing for precise control and easy modification. Another powerful technique is adapting existing artwork – this could be your own photography (imagine a pet portrait converted into a stylized line drawing), a child’s drawing immortalized on wood, or illustrations from public domain archives. When adapting, focus on simplifying details, enhancing contrasts, and converting elements into clear vector paths suitable for engraving. Remember, the goal is not just to copy but to reinterpret and transform these sources into unique Laser Engraving Designs tailored for the laser process. Be particularly cautious with contemporary artwork found online; always seek permission or ensure it’s explicitly offered for modification and use.
The final, crucial stage in generating your unique designs involves considering the properties of your chosen material and then creating the actual laser engraving files. The same laser engraving pattern can look vastly different on wood versus acrylic, or leather versus coated metal. Wood grain, for instance, can complement or compete with fine details; bold, clean designs often work best. Smooth acrylic can handle incredibly intricate patterns and achieve sharp contrasts. Leather often takes on a beautiful branded look, but very fine lines might get lost in its texture. For specific laser engraving projects, you must tailor your design to the material. A delicate floral pattern intended for a clear acrylic keychain might need to be simplified with thicker lines if you decide to engrave it on rustic pine. When your design is refined, you’ll export it from your vector software. The preferred formats, as discussed for free files, remain SVG, DXF, and sometimes AI. Ensure your design consists of closed paths (for cutting) and well-defined areas for engraving. Convert any text to paths or curves to ensure font consistency. Simplify overly complex paths with too many nodes, as this can slow down engraving and potentially reduce quality. This process of thoughtful design, material consideration, and proper file preparation is what elevates a simple idea into a stunning and successful laser engraved piece.
Executing Creative Laser Engraving Projects
Executing your meticulously planned Laser Engraving Designs is where your creative vision meets tangible reality. This stage transforms digital laser engraving files into beautifully crafted physical objects. The process, while requiring attention to detail, can be broken down into manageable steps, applicable whether you’re making simple keychains with free laser engraving files or intricate art pieces on wood.
First, ensure your digital design is truly laser-ready. This means double-checking that all paths are closed for cutting operations, text has been converted to curves or outlines to prevent font issues, and overly complex areas with excessive nodes have been simplified. As detailed in previous chapters, you might be using a customized free laser engraving file or one you’ve crafted from your unique laser engraving ideas; regardless, this final digital check is crucial. Once satisfied, import your file (typically SVG or DXF) into your laser control software (e.g., LightBurn, RDWorks). Here, you’ll assign specific laser operations – like engraving, scoring, or cutting – to different parts of your design, often distinguished by color or layer within your design file.
Material Preparation and Laser Settings: The Core Technical Steps
Selecting and preparing your material is paramount. Common choices for laser engraving projects include wood (plywood, MDF, solid woods), acrylic, slate, leather, and coated metals. For wood and acrylic, consider applying transfer tape or paper masking to the surface before engraving. This significantly reduces staining from smoke and resin, makes cleanup easier, and helps achieve crisper edges, especially with intricate laser engraving patterns. Slate usually requires a simple wipe-down to remove dust. Leather should be clean and flat. Always conduct a small test cut or engrave on a scrap piece of the exact same material before committing to your main project. This helps you dial in the ideal laser settings.
The holy trinity of laser settings are Power, Speed, and DPI (Dots Per Inch) or LPI (Lines Per Inch).
- Power: The laser tube’s output. Higher power burns deeper or darker.
- Speed: How fast the laser head moves. Slower speeds allow more energy to be applied to one spot, resulting in deeper or darker marks.
- DPI/LPI: The resolution of the engraving, similar to print resolution. Higher DPI/LPI means more lines engraved per inch, resulting in finer detail but also longer job times.
These settings vary drastically between materials and desired effects. For example, engraving a light, detailed floral laser engraving pattern on birch plywood might require lower power (e.g., 15-20%) and high speed (e.g., 300-500 mm/s) at 300-600 DPI. Conversely, deep engraving a bold logo on a slate coaster might need higher power (e.g., 40-60%) and slower speed (e.g., 100-150 mm/s). Cutting through 3mm acrylic for a keychain blank will require significantly higher power and much slower speed settings specific to cutting operations. Always consult your laser machine’s manual for starting point recommendations and build your own material settings library through systematic testing. A “material test grid” is invaluable here – a small file with squares testing various power/speed combinations. Secure your material flatly onto the laser bed, ensuring it won’t move during operation. Correctly focusing the laser beam to the material’s surface is critical for sharp, consistent results. Most lasers have a manual or autofocus mechanism; master its use.
From Execution to Enhancement: Finishing Your Projects
With settings dialed in, material secured, and focus set, perform a final safety check: ensure proper ventilation is active, wear your safety glasses, and have a fire extinguisher rated for your laser’s risks nearby. Now, you can run your laser engraving project. Monitor the process, especially during the initial stages of a new design or material.
Once the laser has finished, careful post-processing enhances your Laser Engraving Designs.
- Cleaning: If you used masking, carefully peel it away. For unmasked wood, a soft brush or compressed air can remove soot. A damp cloth with isopropyl alcohol often works wonders on acrylic to remove any residue. Slate typically just needs a wipe down.
- Finishing: This step truly elevates your work.
- Wood: Light sanding of engraved edges (if not masked) can smooth them. Apply wood oil, wax, stain, or varnish to protect and enhance the grain. You can also color-fill engraved areas with acrylic paint for added pop. For a personalized cutting board project using an ornate laser engraving idea, a food-safe mineral oil finish is essential.
- Acrylic: Cut edges can sometimes be flame-polished (with extreme care and practice) for a glossy finish. Engraved areas can also be color-filled. A set of acrylic coasters featuring geometric laser engraving patterns sourced from free laser engraving files can look very professional with clean, sharp engravings.
- Slate: Applying a thin coat of mineral oil to engraved slate dramatically increases contrast, making the lighter engraving pop against the dark stone.
- Leather: Leather conditioners can restore moisture. Some engraved leather items might benefit from edge finishing compounds or dyes.
- Assembly: For projects like keychains, attach the ring and chain. For multi-part items, assemble them as planned.
Successful laser engraving projects are a blend of good design, thoughtful material selection, precise laser operation, and careful finishing. For instance, imagine custom wooden bookmarks engraved with intricate literary quotes (a great laser engraving idea!), finished with a light tung oil. Or perhaps a set of slate coasters each featuring a different animal silhouette sourced from free laser engraving files, the engravings made stark and appealing with mineral oil. Each step, from sourcing your initial laser engraving files to the final polish, contributes to the unique appeal of your finished piece.
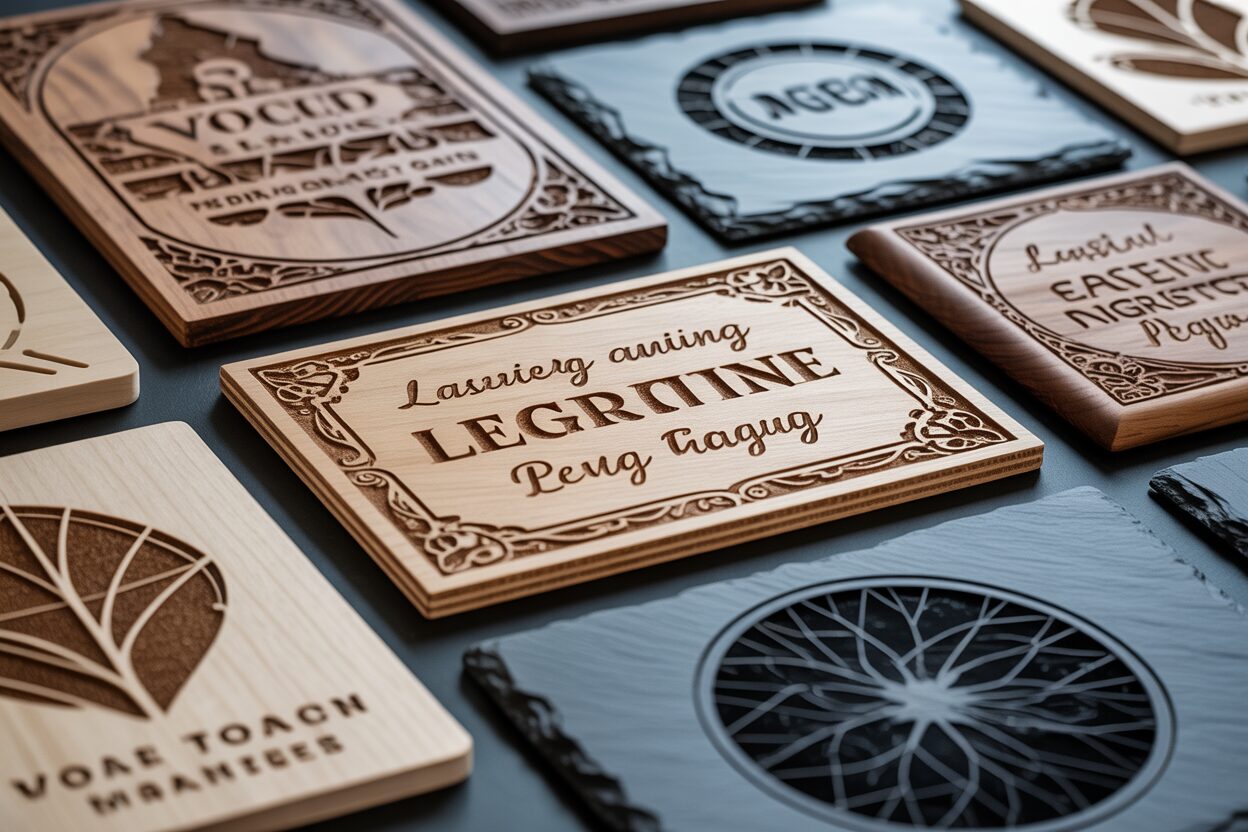
Optimizing Designs for Wood and Slate Materials
Wood and slate are two of the most popular and rewarding materials for laser engraving, each offering unique aesthetic qualities and requiring specific design considerations to achieve optimal results. Understanding their distinct characteristics is the first step in creating stunning Laser Engraving Designs. Wood, an organic material, varies widely in grain, color, density, and resin content. Light-colored, fine-grained woods like alder, maple, or birch generally provide the best contrast and allow for finer detail in laser engraving patterns. The laser burns away the wood, creating a darker mark. Conversely, woods with prominent grain patterns, such as oak or pine, can interfere with very intricate designs, as the grain itself can obscure or break up fine lines. The density of the wood also plays a significant role; softer woods engrave deeper and darker with less power, while hardwoods require more power or slower speeds. Resin content, particularly high in woods like pine, can lead to more smoke and residue, making masking almost essential for clean results.
Slate, a natural metamorphic rock, presents a different canvas. It’s typically dark grey to black, and the laser engraving process works by ablating or fracturing the surface to reveal a lighter grey layer underneath. This creates inherent contrast, making slate excellent for crisp text and bold graphics. However, slate can have natural variations in thickness and surface texture, even within a single piece, which can slightly affect focus and engraving consistency. It’s also more brittle than wood, though generally robust enough for coasters and plaques. The natural, rustic charm of slate is a large part of its appeal for many laser engraving projects.
Optimizing Files and Ideas for Wood
When preparing laser engraving files for wood, particularly for woods with noticeable grain, bolder is often better. Very thin lines or extremely fine details in laser engraving patterns might get lost or appear uneven due to the grain. Consider increasing the stroke weight of lines in your vector design. For raster engravings (fills), ensure there’s enough clear separation between elements. If engraving photographs on wood, the choice of dithering algorithm in your laser software (e.g., Jarvis, Stucki, Newsprint) is crucial for translating grayscale images into engravable dots that create the illusion of tones. Test different DPI settings – higher isn’t always better; sometimes a slightly lower DPI (e.g., 250-300) prevents over-burning and muddying of details on certain woods.
Effective laser engraving ideas for wood include:
- Custom Charcuterie Boards: Engrave family names, monograms, elegant floral borders (many free laser engraving files exist for border elements), or kitchen-themed quotes. Use fine-grained woods like maple or cherry.
- Personalized Photo Plaques: Alder and basswood are excellent for photo engraving due to their light color and minimal grain.
- Wooden Boxes: Engrave intricate laser engraving patterns on the lids of keepsake boxes or wine boxes.
- Home Décor Signs: Use bold typography and rustic imagery for welcome signs or inspirational quotes.
- Ornaments and Gift Tags: Small, detailed iconic shapes or personalized messages can be easily created, often utilizing readily available free laser engraving files for basic shapes.
Always test your settings on a scrap piece of the specific wood you are using. Engraving direction (e.g., engraving with or against the grain for fill areas) can also subtly impact the final look.
Tailoring Designs for Slate’s Unique Surface
For slate, high contrast is key. Designs that rely on stark black-and-white (or rather, dark-slate-and-light-engraved-grey) contrast render beautifully. This makes slate ideal for detailed line art, crisp typography, and silhouettes. When adapting laser engraving files, especially those with filled areas, you might sometimes need to invert your image. For instance, if your design has black text on a white background, you want the laser to engrave the text area to make it lighter. Be mindful that slate can sometimes produce very fine dust; good ventilation is important. Power settings are critical; too much power can make the engraving look overly “blasted” or cause minor chipping, while too little will result in a faint mark. Precise focus is also essential for achieving the sharpest detail.
Popular laser engraving ideas for slate include:
- Personalized Slate Coasters: Monograms, funny quotes, custom logos, or intricate geometric laser engraving patterns look fantastic. Many free laser engraving files offer coaster-sized templates or decorative elements.
- House Number Plaques: Clear, bold numbers and street names have excellent readability.
- Garden Markers or Memorial Stones: Simple text and symbols are effective and durable.
- Serving Trays or Cheese Boards: Engrave names of cheeses, decorative borders, or custom messages.
- Restaurant Menu Boards or Table Signs: The rustic elegance of engraved slate suits many establishments.
For both wood and slate, remember that finishing can enhance the engraving. For wood, oils or varnishes can deepen the color and protect the surface. For slate, a light coat of mineral oil or a specialized slate sealer dramatically darkens the unengraved slate, making the lighter engraved areas pop even more, significantly boosting the contrast of your Laser Engraving Designs.
Software and Tools for Creating Laser Engraving Files
The creation and refinement of laser engraving files is a critical step in producing high-quality engraved products, and the right software tools can make this process efficient and creatively fulfilling. Software for laser engraving generally falls into two main categories: vector design software, used for creating or extensively modifying intricate Laser Engraving Designs from scratch, and laser control software, which prepares these designs for the laser and sends the job to the machine. Often, laser control software will also include some basic design and editing capabilities.
Dedicated Vector Design Software
For generating original artwork, complex laser engraving patterns, or significantly altering existing free laser engraving files, dedicated vector graphics software is indispensable.
- Adobe Illustrator (AI): An industry-standard, Illustrator offers a comprehensive suite of tools for vector creation. Its precise pen tool, pathfinder options (for combining or subtracting shapes), advanced typography controls, and ability to trace bitmap images into vectors make it exceptionally powerful for developing detailed laser engraving ideas. It exports to numerous formats, including SVG and DXF, ensuring compatibility with most laser systems. Its robust layering system is also beneficial for organizing complex designs intended for multi-step laser engraving projects.
- CorelDRAW: A long-standing favorite in the sign-making and engraving industries, CorelDRAW provides a powerful alternative to Illustrator. It boasts a user-friendly interface for many, strong vector manipulation tools, and excellent DXF import/export capabilities. It’s well-suited for creating everything from simple logos to elaborate artistic engravings. Many users appreciate its perpetual license option as an alternative to subscription models.
- Inkscape: For those seeking a no-cost yet powerful solution, Inkscape is an outstanding open-source vector graphics editor. It fully supports SVG as its native format and offers a wide array of tools comparable to professional software, including bezier curves, boolean operations, and text manipulation. Inkscape is excellent for hobbyists or professionals on a budget and is perfectly capable of producing professional-quality laser engraving files. It’s a great starting point for learning vector design before committing to paid software.
- Affinity Designer: A newer contender, Affinity Designer has gained popularity for its one-time purchase price and robust feature set that rivals Illustrator and CorelDRAW. It offers both vector and raster design tools within the same interface, which can be beneficial for certain types of Laser Engraving Designs that might incorporate photographic elements alongside vector graphics.
These programs allow you to draw custom shapes, convert text to outlines, precisely arrange elements, and ensure your designs are “laser-ready” by checking for open paths or unintended overlapping lines that could cause issues during engraving. They are essential for taking a unique concept and turning it into a clean, scalable vector file.
Laser Control and Hybrid Software
Once your design is created, you’ll typically use laser control software to interface with your machine.
- LightBurn: This software has become a de facto standard for many hobbyist and professional laser users due to its wide compatibility with various laser controllers (including Ruida, Trocen, GCode-based systems like GRBL), intuitive interface, and powerful feature set. LightBurn allows you to import vector files (AI, SVG, DXF, PDF) and image files, arrange them on your workspace, assign power, speed, and mode (cut, scan, offset fill) to different layers (often color-coded in your design file). It also offers decent built-in vector editing tools for quick modifications, text creation, and even some basic drawing, making it a hybrid solution. Its camera alignment features and material library are invaluable for streamlining workflow for various laser engraving projects.
- RDWorks: Often bundled with lasers using Ruida controllers, RDWorks is primarily a laser control program. While it has basic design capabilities (drawing shapes, adding text), it’s generally less intuitive for complex design tasks compared to dedicated vector software or LightBurn. Its main strength lies in communicating directly with the laser to set parameters, manage jobs, and control the machine’s motion. Many users design in Illustrator or CorelDRAW and then import the DXF or AI file into RDWorks for final setup and execution.
Choosing the right software depends on your needs and budget. If your primary focus is on creating complex, original laser engraving patterns, investing time and money in Illustrator, CorelDRAW, or Affinity Designer, supplemented by a good laser control program like LightBurn, is advisable. If you primarily work with free laser engraving files or simple modifications, Inkscape combined with LightBurn (or the software that came with your laser) can be a highly effective and economical setup. Ultimately, proficiency in your chosen software package(s) will significantly enhance your ability to translate imaginative laser engraving ideas into stunning, tangible results. These tools are the bridge between your creative vision and the precise execution capabilities of your laser engraver.
Conclusions
The world of Laser Engraving Designs is vast and continually expanding. With access to free laser engraving files, a plethora of laser engraving ideas, diverse laser engraving patterns, and exciting laser engraving projects, your creative potential is limitless. Embrace these resources to enhance your skills and produce exceptional, personalized items that stand out, whether for personal enjoyment or to boost your sales.
Frequently Asked Questions
Q: What are the best file formats for laser engraving?
A: The most common and compatible file formats for laser engraving are vector-based, including SVG (Scalable Vector Graphics), DXF (Drawing Exchange Format), and AI (Adobe Illustrator). These formats define paths mathematically, allowing the laser to follow them precisely without losing quality when scaled.
Q: How can I find free laser engraving files?
A: Free laser engraving files can be found on various platforms such as Thingiverse, Instructables, specialized Facebook groups, and design marketplaces like Creative Fabrica or Design Bundles, which often offer complimentary files or dedicated free sections. Public domain vector repositories and open-source design projects are also excellent sources.
Q: Why is material preparation important before laser engraving?
A: Material preparation, such as applying transfer tape or masking to wood and acrylic, is crucial to reduce staining from smoke and resin, ensure cleaner edges, and make post-engraving cleanup easier. For other materials like slate or leather, simple cleaning ensures optimal results.
Q: What are the key laser settings to understand for engraving projects?
A: The “holy trinity” of laser settings are Power (laser tube’s output), Speed (how fast the laser head moves), and DPI/LPI (resolution of the engraving). Adjusting these settings precisely based on the material and desired effect is critical for achieving sharp, consistent, and high-quality engravings or cuts.
Q: Which software is recommended for creating laser engraving designs from scratch?
A: For creating original artwork and complex laser engraving patterns, dedicated vector design software like Adobe Illustrator, CorelDRAW, Inkscape (a powerful free option), or Affinity Designer are highly recommended. These tools provide the precision and features necessary to create “laser-ready” scalable vector files.
Block "subscribe-popup" not found