Projects
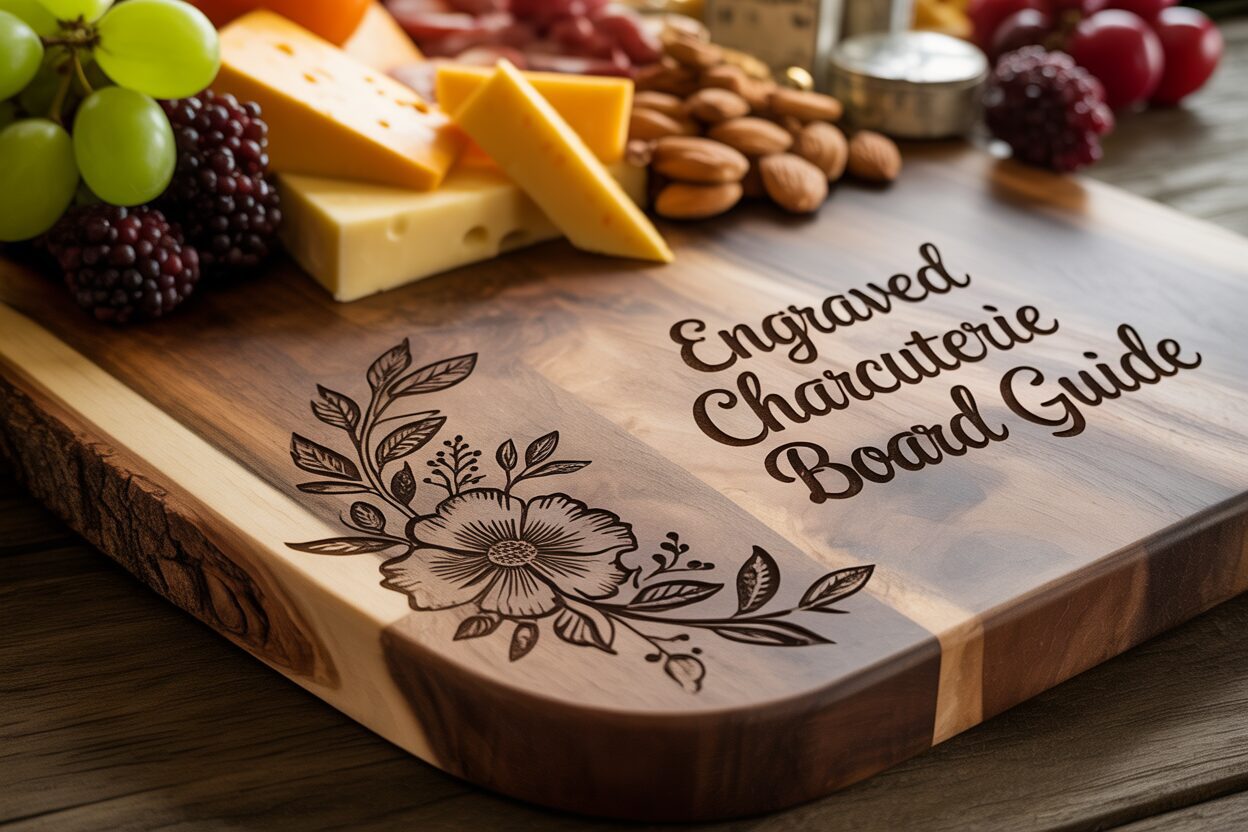
Creating the Perfect Engraved Charcuterie Board
Sep
Estimated reading time: 8 minutes
Key Takeaways
- Wood Selection is Crucial: Choose closed-grain hardwoods like Maple, Cherry, or Walnut for durability and food safety. Each wood offers a different aesthetic, from high-contrast Maple to the subtle, luxurious tones of Walnut.
- Design & File Prep Matter: Use vector files (like SVGs) for crisp, scalable designs. When creating your own, prioritize bold lines and good contrast to ensure the design stands out against the wood grain.
- Test Your Settings: Never engrave your final piece without first running a test grid on a scrap piece of the same wood. Dialing in the correct Power, Speed, and DPI settings is essential for achieving the desired look and avoiding mistakes.
- Proper Finishing is Non-Negotiable: After engraving, clean the residue with isopropyl alcohol (not water) and a soft brush. Finish the board with multiple coats of food-grade mineral oil to protect the wood, enhance its beauty, and make the engraving pop.
Table of Contents
- Selecting the Ideal Wood and Design
- Setting Up Your Laser and Engraving File
- Engraving and Finishing Your Charcuterie Board
- Conclusions
- Frequently Asked Questions
Discover how to transform a simple wooden board into a stunning engraved charcuterie board. This guide will walk you through selecting the right materials, preparing your design, and engraving your project. A personalized charcuterie board not only elevates your hosting but also makes for a heartfelt, unique gift. Let’s dive into the creative process of making a beautiful and functional piece of art.
Interested in more Charcuterie Board? Check out our Charcuterie Board laser file designs: Click here!
Selecting the Ideal Wood and Design
The foundation of a stunning engraved charcuterie board lies in two key elements: the wood you choose and the design you apply. This decision is a marriage of aesthetics and function, as the material will not only serve as your canvas but also as a food-safe surface. Let’s explore how to select the perfect combination for a beautiful and durable result.
Choosing Your Wooden Canvas
The best woods for a charcuterie or cutting board are closed-grain hardwoods. These woods are dense, durable, and less porous than softwoods, making them more resistant to bacteria and moisture. For laser engraving, the wood’s color and grain pattern are crucial as they directly impact the final look. Here are the top food-safe choices:
- Maple: A classic choice, maple is prized for its hardness and light, creamy color. Its fine, subtle grain provides a clean, uniform surface that makes it an ideal canvas. Pros: The light color creates a high-contrast, dark burn when engraved, making intricate details pop. Its durability means it stands up well to knife use. Cons: Its density can sometimes require slightly higher laser power or slower speeds for deep engraving.
- Cherry: Known for its warm, reddish-brown hue that deepens beautifully with age, cherry is a favorite for elegant projects. It has a fine, straight grain that is easy to work with. Pros: It engraves with rich, dark contrast and a very clean finish. It’s slightly softer than maple, making the engraving process smooth. Cons: Being softer, it will show knife marks more readily, making it better suited for serving boards rather than heavy-duty chopping blocks.
- Walnut: For a luxurious, premium feel, walnut is unparalleled. Its deep, chocolate-brown color and captivating grain patterns create a dramatic statement piece. Pros: Engraving on walnut results in a subtle, tone-on-tone effect that is sophisticated and high-end. Cons: The primary challenge is the low contrast. The engraved area is only slightly darker than the wood itself, so designs must be bold and simple to be clearly visible. Fine details can easily get lost.
Crafting the Perfect Design
With your wood selected, it’s time to decide what to engrave. The right design will complement the wood’s natural beauty and the occasion for the gift. Inspiration for wood engraving designs can be found everywhere, from botanical illustrations and geometric patterns to family crests and meaningful quotes. For beginners or those seeking a flawless, ready-to-use option, pre-made charcuterie board svg files are an excellent resource. Found on marketplaces like Etsy or design websites, these files are professionally designed as vectors, meaning they can be scaled to any size without losing quality. They are already optimized for laser engraving, saving you significant time and ensuring crisp, clean lines.
If you prefer to create a truly unique piece, designing your own artwork for a custom cutting board is incredibly rewarding. To ensure your design translates well from screen to wood, keep these principles in mind. First, prioritize clarity and contrast. Bold lines, silhouettes, and block lettering are more impactful than thin, delicate linework, which can get lost in the wood grain. Second, consider the negative space; a cluttered design can look chaotic once engraved. A simple, well-placed monogram or a tasteful border is often more striking than an overly complex scene. Finally, always create your design in a vector format (like SVG or AI). This gives the laser cutter a precise path to follow, resulting in a much cleaner and more professional finish than a pixel-based image (like a JPG or PNG).
Setting Up Your Laser and Engraving File
Once you have your wood and design, the next phase is translating your digital vision into physical reality. This involves meticulously preparing your file in laser software and dialing in the precise settings on your machine. This technical preparation is what separates a good engraving from a great one. The first step is to bring your design, such as your chosen charcuterie board svg, into your laser control software, like LightBurn. Don’t just import the file and hit “go.” You must first create a digital template of your physical board. Carefully measure your charcuterie board’s length and width, and draw a corresponding rectangle in the software. This digital workspace represents your canvas, allowing you to position and scale your design with absolute precision. Drag your SVG design into this template and resize it appropriately. Consider the board’s unique features—do you need to avoid a handle, a hole for hanging, or a particularly prominent grain pattern? Use the software’s alignment tools to perfectly center the design or place it artistically in a corner. This digital setup ensures what you see on the screen is exactly what you’ll get on the wood.
Dialing in Your Laser Settings
The secret to a beautiful result lies in finding the ideal laser engraver settings for wood, which are primarily a balance of three variables: Power, Speed, and DPI (Dots Per Inch). Think of these as the artist’s controls for depth and color.
- Power: This setting, expressed as a percentage, controls the intensity of the laser beam. Higher power results in a deeper, darker burn, while lower power creates a lighter, more superficial marking.
- Speed: This dictates how fast the laser head moves across the wood. A slower speed allows the laser to dwell on each spot longer, creating a deeper and darker engrave. A faster speed produces a lighter etch and is quicker to complete. A deep, rich mark on a hardwood like maple might require high power (e.g., 70-80%) and a relatively slow speed (e.g., 150-200 mm/s).
- DPI/LPI (Lines Per Inch): This setting determines the resolution of your engrave. A higher DPI (e.g., 300-600) means the engraved lines are packed closer together, resulting in a darker, more solid-filled appearance, ideal for detailed graphics. A lower DPI will engrave faster but may leave visible lines, which can be a stylistic choice.
The interplay between these settings is key. You can achieve a similar dark look with high power/high speed or medium power/low speed. Before you even think about engraving your final personalized charcuterie board, you must perform a test run. Every piece of wood is unique; its density, moisture, and resin content will affect how it reacts to the laser. Use a scrap piece of the same wood type—or the back of the board if you have no scraps—and create a test grid. This grid consists of a series of small squares, each engraved with a different combination of power and speed. Engraving this grid will give you a visual library of outcomes, allowing you to select the exact settings that produce the aesthetic you desire, eliminating guesswork and preventing a costly mistake.
Engraving and Finishing Your Charcuterie Board
With your design prepared and settings tested, you are ready for the most exciting step: the engraving itself. Securely place your charcuterie board on the laser bed, ensuring it is perfectly flat and level. Use the laser’s red dot pointer to confirm that the origin point in your software matches the starting point on the board. Double-check that your exhaust fan is running at full power to properly ventilate smoke and fumes. Once you begin the job, remain near the machine but never stare directly at the laser beam without appropriate safety glasses. Monitor the process for any signs of flare-ups, which can occasionally happen with woods containing pockets of resin. Keep a fire extinguisher rated for electrical fires nearby as a standard safety precaution. You will watch as your digital design is methodically burned into the wood, line by line, transforming a simple board into a personalized work of art.
Cleaning and Finishing for a Professional Look
After the laser has finished and the smoke has cleared, your engraved charcuterie board will be covered in a fine layer of soot and resin residue. Proper cleaning is essential for a crisp, clean look. Avoid the temptation to use water, as this can cause the wood grain to swell and may smear the dark residue into the clean wood surrounding the design. The best method is to first use a soft-bristled brush (like a new toothbrush) to gently whisk away the loose debris from the engraved areas. For any stubborn, sticky residue, lightly dampen a clean cloth or cotton swab with isopropyl alcohol and carefully wipe inside the engraving. The alcohol will cut through the resin without raising the wood grain and will evaporate quickly.
The final step, and arguably the most important for both beauty and longevity, is applying a food-safe finish. This protects the wood from moisture and staining, and it dramatically enhances the appearance of the wood engraving designs. The industry standard is food-grade mineral oil, often blended with beeswax to create a more durable “board butter” or conditioner. To apply, pour a generous amount of oil directly onto the board and use a clean, lint-free cloth to spread it evenly over the entire surface, including the edges and the engraved portions. Let the oil soak into the wood for at least 20-30 minutes, or even overnight if possible. The wood will absorb the oil, deepening its natural color and making the dark burn of the engraving stand out with rich contrast. After it has had time to penetrate, use another clean cloth to buff away any excess oil. For a new custom cutting board, it is highly recommended to apply two or three coats, allowing time for absorption between each. This final step not only protects your creation but also gives it that lustrous, professional finish that makes it a truly premium gift.
Conclusions
You’ve now learned the essential steps to create a beautiful engraved charcuterie board. From selecting the wood to applying the final food-safe finish, this project is a rewarding way to craft a personalized charcuterie board for your home or as a special gift. With these skills, you can now explore endless custom cutting board possibilities and bring your creative wood engraving designs to life.
Frequently Asked Questions
Q: What is the best wood for an engraved charcuterie board?
A: The best woods are closed-grain hardwoods like Maple, Cherry, and Walnut. Maple provides high-contrast engraving, Cherry offers a warm, rich tone, and Walnut gives a subtle, luxurious look. All are durable and considered food-safe when finished properly.
Q: Can I use a regular image like a JPG for engraving?
A: While possible, it’s not recommended. Vector files (like SVG or AI) are far superior because they provide the laser with a clean, precise path to follow, resulting in crisp lines and professional-quality results. Pixel-based images like JPGs can lead to less clean engravings.
Q: How do I clean my charcuterie board after engraving?
A: Avoid using water, which can raise the wood grain and smear residue. First, use a soft-bristled brush to remove loose debris. Then, use a cloth or cotton swab lightly dampened with isopropyl alcohol to wipe away any sticky resin from inside the engraved area.
Q: What is the best finish for an engraved charcuterie board?
A: A food-safe finish is essential. The industry standard is food-grade mineral oil. For enhanced protection and a richer finish, use a “board butter” or conditioner, which is typically a blend of mineral oil and beeswax. Apply several coats, allowing the oil to soak in between each one.
Block "subscribe-popup" not found