-
×
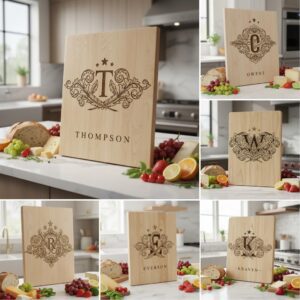 Vintage Crest Bundle, Charcuterie Board Designs, Elegant Monogram Family Name Art
1 × Original price was: $5.00.$3.50Current price is: $3.50.
Vintage Crest Bundle, Charcuterie Board Designs, Elegant Monogram Family Name Art
1 × Original price was: $5.00.$3.50Current price is: $3.50.(30% off)
-
×
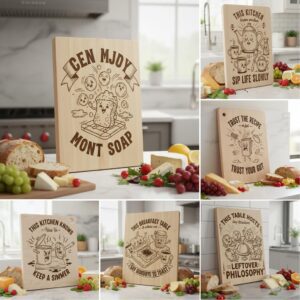
 Funny Kitchen Humor Bundle, Charcuterie Board Engraving Designs, 20 Styles
1 × Original price was: $5.00.$3.50Current price is: $3.50.
Funny Kitchen Humor Bundle, Charcuterie Board Engraving Designs, 20 Styles
1 × Original price was: $5.00.$3.50Current price is: $3.50.(30% off)
 Funny Kitchen Humor Bundle, Charcuterie Board Engraving Designs, 20 Styles
 Tutorials
Creating a Personalized Laser Engraved Charcuterie Board
08
Aug
Aug
Estimated reading time: 8 minutes
Key Takeaways
- Wood Selection is Critical: Opt for close-grained hardwoods like maple, cherry, or walnut for their durability, food safety, and distinct engraving results.
- Preparation is Key: Achieving a flawless engraving requires a perfectly smooth surface. Always sand the board thoroughly and clean it before placing it in the laser.
- Calibrate Settings Carefully: Test your laser’s power, speed, and DPI settings on a scrap piece of the same wood to achieve a rich, dark burn without scorching the material.
- Finishing is Non-Negotiable: Always use a food-safe finish, such as mineral oil or a beeswax blend, to seal the wood, enhance its beauty, and ensure it’s safe for serving food.
Table of Contents
- Selecting the Right Wood and Design
- The Laser Engraving Process
- Sanding and Applying a Food-Safe Finish
- Conclusions
- Frequently Asked Questions
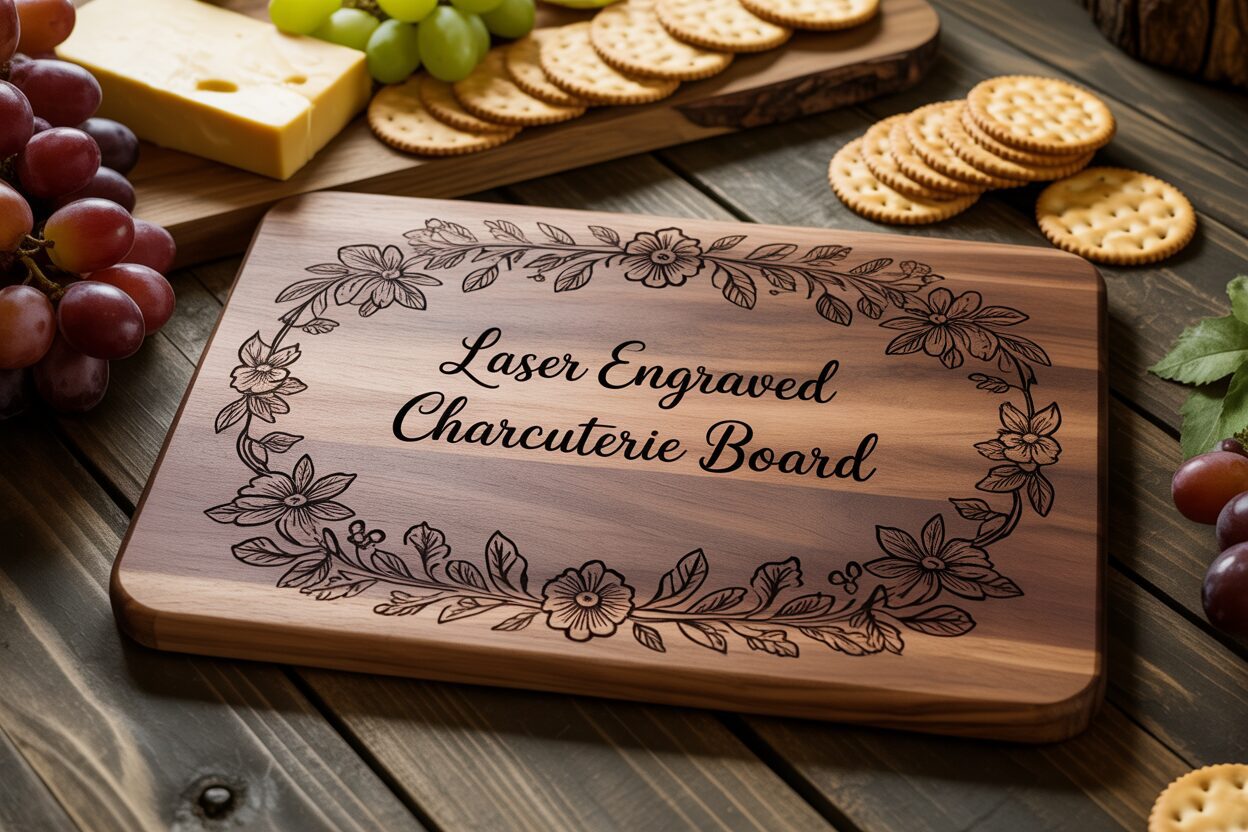
Elevate your hosting game or create a heartfelt personalized gift with a laser engraved charcuterie board. This tutorial guides you through every step, from selecting the right materials to applying a beautiful, food-safe finish. We’ll explore how to transform a simple piece of wood into a functional work of art, perfect for any occasion and a great way to boost your sales.
Interested in more Charcuterie Board? Check out our Charcuterie Board laser file designs: Click here!
Selecting the Right Wood and Design
The foundation of a truly exceptional personalized charcuterie board is the wood itself. Your choice will influence not only the final look and feel but also its durability and food safety. For this project, we exclusively recommend close-grained hardwoods. These woods have very small pores, which prevents bacteria from getting trapped and makes them easier to clean and maintain, a critical feature for any surface that comes into contact with food. Avoid softwoods like pine, as they can impart undesirable flavors and are easily damaged. Let’s explore the top contenders:
- Maple: Often considered the gold standard for cutting boards, maple is incredibly durable, dense, and has a light, creamy color. Its fine, subtle grain provides a perfect canvas for laser engraving, allowing for extremely high-contrast and detailed results. If your design features intricate lines or small text, maple is an unbeatable choice.
- Cherry: Known for its warm, reddish-brown hue that beautifully darkens with age, cherry offers a rich and elegant alternative. Its grain is smooth and straight. Engravings on cherry have a slightly more subtle, sophisticated contrast compared to maple, creating a warm, burnished look that many find appealing.
- Walnut: For a dramatic and luxurious feel, walnut is the premier option. Its deep, chocolate-brown color and complex grain patterns make a statement on their own. Laser engraving on walnut results in a darker, tone-on-tone effect. This creates a subtle, high-end look that is perfect for bold monograms or simple, elegant logos rather than highly detailed imagery.
Preparing the Surface for a Flawless Engraving
Once you have selected your wood, proper preparation is key to achieving a crisp, clean engraving. A laser is incredibly precise, and any imperfections on the surface will be reflected in the final result. Your goal is to create a perfectly smooth and clean canvas. Start by sanding the board, even if it appears smooth from the store. Use a medium-grit sandpaper (around 120-grit) to begin, always sanding with the grain to remove any minor blemishes or mill marks. Follow this with a fine-grit sandpaper (220-grit or higher) to achieve a silky-smooth finish. After sanding, it is crucial to remove every particle of dust. A tack cloth is ideal for this, but you can also use a clean, lint-free cloth lightly dampened with denatured alcohol. A pristine surface ensures the laser beam can work without any obstruction, preventing fuzzy edges or inconsistent engraving depth.
Selecting the Perfect Digital Design
With your board prepped, it’s time for the most personal step: choosing a design. The right design transforms a simple piece of wood into a cherished keepsake. In our online store, you’ll find a wide variety of digital files specifically created for a DIY charcuterie board project, from elegant monograms and family name templates to intricate floral patterns and witty quotes. When selecting your design, consider the wood and the board’s dimensions. A highly detailed design will stand out beautifully on the fine grain of maple, while a bolder, simpler design is better suited to complement the strong grain of walnut. Measure the available surface area of your board and decide on the placement. Engraving in a corner or along one edge preserves the main surface for serving while adding a custom touch. Think about the board’s shape—a circular design might look stunning on a round board, while a long, flowing script could perfectly adorn a rectangular paddle board. Our designs are provided as high-quality vector files, ensuring your laser produces sharp, scalable lines for a professional-grade masterpiece.
The Laser Engraving Process
With your beautiful hardwood board sanded smooth and your design chosen, you are now ready for the most exciting part: the laser engraving wood process. This is where your digital file is permanently etched into the wood, creating that stunning custom wood burning effect. Proper setup is paramount for a professional result. First, securely place your charcuterie board on the laser machine’s bed. It must be completely flat and unable to shift during the engraving process; even a millimeter of movement can ruin the design. Import your design file into your laser control software. Now, use your machine’s features, such as a red dot pointer or a bed camera, to precisely align the design onto the board. A crucial pro-tip is to run a “framing” or “trace” command. This will move the laser head around the outer perimeter of your design without firing the laser, allowing you to visually confirm the size and placement are perfect before you commit to the burn.
Calibrating Power and Speed for the Perfect Burn
Finding the correct settings is more of an art than a science, as every piece of wood reacts differently. Never engrave your final piece without first running a test on a scrap piece of the exact same wood, sanded to the same finish. Your goal is a rich, dark brown engraving, not a deep, charred crater. This is controlled by three main settings:
- Power: This determines the intensity of the laser beam. Higher power results in a darker and deeper engraving.
- Speed: This is how fast the laser head moves across the material. A slower speed allows the laser to burn for longer in one spot, creating a darker mark.
- DPI (Dots Per Inch): This is the resolution of your engraving. A higher DPI (e.g., 300) will produce more detail but also concentrates more heat, increasing the risk of scorching.
For dense woods like maple, you’ll generally need higher power or slower speeds. For cherry, which engraves very cleanly, you can often use less power to avoid excessive darkness. Walnut provides a unique challenge, as too much power can obliterate the subtle contrast. Start with your laser manufacturer’s recommended settings for hardwood and adjust from there on your test piece. A good starting point for a 40W diode laser might be 80% power at a speed of 3000 mm/min. Make small adjustments until you achieve the desired rich, coffee-colored burn.
Executing the Engraving and Troubleshooting Common Issues
Once your settings are dialed in on your test piece and your design is perfectly aligned, it’s time to create your DIY charcuterie board. Ensure your machine’s ventilation system is running, put on your safety glasses, and start the engraving job. While the machine works, keep an eye out for any potential issues. The most common problem is scorching or a “halo” of smoke residue around the engraved areas. To prevent this, you can use one of two methods. The best solution is a strong air assist, which uses a jet of air to blow smoke and debris away from the engraving point, resulting in incredibly clean lines. An alternative DIY method is to cover the entire engraving area with a single, smooth layer of low-tack paper masking tape before you start. The laser will cut through the tape and engrave the wood, and the tape will catch all the residue. Once the job is done, you simply peel the tape away to reveal a perfectly clean engraving. If you notice the engraving is uneven or fades in certain areas, the most likely culprits are an unlevel board or an improperly focused laser. Double-check that your board is perfectly flat and re-run your laser’s focus procedure to ensure the beam is at its sharpest point on the wood’s surface.
Sanding and Applying a Food-Safe Finish
Your laser engraved charcuterie board is now permanently marked with your custom design, but the project is not yet complete. The final steps of finishing are what elevate it from a piece of engraved wood to a beautiful, durable, and functional kitchen masterpiece. After engraving, even with careful preparation, the wood surface may have a very slight smoky residue or some raised wood fibers around the design. To create a perfectly smooth final product, a very light sanding is in order. Use a high-grit sandpaper, something 320-grit or finer, or even a fine synthetic scouring pad. The key here is gentleness. You are not trying to remove wood; you are simply polishing the surface. Lightly buff the entire board, paying special attention to the areas around the engraving. You can sand lightly over the engraved portion itself, which helps to clean out any loose particles and soften the feel without diminishing the dark, crisp lines you worked so hard to achieve. Once you’re satisfied with the smoothness, wipe the entire board meticulously with a clean, dry, lint-free cloth to remove every speck of dust.
Choosing and Applying a Food-Safe Wood Finish
This is arguably the most critical step for ensuring your board is both beautiful and safe for serving food. Raw wood is porous and will absorb moisture, oils, and bacteria from food, leading to stains and potential contamination. Applying a finish creates a protective barrier that seals the wood pores. It is absolutely essential to use a finish that is specifically designated as food-safe wood finish. Never use common woodworking finishes like polyurethane, lacquer, or staining oils, as these can contain toxic chemicals that can leach into food. The best and most traditional choices are penetrating oils and waxes:
- Food-Grade Mineral Oil: This is the industry standard for cutting boards and butcher blocks. It is an inert, non-toxic oil that penetrates deep into the wood fibers, hydrating them to prevent drying, cracking, and warping. It is colorless and odorless and does an excellent job of making the wood grain “pop” and dramatically darkening the engraved area for maximum contrast.
- Beeswax and Mineral Oil Blends: Often sold as “board butter” or “wood conditioner,” these products combine the penetrating properties of mineral oil with the surface-sealing power of beeswax. The wax adds an extra layer of water resistance and provides a subtle, silky sheen to the board’s surface. This is a superior choice for long-term protection.
To apply the finish, start by pouring a generous amount of your chosen oil or scooping a liberal amount of board butter onto the clean board. Using a soft, clean cloth, work the finish into the wood, rubbing in the direction of the grain. Be sure to cover every surface, including the top, bottom, all edges, and especially the engraved design. Really work the finish into the engraving to saturate the exposed wood, which will enrich its color. Now, let the board sit and absorb the finish for at least 30 minutes, though for the first application, leaving it overnight is even better. The wood will drink up the oil it needs. Finally, take a new clean cloth and buff off all the excess finish until the surface no longer feels greasy. Your board is now sealed, protected, and its natural beauty is fully revealed, ready for its delicious debut.
Conclusions
You’ve now learned how to create a stunning and personalized charcuterie board. By following these steps for engraving and finishing, you can produce high-quality, safe, and beautiful items for your home, as gifts, or for sale. Don’t hesitate to experiment with different woods and designs to create your own unique collection of custom-made products.
Frequently Asked Questions
Q: What is the best wood for a beginner to start with?
A: Maple is an excellent choice for beginners. Its fine, consistent grain and light color are very forgiving and provide a high-contrast result, making it easy to see the quality of your engraving and dial in your laser settings.
Q: Can I use a regular stain or varnish on my charcuterie board?
A: Absolutely not. Most common woodworking finishes like stains, polyurethane, and lacquer contain chemicals that are not safe for consumption and can leach into your food. You must use a product specifically labeled as “food-safe” or “food-grade,” such as mineral oil or a beeswax/mineral oil blend.
Q: My engraving looks burnt and has a smoky “halo” around it. What went wrong?
A: This is called scorching and is caused by smoke and residue settling back onto the wood. The best way to prevent this is to use a strong air assist on your laser. Alternatively, you can cover the wood with low-tack masking tape before engraving; the tape will catch the residue, and you can peel it off for a clean result.
Q: How often should I re-apply a food-safe finish to my board?
A: It depends on how often you use and wash the board. A good rule of thumb is to re-oil your board once a month or whenever the wood starts to look dry or faded. This will keep it hydrated, protected, and looking its best.
Block "subscribe-popup" not found