Projects
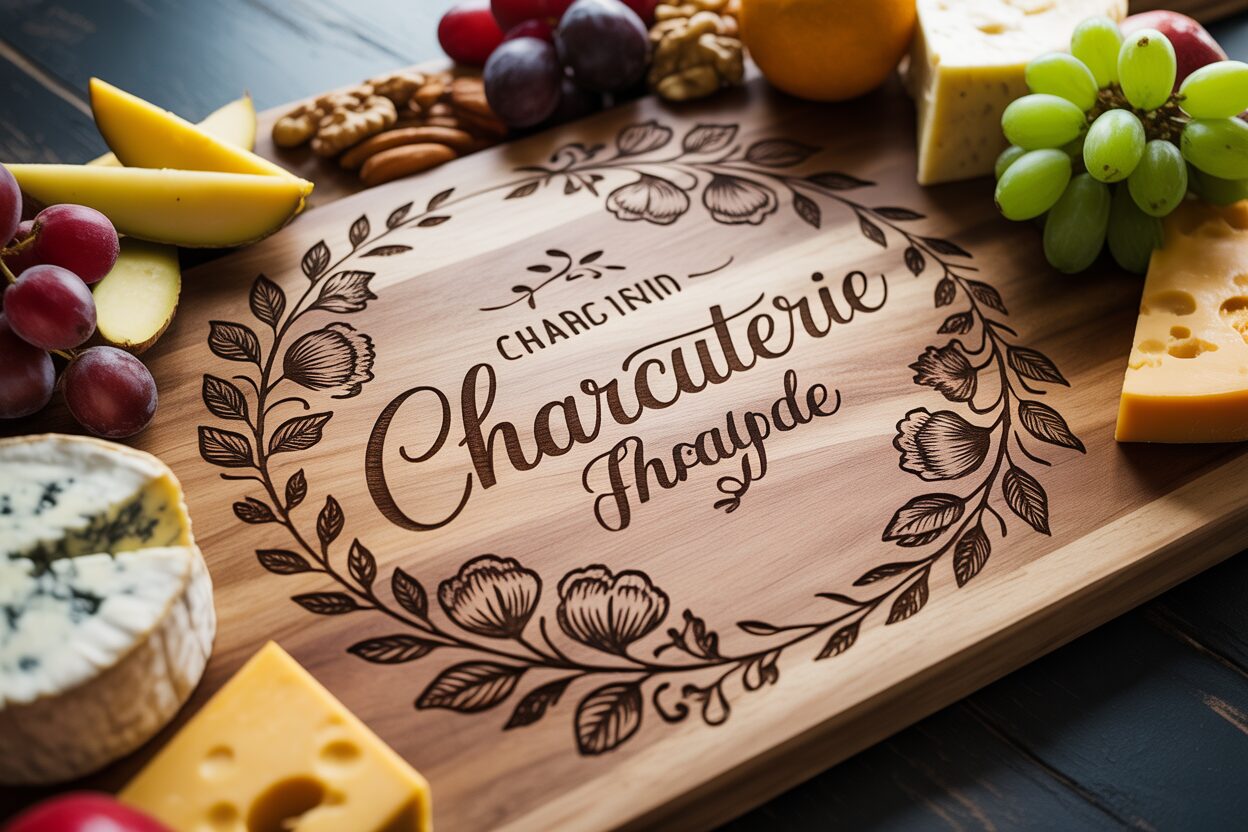
Crafting Unique Charcuterie Boards with Laser Engraving
Jun
Discover the art of laser engraving charcuterie boards. This guide delves into selecting designs, preparing wood, and utilizing laser technology to create beautiful, personalized pieces perfect for any occasion, enhancing both your culinary presentation and creative skills.
Estimated reading time: Around 10 minutes
Key Takeaways
- Wood Selection is Crucial: Prioritize closed-grain, food-safe hardwoods like Maple, Cherry, Walnut, and Beech for durability and clean engraving. Avoid softwoods and porous woods for direct food contact.
- Versatile Design Options: Personalize boards with monograms, meaningful quotes, family recipes, intricate patterns, or custom artwork, ensuring designs align with the board’s intended use and aesthetics.
- Master the Engraving Process: Success hinges on accurate digital design preparation, precise laser settings (power, speed, focus, LPI), thorough board preparation (sanding, masking), proper safety, and diligent post-engraving cleaning and food-safe sealing.
- Expand Your Creativity: The skills acquired from engraving charcuterie boards are transferable to a wide range of other kitchenware, allowing for the creation of cohesive, personalized sets like coasters, serving utensils, and recipe boxes.
Table of Contents
- Choosing Your Canvas: Perfect Wood for Charcuterie Board Engraving
- Design Inspiration: Laser Engraving Ideas for Charcuterie Boards
- The Engraving Process: From Digital Design to Finished Board
- Beyond the Board: Expanding Your Laser Engraved Kitchenware
- Conclusions
Choosing Your Canvas: Perfect Wood for Charcuterie Board Engraving
The foundation of any memorable laser engraving charcuterie board is, unequivocally, the wood itself. Selecting the right type of wood is not just about aesthetics; it profoundly impacts food safety, durability, and the quality of your laser engraving. Understanding how different woods behave under the laser and in general use will elevate your projects from simple platters to cherished heirlooms or highly desirable products.
Interested in more Charcuterie Board? Check out our Charcuterie Board laser file designs: Click here!
Several key factors must guide your selection process. Firstly, food safety is paramount. Opt for closed-grain hardwoods, as they are less porous, making them easier to clean and less likely to harbor bacteria. Woods like maple, cherry, and walnut are excellent choices. Always ensure any finish applied post-engraving is food-grade. Secondly, consider wood hardness, often measured on the Janka scale. Harder woods (e.g., Hard Maple, Hickory) resist scratches and knife marks better, ensuring longevity for a board that will see active use. While they require more laser power to engrave deeply, the results are typically clean and crisp. Softer woods (e.g., Alder, Poplar – though poplar is not ideal for durability) engrave more quickly and with less power but will show wear and tear more easily. A good balance is often found in woods like Cherry or Walnut.
The wood grain and texture significantly influence the final engraved appearance. Woods with fine, tight grains, such as Maple, Cherry, and Beech, are ideal for intricate designs and detailed text. The smooth surface allows the laser to create sharp, precise lines, making them perfect for complex wood engraving patterns. Conversely, woods with prominent, open grains, like Oak, can present challenges. The laser may follow the softer parts of the grain, leading to slight inconsistencies or a more rustic look, which might be desirable for certain styles but not for fine detail. The natural color of the wood also affects the contrast of the engraving. Lighter woods, like Maple or Birch, produce a striking dark burn, offering high contrast and making the design pop. Darker woods, such as Walnut, result in a more subtle, tonal engraving, lending an air of sophistication; for these, a deeper engrave or even a light color fill might be considered to enhance visibility.
Understanding laser reactivity is crucial. Different woods react distinctly to laser energy. Some woods, particularly those high in resin like Pine (which is also generally too soft and not ideal for food safety), can produce more soot, flare-ups, or sticky residue, requiring more post-engraving cleanup. They may also engrave unevenly. Maple, Cherry, and Alder are known for their consistent and clean engraving qualities, charring to a rich dark brown or black. Bamboo, technically a grass but widely used for cutting boards, also engraves very well, typically yielding excellent contrast due to its light color and fine “grain.” It’s also a sustainable option.
Recommended Woods for Laser Engraving Charcuterie Boards
Let’s explore some highly recommended woods for your laser engraving charcuterie board projects:
- Hard Maple: Known for its exceptional hardness (Janka rating around 1450 lbf), fine grain, and creamy white to light brown color. It provides a superb, high-contrast canvas for detailed engravings. It’s very durable and food-safe. Engraving is crisp and clean, though it may require slightly higher laser power settings.
- Cherry: Valued for its smooth, fine, straight grain and beautiful warm pinkish-brown to reddish-brown hue that darkens richly with age. It has a medium hardness (around 950 lbf) and engraves beautifully, producing a dark, consistent burn with excellent detail. It’s food-safe and a favorite for high-quality kitchenware.
- Walnut: A premium hardwood with a rich, dark brown color, often featuring attractive grain variations. It’s relatively hard (around 1010 lbf) and machines and engraves well. The engraving on walnut is more subtle, creating an elegant, tonal effect. For more prominent designs on walnut, deeper engraving or a light-colored fill can be effective. It is food-safe and luxurious.
- Beech: A hard, strong wood (around 1300 lbf) with a fine, straight grain and a light, creamy color, sometimes with a pinkish or yellowish hue. It engraves very similarly to maple, offering excellent contrast and detail. It’s food-safe, durable, and often more affordable than maple or cherry.
While these are excellent choices, some woods should be approached with caution or avoided. Softwoods like Pine or Fir are generally unsuitable due to their softness, high resin content (which can make engraving messy and affect food taste), and tendency to splinter. Woods with very open pores, like Red Oak, can be difficult to keep clean and may harbor bacteria, making them less ideal for direct food contact unless properly sealed and understood to be for lighter use. Always research the specific wood species for any known toxicity if you are considering something exotic or unfamiliar. Reclaimed wood, while sustainable, should be thoroughly checked for contaminants, old finishes, nails, or staples before use in a laser engraving charcuterie board. Your choice of wood ultimately sets the stage for the beauty and functionality of your engraved creation.
Design Inspiration: Laser Engraving Ideas for Charcuterie Boards
Once you’ve selected the perfect wood, the creative journey of designing your laser engraving charcuterie board truly begins. The beauty of laser engraving lies in its precision and versatility, allowing for an almost limitless array of charcuterie board design ideas. Whether you’re aiming for understated elegance, rustic charm, or a bold statement piece, the right design can transform a simple wooden board into a work of art or a deeply personal gift.
Monograms and Initials
Timeless and classic, monograms and initials offer a sophisticated touch. For a personalized charcuterie board, consider engraving the family initial, a couple’s intertwined monogram for a wedding gift, or the recipient’s full name in an elegant script. The choice of font here is crucial; a bold, stately serif font can convey tradition, while a flowing script can suggest romance or artistry. Experiment with placement – a subtle monogram in a corner, a larger one centered, or even a repeating pattern of initials. For more intricate options, incorporate laurel wreaths, family crests, or established dates seamlessly around the monogram. The key is to balance the size of the monogram with the overall dimensions of the board, ensuring it enhances rather than overwhelms.
Meaningful Quotes and Sayings
Quotes, sayings, or even favorite family recipes engraved onto the board add a narrative element. “Gather,” “Bon Appétit,” or a humorous food-related quip can set the tone for convivial gatherings. For a truly personalized charcuterie board, consider an inside joke, a line from a beloved poem, a significant date, or GPS coordinates of a special place. The style of the text can vary dramatically, from a rustic, hand-written look to a clean, modern typeface. Think about the board’s intended use: a board for family gatherings might feature a warm, inviting message, while one for a wine enthusiast could have a witty wine-related quote. Ensure the text is legible and scaled appropriately. A subtle border or a simple graphic flourish can frame the quote beautifully without detracting from the message. Consider engraving a treasured family recipe directly onto the board – a nonna’s secret pasta sauce ingredients, or a grandparent’s cookie recipe – turning the board into a functional family heirloom.
Intricate Patterns and Custom Artwork
For those with an artistic flair, intricate patterns, custom artwork, or thematic illustrations can make a charcuterie board truly unique. Geometric patterns, mandalas, floral motifs, or nature-inspired scenes like mountains or forests can be engraved with stunning detail. If the board is for a specific occasion, such as a housewarming, an illustration of the new home could be a heartwarming touch. Custom artwork, perhaps a child’s drawing converted into a vector file, or a logo for a corporate gift, offers boundless personalization. These complex charcuterie board design ideas showcase the laser’s precision. The density of the pattern and the chosen wood type will interact; a dense pattern on a highly figured wood might look too busy, while on a plain wood like maple, it could be the star. Furthermore, inspiration can be drawn from other laser cut wood projects. Imagine using laser-cut inlays of a contrasting wood type to create standout features within the engraved design, or laser cutting complementary pieces like small cheese markers or coasters that echo the board’s theme. These could be simple shapes, letters, or even miniature versions of the main design, creating a cohesive set. The negative spaces from laser-cut elements can also inspire stencils for painting or resin filling specific areas of the engraved board if desired, adding another layer of customization.
Consider also the practical aspect of the design. Will the board be heavily used for cutting, or is it more of a serving platter? If heavy cutting is anticipated, it might be wise to confine intricate engravings to the edges or a specific section, leaving the primary cutting surface clearer to preserve the design’s integrity over time. This approach also ensures food doesn’t get trapped in very detailed engraved areas. Ultimately, the best design is one that resonates with the intended recipient or purpose, skillfully blending aesthetics with practicality on your beautifully chosen wooden canvas.
The Engraving Process: From Digital Design to Finished Board
With your perfect wood selected and a compelling design in mind, it’s time to transition from digital concept to tangible creation. The DIY laser engraving process for crafting your laser engraving charcuterie board involves several key stages, each contributing to the final quality and beauty of your piece. Careful attention at each step will ensure your vision is accurately translated onto the wood.
Design Preparation in Software
The journey begins on your computer. Whether you’re using dedicated laser control software like LightBurn, or graphic design programs such as Adobe Illustrator, CorelDRAW, or the free Inkscape, your design must be prepared for the laser. For crisp lines, text, and intricate wood engraving patterns, vector graphics (like .SVG, .AI, .DXF files) are ideal. These math-defined paths tell the laser exactly where to cut or engrave. If you’re working with an image, like a photograph or a scanned drawing for a truly personalized charcuterie board, it will likely be a raster file (like .JPG or .PNG). Most laser software can handle raster images, often converting them into engravings through processes like dithering, which uses patterns of dots to simulate shades of gray. Ensure your design is scaled appropriately for your board. Pay close attention to line weights; very thin lines might not engrave distinctly, while overly thick lines can lose detail. Finalize the placement of your design on a digital template of your board to visualize the outcome before committing to the engraving.
Dialing in Your Laser: Settings for Success
Achieving optimal wood engraving patterns hinges on correctly configuring your laser cutter’s settings. The three primary settings are power, speed, and focus (and often PPI/LPI – pulses per inch/lines per inch for raster engraving). Power determines the intensity of the laser beam; higher power engraves deeper or darker. Speed dictates how quickly the laser head moves; slower speeds allow more energy transfer, resulting in deeper or darker marks. Lines Per Inch (LPI) determines the resolution of raster engravings; higher LPI means more lines engraved per inch, leading to finer detail but also longer engraving times and potentially more heat buildup.
Crucially, always test your settings on a scrap piece of the same wood you plan to use for your charcuterie board. Different woods, and even different pieces of the same wood species, can react differently to the laser due to variations in density, grain, and moisture content. A small test grid with varying power and speed combinations will help you find the sweet spot for the desired depth and color of your engraving. Proper laser focus is paramount for sharp details; an out-of-focus laser produces blurry, wider lines. Most machines have a calibration tool or procedure for setting the correct focal distance. Don’t forget to use air assist, if your machine has it, to blow away smoke and debris, resulting in cleaner engravings and reducing the risk of flare-ups.
Preparing Your Canvas: The Charcuterie Board
Before placing your board in the laser, proper preparation is key. Ensure the wood surface is clean, dry, and smooth. If it’s a raw board, a light sanding with fine-grit sandpaper (e.g., 220 grit) can improve engraving quality. For lighter woods or very intricate designs, consider applying a layer of application tape or paper-based masking material over the engraving area. This mask will protect the wood surface from smoke stains and resinous residue, peeling off after engraving to reveal a much cleaner result. Carefully align and secure your charcuterie board on the laser bed. Ensure it’s level, as variations in height can affect focus and engraving consistency. Many laser software programs have a “framing” or “trace” feature that allows you to run the laser head (with the beam off or on very low power) around the perimeter of your design, so you can visually confirm its placement on the board.
The Active Engraving and Post-Engraving Care
With your design ready, settings dialed in, and board prepared, it’s time for the engraving. Double-check all safety measures: ensure proper ventilation is active and always wear appropriate laser safety glasses. Start the engraving process and monitor it, especially during the initial stages, to catch any unexpected issues like excessive flaring or if the material is charring more than anticipated.
Once the laser has finished its work, allow the board and the machine’s exhaust to clear any remaining smoke. If you used masking, carefully peel it away. You’ll likely notice some soot or residue, especially within the engraved areas. This can be cleaned gently. A soft brush (like an old toothbrush) can dislodge loose particles. Isopropyl alcohol on a cloth or cotton swab can often clean up remaining residue effectively, but test on an inconspicuous area first. For tougher char, some makers use a very mild abrasive cleaner or even a gentle magic eraser, but always be cautious not to damage the surrounding wood or the engraving itself. After cleaning, your laser engraving charcuterie board needs to be sealed to protect the wood and ensure it’s food-safe. Apply a generous coat of food-grade mineral oil, a beeswax and mineral oil blend, or a specialized cutting board conditioner. Let it soak in for at least a few hours or overnight, then wipe off any excess. This finishing step not only protects the wood but also enhances the natural grain and makes the engraved design pop, completing your beautifully crafted piece.
Beyond the Board: Expanding Your Laser Engraved Kitchenware
The skills and creative confidence you’ve developed in crafting stunning laser engraving charcuterie board projects are not confined to that single item. In fact, they are a versatile foundation for an entire suite of personalized and beautifully coordinated kitchenware. The principles of selecting wood, preparing designs, and mastering laser settings translate directly to a host of other items, allowing you to expand your DIY laser engraving repertoire and create truly unique, cohesive collections or thoughtful, expanded gift sets.
Many of the successful charcuterie board design ideas you’ve explored can be thoughtfully adapted for smaller or differently shaped items. A sophisticated monogram that graces a large charcuterie board can be scaled down to elegantly adorn a set of wooden coasters or the handles of serving utensils. A beloved quote might be condensed, or a key phrase extracted, to fit a smaller canvas like a wine bottle stopper or a recipe box lid. Complex patterns can be simplified, or a striking element from an intricate design can become the focal point on a smaller piece. For example, if your personalized charcuterie board features a detailed floral border, a single bloom from that border could be engraved onto matching napkin rings. Consistency in font choice, motif style, and overall aesthetic across different items is key to creating a harmonious collection.
Complementary Laser Cut Wood Projects
This opens the door to numerous complementary laser cut wood projects that can accompany your charcuterie boards or stand alone as beautiful kitchen accents. Consider these possibilities:
- Coasters: Wooden coasters are a natural extension. You can use the same wood as your charcuterie boards for a perfect match or opt for contrasting woods for visual interest. Slate and cork coasters also engrave beautifully. Designs can range from simple initials to miniature versions of larger board patterns, or even a set where each coaster has a unique but related design element.
- Serving Utensils: Wooden spoons, spatulas, salad servers, and cheese knife handles offer prime real estate for subtle personalization. Engraving a family name, a small icon, or a simple band pattern can elevate everyday utensils into cherished items. Challenges include working with curved surfaces, which may require a rotary attachment for some laser machines or careful jigging for others.
- Recipe Boxes: A laser engraved wooden recipe box makes a beautiful heirloom. The lid can feature a full design, perhaps a kitchen-themed illustration, a quote, or a monogram. You could even offer to engrave section dividers within the box with categories like “Appetizers,” “Main Courses,” and “Desserts.”
- Trivets: Larger than coasters, trivets can handle more detailed engravings and protect surfaces from hot dishes. They can be made from thicker wood stock or even from layers of laser-cut wood assembled into interesting patterns.
- Napkin Rings: These small items can showcase intricate details or simple, elegant monograms. A set of personalized napkin rings adds a touch of class to any table setting.
- Wine Charms or Bottle Tags: Small, laser-cut and engraved wooden discs can be used as personalized wine charms or decorative tags for gifted bottles, echoing the theme of a larger gifted board.
The techniques employed for your personalized charcuterie board are directly transferable. Material testing remains crucial, especially if you’re using different types or thicknesses of wood for these smaller items. For instance, bamboo, often used for utensils and smaller cutting boards, engraves with excellent contrast but may require different settings than maple or cherry. You might find yourself creating simple jigs to hold irregularly shaped items like spoon handles securely and consistently in the laser bed. Furthermore, don’t limit yourself to just engraving. Your laser cutter’s cutting capabilities can be used to create the items themselves – cutting out coaster shapes with intricate edges, crafting custom-shaped tags, or even creating delicate fretwork for a recipe box lid before engraving details onto it. By applying your existing knowledge and exploring these new avenues, you can significantly broaden your creative output, producing not just individual pieces but beautifully themed ensembles for the kitchen.
Conclusions
Laser engraving opens up a world of possibilities for charcuterie boards. By applying the right designs and techniques, you can craft unique, professional-quality pieces that impress guests, make memorable gifts, or even start a small business venture.
FAQ
Q: What are the best types of wood for laser engraving charcuterie boards?
A: The best woods are closed-grain hardwoods like Maple, Cherry, Walnut, and Beech. These are food-safe, durable, and engrave with good contrast and detail. Bamboo is also a good sustainable option.
Q: What design elements work well for personalized charcuterie boards?
A: Monograms, initials, meaningful quotes, sayings (including family recipes), intricate patterns (geometric, mandalas, floral), and custom artwork are all excellent choices. Consider the board’s intended use and balance design size with board dimensions.
Q: What are the critical steps in the laser engraving process for a charcuterie board?
A: Key steps include preparing your design in software (preferably vector files), dialing in laser settings (power, speed, focus, LPI) with test engraves, preparing the board surface (cleaning, sanding, masking), active engraving with safety precautions, and post-engraving cleaning followed by sealing with food-grade oil.
Block "subscribe-popup" not found