Projects
Crafting Elegant Slate Cheese Boards with Laser Engraving
Jun
Estimated reading time: 10 minutes
Key Takeaways
- Selecting the right natural slate (type, thickness, surface, color) is crucial for a successful and food-safe engraved cheese board.
- Design choices should leverage slate’s dark contrast, with vector files and high-resolution, high-contrast raster images producing the best results.
- Optimizing laser power, speed, frequency, and resolution through test engravings is essential to achieve crisp, non-chipped marks.
- Thorough cleaning and applying a food-safe sealant post-engraving are vital for food safety, durability, and enhancing the board’s appearance.
Table of Contents
Elevate your culinary presentation with custom laser-engraved slate cheese boards. This article delves into selecting the right slate, inspiring design ideas, mastering engraving techniques, and ensuring your creations are both beautiful and food-safe, perfect for gifts or enhancing your own kitchen.
Choosing and Preparing Slate for Engraving
The journey to a beautifully engraved slate cheese board begins with the slate itself. The quality and characteristics of the raw material will profoundly influence both the engraving process and the final product’s aesthetic appeal and functionality. Selecting the right piece of slate is paramount for creating a stunning personalized slate cheese board that is both elegant and food-safe.
Slate Characteristics: What to Look For
When choosing slate, several key factors come into play. Firstly, consider the slate type. Opt for natural, quarried slate. This material is inherently food-safe once cleaned and properly finished, and its natural variations add unique character. Avoid composite or synthetic slates, as their binders and composition may not be food-safe, could react poorly to laser engraving, or release harmful fumes. The geological origin can also impact the slate’s density and purity; denser, less friable slate will generally engrave more cleanly and be more durable.
Next, thickness is a crucial consideration. Slate for cheese boards typically ranges from 1/4 inch (approximately 6mm) to 3/8 inch (approximately 10mm). Thicker slates offer robustness and a premium feel, reducing the risk of breakage, but they are also heavier. Thinner slates are lighter but might feel less substantial or be more prone to chipping if mishandled. From a laser engraving perspective, a consistent thickness across the piece is desirable for maintaining optimal laser focus, although natural slate will always have some variation. Substantial irregularities can lead to inconsistent engraving depth.
The surface finish dramatically affects both the engraving outcome and the board’s final look. Most commonly, you’ll find slate with a natural cleft finish. This provides a rustic, textured surface, with subtle layers and ridges. While aesthetically pleasing, this texture can make achieving ultra-fine, sharp engraving details more challenging, as the laser may interact differently with the peaks and valleys. Alternatively, honed slate offers a smoother, more matte, and uniform surface. Honed slate generally yields crisper, more consistent engravings and is often easier to clean. Polished slate is less common for this application and generally not recommended, as its reflective surface can interfere with the laser, and it may be too slippery for practical use as a cheese board.
Finally, color is critical for achieving good contrast with laser engraving. Slate typically engraves to a lighter grey or whitish color. Therefore, darker slates – such as charcoal, deep grey, or near-black – provide the most striking contrast and make your designs pop. Lighter colored slates will result in a more subtle, lower-contrast engraving. Be aware that natural slate can contain mineral inclusions like pyrite (fool’s gold); these can add visual interest but might also create small, unpredictable spots during engraving if the laser hits them directly.
Sourcing Your Slate
Finding slate suitable for creating a personalized slate cheese board can involve exploring a few avenues. Many kitchenware stores and online retailers directly sell pre-cut slate cheese boards. When purchasing these, verify they are natural slate and inquire about any pre-applied sealants, as some may not be compatible with laser engraving or might need removal. Tile suppliers can be an excellent source, often offering slate in various sizes which you might then cut to your desired dimensions. Ensure you’re purchasing natural stone tile and not a synthetic look-alike. Craft stores and specialized online craft suppliers frequently stock slate blanks specifically intended for engraving and other craft projects. These are often a good starting point as they are typically selected for consistent quality. For a more rustic or upcycled approach, consider sourcing reclaimed roofing slate; however, this requires thorough cleaning and careful inspection to ensure it’s free from contaminants and suitable for food contact after processing. Always prioritize slate marketed as “food-grade” or confirm its natural, untreated state if sourced unconventionally.
Preparing the Slate for Engraving
Proper preparation of the slate surface is essential for achieving clean, crisp engravings and ensuring food safety. Before the slate meets the laser, a meticulous cleaning process is required.
Begin by inspecting the slate for any loose particles, dust, or existing imperfections like significant chips or cracks that could be exacerbated by the laser. The primary goal of cleaning is to remove oils, fingerprints, dust, and any other surface contaminants that could interfere with the laser beam’s interaction with the slate. Such contaminants can cause uneven etching, discoloration, or even produce unwanted fumes.
For general cleaning, use a soft brush or cloth with mild dish soap and warm water. Gently scrub the surface, paying attention to any crevices if you’re working with natural cleft slate. Rinse the slate thoroughly under running water to remove all soap residue, as leftover detergent can also affect the engraving quality. Allow the slate to air dry completely, or pat it dry with a clean, lint-free cloth. Even slight moisture can interfere with the laser engraving process, potentially leading to a cloudy or inconsistent mark.
As a final preparatory step, many engravers recommend wiping the slate surface with isopropyl alcohol (IPA), ideally 90% concentration or higher. Apply it with a lint-free cloth, allow it to evaporate completely. This step effectively degreases the surface and removes any lingering microscopic dust or oils, ensuring the laser has a pristine surface to work on. Avoid using harsh chemical cleaners, abrasives, or solvents, as these can damage the slate, leave harmful residues, or alter its natural color and texture. A clean, dry, and residue-free surface is the ideal canvas for your laser engraving artistry.
Creative Design Ideas and Software Tips for Slate
The beauty of a personalized slate cheese board lies not just in its material, but in the story it tells through its engraving. Your design choices are where creativity meets craftsmanship, transforming a simple piece of stone into a unique centerpiece or a cherished gift. The dark, rich surface of slate offers a fantastic canvas for designs that pop with contrast.
Inspiring Slate Cheese Board Design Ideas
When brainstorming slate cheese board design ideas, consider both the aesthetic and the recipient.
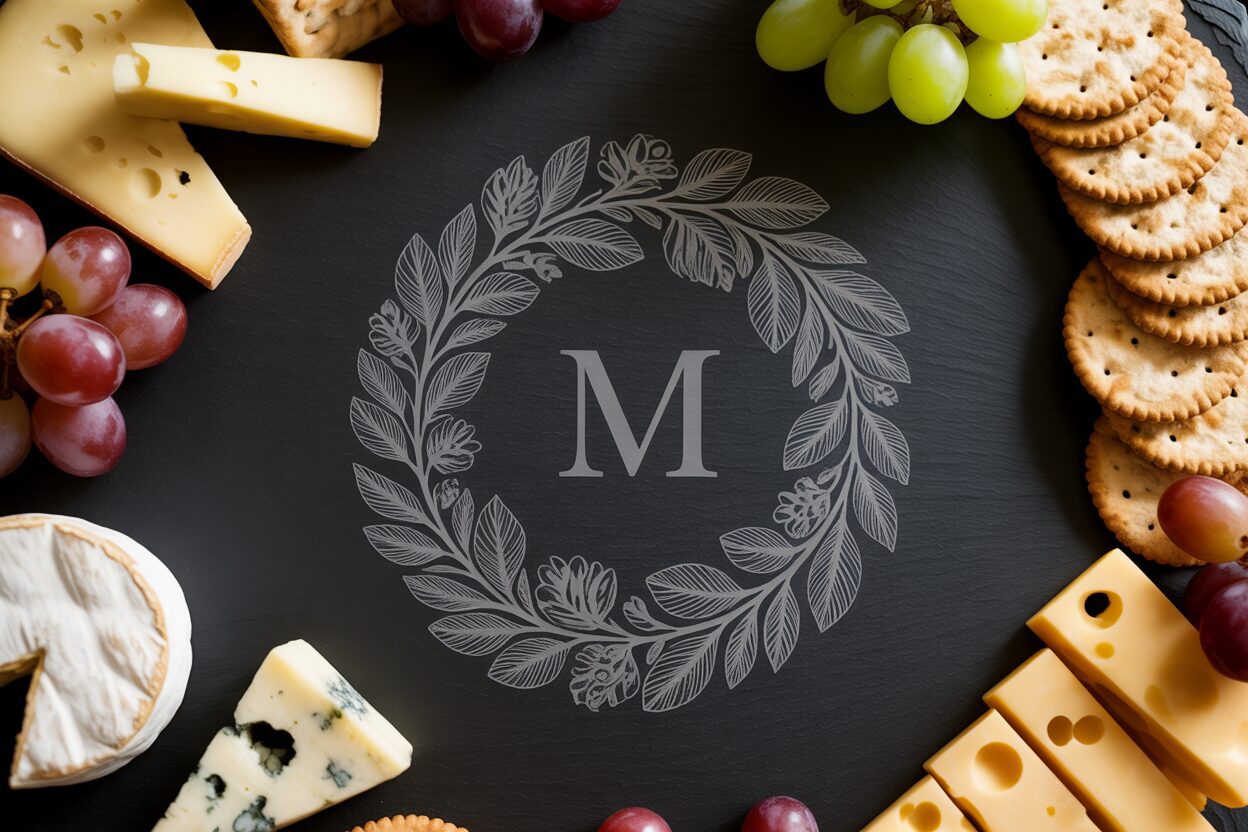
- Monograms and Initials: A timeless classic. Elegant script fonts, bold serif initials, or intertwined monograms can add a touch of sophistication. Consider adding an established date for weddings or anniversaries, subtly placed beneath or within the monogram. The key is selecting a font that remains legible and clear even when engraved.
- Meaningful Quotes and Witty Sayings: Short, impactful text works best. Think foodie quotes (“Life is great, cheese makes it better”), humorous lines, or heartfelt messages. Font choice is critical here; it should match the tone of the quote. Ensure the text is large enough to be easily readable.
- Intricate Patterns and Borders: Geometric designs, Celtic knots, art deco borders, or delicate floral motifs can frame the board or act as a standalone design. Simpler, bold patterns often engrave more effectively on natural cleft slate, as very fine lines might get lost in the texture. Consider how the pattern will interact with the food placed on the board – will it be obscured or complementary?
- Custom Artwork and Illustrations: This is where true personalization shines. Convert a child’s drawing, a beloved pet’s silhouette, a sketch of a family home, or a company logo into a vector format for clean engraving. Line art, simplified graphics, and silhouettes generally produce the best results. Avoid highly detailed, shaded images unless you are adept at converting them into high-contrast, engravable formats.
- Thematic Designs: Tailor designs to specific interests. For wine lovers, grapevines or wine bottle silhouettes. For regional pride, outlines of states or countries with a heart marking a specific city. Kitchen utensil motifs, cheese variety names stylishly arranged, or even a simplified family crest can create a truly custom slate cheese board.
Software Tips for Perfect Slate Engraving
Translating your design idea into a laser-ready file requires attention to detail, especially for a material like slate. The goal is to achieve high contrast and clarity.
Laser engraving on slate typically creates a light grey or whitish mark by ablating the dark surface. Therefore, your design in the software should be primarily black and white, where black areas represent the parts to be engraved.
- Vector is King: For most designs, especially those involving text, lines, and logos, vector files (SVG, AI, EPS, DXF) are highly recommended. Vectors are scalable without loss of quality, ensuring crisp, clean lines. Ensure all text is converted to paths or outlines to avoid font issues on the laser machine’s computer.
- Raster Images (Photographs/Complex Graphics): If using raster images (JPG, PNG, BMP, TIFF), they must be high resolution (at least 300 DPI) and converted to a high-contrast black and white image. Most laser software offers dithering options (e.g., Stucki, Jarvis, Floyd-Steinberg) to simulate shades of grey using dot patterns. Experiment with different dithering methods for slate, as some produce cleaner results than others. Simple thresholding (pure black and white with no intermediate greys) often works best for clear, impactful engravings on slate.
- Line Thickness and Detail: Avoid extremely thin lines or tiny, intricate details, especially on natural cleft slate with its inherent texture. Lines less than 0.1mm or 0.2mm might not engrave cleanly or visibly. Test small sections if unsure. Similarly, very small text can lose legibility.
- Negative Space: Embrace the dark color of the slate itself as part of your design. Sometimes, engraving the background and leaving the design elements as un-engraved slate (a negative image) can produce a striking effect, though it requires more engraving time.
- Simplify and Test: Before committing to a large, complex design, simplify where possible. Remove unnecessary anchor points in vector paths. Always perform a small test engrave on a scrap piece of similar slate or an inconspicuous area of the board to check your power, speed, and frequency settings, as well as the visual outcome of your design.
When preparing files, remember that most laser control software interprets fill colors for engraving areas and line colors/weights for cutting or vector marking. For slate, you’ll primarily be using the fill settings for your designs.
Tailoring Designs for a Custom Slate Cheese Board
The true power of laser engraving lies in creating something uniquely personal. For a wedding gift, consider a design incorporating the couple’s names, wedding date, and perhaps a motif that reflects their shared interests. Housewarming gifts could feature the family name with an “Est. [Year]” or a graphic of a house key. For corporate gifting, a company logo tastefully placed alongside a subtle pattern can create a sophisticated promotional item. Anniversaries, birthdays, thank-you gifts – each occasion offers an opportunity to match the design to the sentiment and the recipient’s personal style, making the custom slate cheese board a memorable and functional piece of art.
Optimizing Laser Engraving Settings for Slate
Achieving a sharp, high-contrast engraving on slate hinges on meticulously fine-tuning your laser’s parameters. Unlike more forgiving materials, slate responds quite specifically to laser energy, and finding the sweet spot in your engraving settings for slate is crucial for a professional finish. While exact numbers will vary depending on your specific laser machine (wattage, type – CO2 or diode), slate batch, and desired effect, understanding the principles behind each setting will empower you to dial them in effectively.
Core Laser Engraving Parameters for Slate
Four primary settings dictate the outcome of your engraving:
- Laser Power: This determines the intensity of the laser beam. For slate, you typically want just enough power to ablate the surface and create a lighter, contrasting mark. Too little power will result in a faint, barely visible engraving. Conversely, too much power can cause the slate to overheat, leading to excessive chipping around the edges of the design, a “glassy” melted appearance, or even micro-fractures. Slate generally requires significantly less power than materials like wood or acrylic. For CO2 lasers, starting points might be in the 10-30% power range for a 40-60W tube, but this is highly machine-dependent. Diode lasers will use different power scales, often expressed in milliamps or a direct percentage of their lower maximum output.
- Speed: This is the velocity at which the laser head moves across the slate. Speed works in conjunction with power; higher speeds require more power to achieve the same depth of engrave, while slower speeds use less power but increase the laser’s dwell time on any given point. For slate, a moderate to relatively high speed is often preferred to prevent overheating and minimize chipping. If your mark is too deep or shows signs of melting, increasing speed (or decreasing power) is a common adjustment.
- Frequency (PPI/PPS): For CO2 lasers, this setting (Pulses Per Inch or Pulses Per Second) dictates how many times the laser fires within a given distance or time. A higher PPI can create a smoother, more consistent mark, as the laser pulses overlap more. However, on slate, an excessively high PPI can also lead to heat build-up and potential melting or a less defined edge. Finding a balance is key. Some engravers find that a moderate PPI helps achieve a brighter white mark on slate. Typical starting ranges might be 250-500 PPI, but experimentation is vital.
- Resolution (DPI): Dots Per Inch determines the level of detail in the engraving, particularly for raster images. A higher DPI means more lines of engraving per inch, resulting in finer detail. However, exceeding the practical limit for slate, especially natural cleft slate with its inherent texture, can increase engraving time without a proportional increase in visual quality, and may even overwork the material. A DPI range of 300-600 is often sufficient for most slate cheese board designs. For very bold, simple graphics, a lower DPI might be acceptable.
Adjusting Settings for Slate Variations and Laser Machines
It’s crucial to understand that there’s no universal “perfect” setting. The ideal engraving settings for slate are specific to your laser machine and your particular piece of slate. Darker, denser slates may react slightly differently than lighter, more friable ones. A honed (smooth) surface might allow for finer detail and different setting combinations than a rustic natural cleft surface, where the laser may interact differently with the peaks and valleys. The wattage of your laser tube is a major factor. A 100W laser will achieve the same result at a much lower power percentage and potentially higher speed than a 30W laser. Diode lasers, typically having lower power output than CO2 lasers, will often require slower speeds and higher relative power percentages to mark slate effectively. Always refer to your laser machine manufacturer’s general guidelines as a very broad starting point, but anticipate significant adjustments for slate. Air assist is also a factor; moderate air assist is usually beneficial to clear debris and prevent flaming if any coating is present, but some users find that very low or even no air assist can sometimes yield a whiter mark on certain slates. However, be cautious with reduced air assist due to potential debris build-up on the lens.
The Indispensable Role of Test Engravings
Before committing your final design to a valuable piece of slate, conducting test engravings is non-negotiable. This is the most reliable way to fine-tune your settings.
- Use Scrap Material: Ideally, test on a spare piece of the same slate you’ll be using for the final project, or on an inconspicuous area of the board itself (like the underside, if it’s uniform).
- Create a Test Matrix: Design a small grid or a series of small identical graphics (e.g., a small square or a letter). Engrave each graphic with a different combination of power and speed, keeping frequency and DPI constant initially. For example, create rows with increasing power and columns with increasing speed.
- Evaluate the Results: Examine each test engrave closely. Look for a clear, crisp mark with good contrast against the dark slate. The ideal engraving is typically light grey or whitish. Avoid settings that cause excessive chipping, flaking, melting, or a very faint mark. The engraving should be shallow; you’re aiming to change the surface color, not carve deeply into the stone.
- Refine and Repeat: Once you’ve found a good power/speed combination, you can then experiment with varying the PPI/Frequency or DPI if needed. Small adjustments can make a significant difference.
- Document Your Findings: Keep detailed notes of the settings that worked best for specific types of slate and designs. This will save you considerable time and material in future projects.
Patience during the testing phase will be rewarded with consistently beautiful and professional-looking engraved slate cheese boards. Remember that focus is also critical; ensure your laser is perfectly focused on the slate’s surface for the sharpest results. For uneven natural cleft slate, try to focus on the average height of the area to be engraved.
Post-Engraving: Cleaning, Enhancing, and Sealing
Once the laser has worked its magic, your engraved slate requires careful attention to transform it from a freshly etched piece into a finished, food-safe masterpiece. This post-engraving phase involves meticulous cleaning, optional enhancement of the design’s visibility, and the crucial application of a protective sealant.
Cleaning Your Freshly Engraved Slate
The laser engraving process, by its nature, ablates the surface of the slate, creating fine dust and debris. This residue will likely be covering the engraved areas and possibly the surrounding surface. The first step is to remove this.
- Gentle Brushing: Start by using a soft-bristled brush (like a soft nylon brush or even a dedicated drafting brush) to gently sweep away the loose dust from the engraving and the entire surface. Be thorough but not aggressive, as you don’t want to dislodge any intentionally engraved delicate features or scratch the slate.
- Damp Cloth Wipe: After the initial brushing, wipe the slate down with a clean, damp (not wet) lint-free cloth. Water is usually sufficient. If the slate is particularly dusty or if there was any masking tape in use, a very mild solution of dish soap and water can be used. Ensure you rinse thoroughly with a clean damp cloth afterwards to remove any soap residue, as this could interfere with sealing.
- Air Dry or Pat Dry: Allow the slate to air dry completely, or pat it dry with another clean, lint-free cloth. Ensure it’s perfectly dry before proceeding to any enhancement or sealing steps. Any trapped moisture can affect the sealant’s adhesion and appearance.
Inspecting the cleaned engraving will reveal its true initial contrast. Well-chosen laser settings should have already produced a distinct, lighter mark against the darker slate.
Enhancing Engraving Contrast and Appearance
Often, proper engraving settings and thorough cleaning are all that’s needed for excellent contrast. However, if you wish to subtly enhance the depth of the slate’s natural color, thereby making the lighter engraving appear even more striking, applying a food-grade oil is a common and effective method. This is less about “enhancing the engraving” itself and more about enriching the background.
A light coat of food-grade mineral oil, applied to the entire surface (both engraved and un-engraved areas), can deepen the natural dark color of the slate. This darkening of the slate body naturally makes the lighter engraved areas stand out more prominently. Apply a thin, even coat with a clean cloth, let it sit for 10-20 minutes to allow the slate to absorb what it can, and then buff off any excess thoroughly with a new clean cloth. The slate should not feel oily to the touch. This oil application also serves as an initial layer of protection and is a precursor to full sealing. Avoid using colored waxes or paints to fill engravings on surfaces intended for food contact, as these are unlikely to be food-safe.
The Importance and Application of a Food Safe Slate Sealant
Sealing is a non-negotiable step when creating a personalized slate cheese board intended for direct contact with food. Natural slate is porous and can absorb oils, liquids, and odors from cheeses, cured meats, fruits, and wine, leading to stains and potential bacteria growth. Engraving can also create a slightly more textured surface that might trap food particles. A food safe slate sealant addresses these issues.
- Why Seal?
- Food Safety: It creates a barrier preventing food particles and bacteria from lodging in the slate’s pores or the engraved areas.
- Stain Prevention: Protects against oil, grease, and acidic food stains.
- Ease of Cleaning: A sealed surface is smoother and less porous, making it much easier to wipe clean after use.
- Enhanced Appearance: Many sealants subtly enrich the slate’s color, deepening its natural tones and improving the contrast of the engraving.
- Durability: It can help to consolidate the surface, reducing minor flaking from the engraved edges over time.
- Choosing a Food-Safe Sealant:
- Food-Grade Mineral Oil: This is a widely used, inexpensive, and readily available option. It needs to be pure, USP-grade mineral oil (often sold as cutting board oil or butcher block oil). Reapplication will be needed periodically as it wears off with washing.
- Beeswax and Mineral Oil Blends: These products, often marketed as “board butter” or “cutting board conditioner,” offer slightly more durability than mineral oil alone, as the beeswax provides a more robust surface film. They still require periodic reapplication.
- Specialized Food-Safe Stone Sealants: Several companies produce commercial sealants specifically designed for natural stone countertops and food surfaces. It is critical to ensure the product explicitly states it is “food-safe,” “food-grade,” or suitable for food contact surfaces once cured. These often provide longer-lasting protection than simple oil treatments. Always check the product’s ingredients and certifications.
Avoid general-purpose stone sealers from hardware stores unless their food-safety for direct contact is explicitly verified by the manufacturer. Many contain solvents or chemicals not suitable for food surfaces.
- Application Methods:
Always follow the manufacturer’s instructions for the specific sealant you choose. Generally, the process involves:
- Ensure the slate is impeccably clean and completely dry.
- Apply a thin, even coat of the sealant using a clean, lint-free cloth or applicator as recommended. Work it into the engraved areas as well.
- Allow the sealant to penetrate for the time specified by the manufacturer (typically 15 minutes to several hours).
- Wipe off any excess sealant thoroughly with a clean cloth. The goal is for the sealant to be in the slate, not a thick layer on top of it. A sticky or tacky surface means too much sealant was left.
- Allow the sealant to cure completely as per the manufacturer’s instructions before the board is used for food. Curing times can range from a few hours to 24-72 hours.
Properly cleaning, optionally enhancing, and thoroughly sealing your laser-engraved slate ensures your creation is not only beautiful but also functional, durable, and safe for serving your favorite cheeses and charcuterie.
Conclusions
Laser engraving opens a world of possibilities for slate cheese boards, transforming them into unique, personalized items. By following these guidelines on design, engraving, and food-safe finishing, you can confidently produce stunning pieces that are sure to impress for any occasion.
FAQ
Q: What type of slate is best for laser engraving a cheese board?
A: Opt for natural, quarried slate, as it’s inherently food-safe once cleaned and properly finished. Darker slates (charcoal, deep grey, near-black) provide the best contrast for engravings. Avoid composite or synthetic slates due to potential food safety issues and poor laser reaction. Consider a honed surface for crisper details, though natural cleft slate also works for more rustic designs.
Q: Can I use any design for engraving, or are there limitations?
A: While creativity is encouraged, designs that are high-contrast and simplified work best. Vector files (SVG, AI) are ideal for crisp lines and text. If using raster images, ensure they are high-resolution (300+ DPI) and converted to high-contrast black and white. Avoid extremely thin lines or tiny details, especially on natural cleft slate, as they might not engrave cleanly or visibly. Always test your design on a scrap piece first.
Q: How do I find the correct laser settings for slate?
A: There are no universal “perfect” settings, as they depend on your specific laser machine (wattage, type) and the slate’s characteristics. The most reliable method is to conduct test engravings on a scrap piece of similar slate. Experiment with combinations of laser power (generally lower for slate), speed (moderate to high), frequency (PPI/PPS), and resolution (DPI, 300-600 is common) to find settings that produce a clear, light grey or whitish mark without chipping or melting.
Q: Why is it important to seal a laser-engraved slate cheese board?
Interested in more Slate Cheese Board? Check out our Slate Cheese Board laser file designs: Click here!
A: Sealing is crucial for food safety and durability. Natural slate is porous and can absorb liquids, oils, and odors, leading to stains and potential bacteria growth. A food-safe sealant creates a barrier, making the board easier to clean, preventing stains, enhancing its appearance by deepening the natural color, and consolidating the surface. Always use a sealant explicitly labeled “food-safe” and follow its application and curing instructions carefully.
Block "subscribe-popup" not found