Tutorials
A Step-by-Step Guide to Creating Engraved Slate Coasters
Nov
Estimated reading time: 6 minutes
Key Takeaways
- Preparation is Paramount: Always clean slate coasters with isopropyl alcohol to remove oils and dust. Use high-resolution (300+ DPI), pure black-and-white designs for the best results.
- Use Low Power & High Speed: The goal is to fracture the slate’s surface, not melt it. Start with low power (10-30%) and high speed (3000-6000 mm/min) to achieve a bright white mark.
- Always Run a Test Grid: Slate varies from batch to batch. A material test grid is the only way to find the perfect speed and power combination for your specific coasters, preventing wasted material.
- Finish for Maximum Contrast: After engraving and cleaning, apply food-safe mineral oil or a clear acrylic sealer. This darkens the slate and makes the light-colored engraving pop dramatically.
Table of Contents
Engraved slate coasters offer a touch of rustic elegance and endless personalization possibilities. They make for perfect gifts, promotional items, or a unique addition to your home decor. This guide provides a comprehensive walkthrough, showing you how to achieve stunning, high-contrast results on slate, turning a simple material into a work of art with laser precision.
Preparing Slate Coasters and Your Design
The foundation of a stunning engraved slate coaster lies in careful preparation of both the material and the digital design. Rushing this stage can lead to inconsistent results and wasted materials, so taking the time to get it right is paramount. Your first step is selecting the right slate. While slate is a natural material with inherent variations, you should look for coasters with a relatively smooth and uniform surface. Run your fingers over them; you want to avoid pieces with deep ridges, excessive flaking, or a very porous texture, as these imperfections can cause the laser to go out of focus and produce an uneven or incomplete engraving. Once you have selected your coasters, cleaning them is a non-negotiable step. The surface must be completely free of contaminants. Using a lint-free microfiber cloth, wipe each coaster down with isopropyl alcohol (90% or higher is recommended). This will effectively remove any dust, grease, or oils from handling that could interfere with the laser beam and mar the final result. Allow the coasters to air dry completely before you proceed.
Interested in more Slate Coaster? Check out our Slate Coaster laser file designs: Click here!
Choosing and Optimizing Your Design
With your slate prepped, it’s time to focus on your artwork. The type of design you choose will influence the file format you use. For crisp text, logos, or geometric patterns, vector files (like SVG, AI, or DXF) are the superior choice. Because they are based on mathematical equations, they scale perfectly and allow the laser to trace clean, sharp lines. For detailed photographs or complex imagery, you will use raster files (like JPG, PNG, or BMP). The key to a good raster engrave is resolution. Your image should be at least 300 DPI (dots per inch) at the intended final size to avoid a blurry or pixelated outcome. Great slate coaster ideas are everywhere; you can find inspiration on sites like Etsy and Pinterest, purchase ready-to-use files from design marketplaces, or create your own unique personalized slate coasters. When preparing your design for laser engraving slate, remember that the process is typically binary: the laser either fires (engraving the black parts of your design) or it doesn’t (leaving the white parts untouched). Therefore, you must convert your image to a pure black-and-white format. While some advanced users employ dithering techniques to simulate grayscale, sticking to high-contrast, black-and-white artwork is the surest path to a striking and predictable result for beginners.
Sizing and Positioning for a Perfect Engraving
Properly framing your design on the coaster is what separates an amateur attempt from a professional product. The best practice is to create a template in your design software of choice, such as Adobe Illustrator, Inkscape, or CorelDRAW. Create a new document with an artboard that exactly matches your coaster’s dimensions, most commonly 4×4 inches (or 100×100 mm). This digital square acts as a precise guide for your coaster. Import your prepared black-and-white artwork into this template. Avoid scaling the design to fill the entire surface. For a more refined look, leave a small, consistent margin of about 1/4 inch (around 6 mm) from the chipped edges. This frames the artwork nicely and mitigates any issues with the laser engraving over the uneven perimeter. The final critical step is centering. Use your software’s alignment tools to perfectly center your design both horizontally and vertically within the 4×4 template. This ensures a balanced, symmetrical final product. Once you are satisfied with the size and placement, save the file in a format compatible with your laser software, and you are ready to move to the machine.
Optimal Laser Settings for Slate Engraving
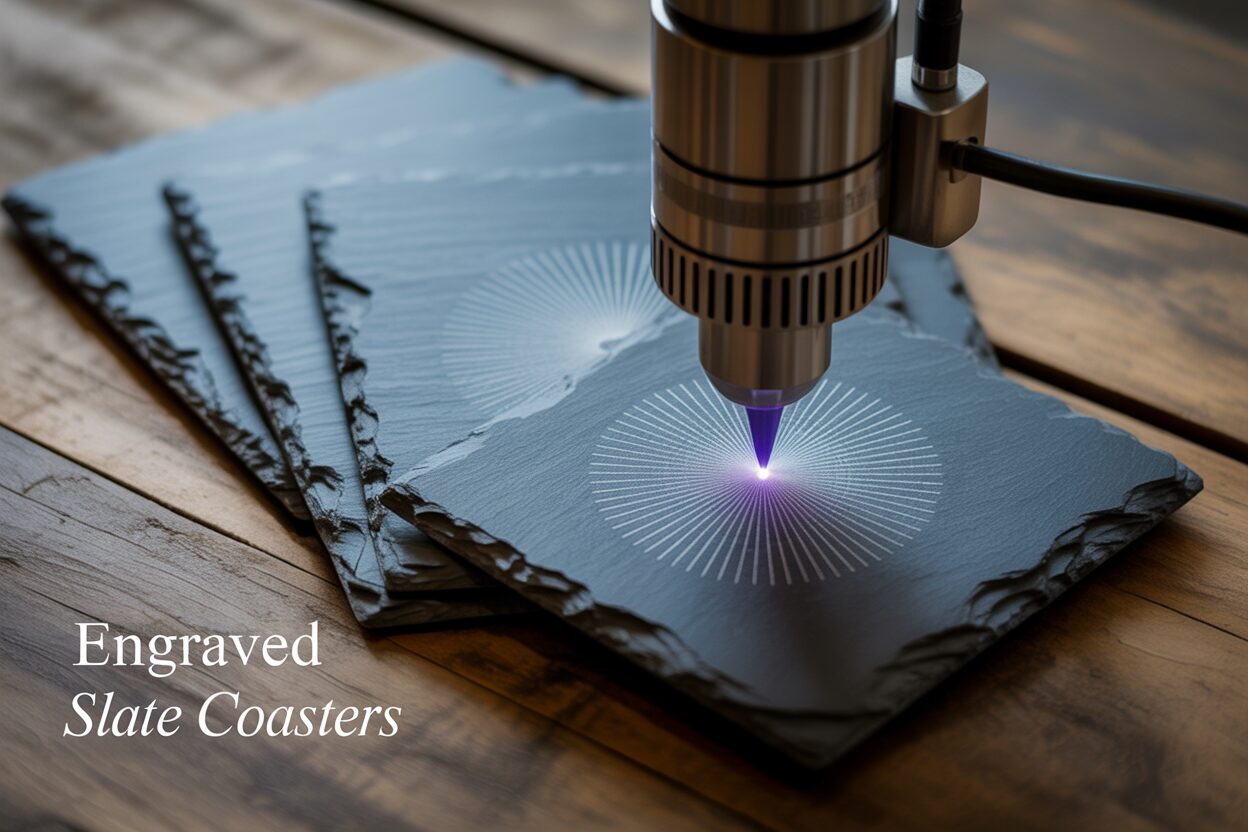
Dialing in the correct laser settings is the most critical technical step in how to laser engrave slate. Unlike engraving wood or acrylic where the laser burns or melts the material, the goal with slate engraving is entirely different. You are not trying to burn the slate; instead, you are aiming to ablate, or fracture, the very top layer of the material. The focused heat from the laser beam causes micro-fractures in the slate’s surface, which exposes the lighter-colored material underneath. This is what creates the characteristic and highly desirable bright white or light gray mark. Understanding this principle is key to avoiding common pitfalls like melting the slate, which results in a dark, glassy, and undesirable finish. Every laser is different, but a universal rule for slate is to use low power and high speed.
Core Laser Parameter Settings
Getting the perfect result requires balancing three main settings: Power, Speed, and Resolution (DPI). Because slate reacts very quickly to the laser, a delicate touch is needed. For most diode lasers in the 10-20W output range, your starting point for settings will look something like this:
- Power: This is the most crucial setting to get right. You need just enough power to fracture the surface without melting it. Start with a very low power range, typically between 10% and 30%. If your engraving looks dark or glassy, your power is too high. If the mark is faint or non-existent, you can slowly increase the power in small increments. Remember, more power is not better when it comes to slate.
- Speed: To complement the low power, you should use a moderate to high speed. A faster speed ensures the laser beam doesn’t dwell on one spot for too long, preventing heat buildup and melting. A good starting range is between 3000 mm/min and 6000 mm/min. The interplay between speed and power is vital; a faster speed might require a slight increase in power to achieve the same result as a slower speed.
- DPI/Lines Per Inch (LPI): This setting determines the density of the engraved lines. For a solid, bright white fill in your design, a higher DPI is recommended. A setting of around 254 to 318 DPI (or 100-125 lines/cm) will cause the engraved lines to slightly overlap, creating a more uniform and impactful visual. A lower DPI may leave visible horizontal lines in the final engraving, diminishing the quality.
The single most important piece of advice is to run a material test before engraving your final product. Slate is a natural material, and its composition can vary significantly from one batch to the next. Use a spare coaster or the back of one of your pieces to run a test grid. Most laser software, like LightBurn, has a built-in feature for this that engraves a matrix of squares using different combinations of speed and power. Once the test is complete, examine the squares to find the one that produced the brightest, cleanest, and most consistent white mark. That specific combination of speed and power is your ideal setting for that particular batch of slate coasters. This small, five-minute step will save you from wasting materials and guarantee a professional-quality result every time.
Engraving and Finishing for a Professional Look
With your design finalized and laser settings dialed in from your test grid, you are ready for the main event. Before you press start, perform a final pre-engraving check. Place your cleaned slate coaster onto the laser bed, ensuring it is positioned directly under the laser head. The single most important factor for a crisp result is focus. Use your machine’s focusing tool—whether it’s a fixed-focus block, a sensor, or an auto-focus function—to set the perfect distance between the laser lens and the surface of the slate. An incorrect focus height will result in a blurry, weak engraving rather than the sharp, bright mark you want. Also, check that the coaster is as level as possible. While slate is a natural material with an uneven surface, you want the primary engraving area to be flat and parallel to the laser’s gantry to ensure the focus remains consistent across the entire design. Once you are confident in your setup, you can proceed with the laser engraving slate process. Run the job, and watch as your digital design is permanently etched into the stone, revealing the striking light gray artwork.
Post-Engraving Cleaning and Finishing
Once the laser has finished its work, your coaster will be covered in a fine layer of dust and residue from the ablated material. This post-engraving cleanup and finishing is what truly elevates your project to a professional level. Carefully remove the coaster from the machine. Using a soft, lint-free cloth or a microfiber towel slightly dampened with water, gently wipe the surface. You don’t need to scrub; the goal is simply to lift away all the loose dust from the engraved areas and the surrounding slate. Be thorough and ensure the entire surface is clean and free of haze. Allow it to air dry completely. At this point, the coaster will look good, but the next step will make it look exceptional.
To create stunning contrast and provide a layer of protection, you must apply a finish. This process darkens the slate body, making the light-colored engraving pop dramatically. You have two primary options:
- Food-Safe Mineral Oil: This is an excellent choice for coasters as it is non-toxic and enhances the natural beauty of the stone. Apply a small amount of mineral oil to a clean cloth and wipe a thin, even layer over the entire surface of the coaster. You will immediately see the slate darken to a rich, deep gray or black, making the engraved portion appear significantly brighter. Let the oil soak in for a few minutes, then use a dry section of the cloth to buff off any excess.
- Clear Acrylic Sealer: For a more permanent and durable finish that offers better protection against moisture, a clear spray sealer is ideal. In a well-ventilated area, apply a very light, even coat of a matte or satin clear acrylic spray. This will achieve a similar darkening effect as the oil while sealing the slate. Avoid a heavy coat, as it can pool and create a glossy, unnatural look.
The final touch for truly professional engraved slate coasters is to add feet to the bottom. This small detail prevents the rough slate from scratching tables and other surfaces. Simply apply four small, self-adhesive felt or cork pads to the corners on the underside of the coaster. This finishing step not only adds functionality but also signals a high-quality, thoughtfully crafted product.
Conclusions
You now have the knowledge to confidently create beautifully engraved slate coasters. By preparing your materials, dialing in the correct laser settings, and applying the right finishing touches, you can produce professional-quality results every time. Don’t hesitate to experiment with different designs and techniques to further refine your craft and create truly unique pieces.
Frequently Asked Questions
Q: What are the best beginner laser settings for slate coasters?
A: A universal starting point for slate is low power and high speed. For a 10-20W diode laser, begin with 10-30% power and a speed between 3000-6000 mm/min. Always perform a test grid on a spare coaster to fine-tune these settings for your specific material.
Q: Why did my engraving turn out dark and glassy instead of bright white?
A: This is the most common issue and is almost always caused by using too much power. Excessive power melts the slate’s surface instead of fracturing it, creating a dark, undesirable finish. Reduce your laser’s power setting significantly.
Q: How do I make the engraved design stand out more?
A: The key is in the finishing step. After cleaning off the engraving dust, apply a thin coat of food-safe mineral oil or a matte/satin clear acrylic sealer. This will darken the body of the slate to a rich black or gray, creating a dramatic contrast that makes the light-colored engraving pop.
Q: What type of design file works best for laser engraving slate?
A: For crisp text and logos, vector files (SVG, AI) are ideal. For photos, use a high-resolution (300+ DPI) raster file (JPG, PNG). Regardless of the format, the design must be converted to a pure, high-contrast black-and-white image for the best results, as the laser engraves the black parts and leaves the white parts untouched.
Block "subscribe-popup" not found