Tutorials
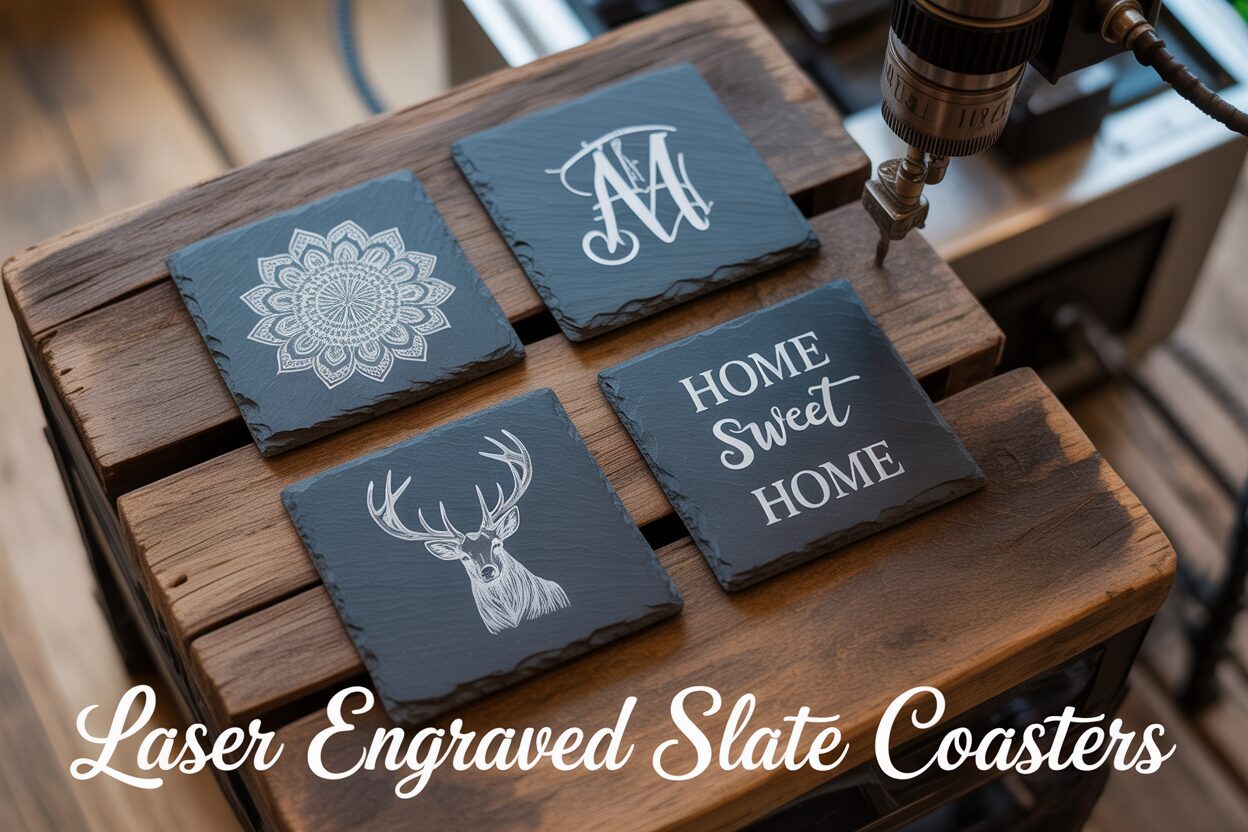
A Step-by-Step Guide to Crafting Laser Engraved Slate Coasters
Aug
Key Takeaways
- Material is Key: Success starts with sourcing the right slate. Choose coasters that are flat, even, and between 4mm-7mm thick. Avoid warped slate to ensure a focused, consistent engraving.
- Preparation is Non-Negotiable: Before engraving, thoroughly clean the slate surface with high-concentration isopropyl alcohol to remove dust and oils. This simple step prevents weak or spotty results.
- Focus for Sharpness: Use digital calipers to measure the exact thickness of each coaster. Inputting this precise measurement into your laser software is the single most important step for achieving a sharp, high-contrast design.
- Test and Refine Settings: Don’t guess your settings. Run a power and speed test grid on a scrap piece to find the ideal combination for your specific laser, aiming for a bright, light-gray mark without flaking the material.
- Finish for a Professional Look: After engraving, clean off the dust and apply a sealant. Food-safe mineral oil or a clear matte/satin acrylic spray will protect the coaster and dramatically enhance the contrast, making your design pop.
Table of Contents
Dive into the world of laser engraving with a perfect beginner-friendly project: custom slate coasters. This guide will walk you through every step, from selecting the right materials to dialing in your machine’s settings and applying the finishing touches. Elevate your home decor or create personalized gifts with this detailed tutorial on making beautiful laser engraved slate coasters.
Sourcing and Preparing Your Slate for Engraving
The journey to a beautifully engraved slate coaster begins long before the laser fires. The quality of your final product is directly tied to the quality of your raw material and the care you take in preparing it. This initial phase of sourcing and preparation is non-negotiable for achieving crisp, professional results. Skipping these steps can lead to inconsistent engravings, wasted materials, and frustration.
Interested in more Slate Coaster? Check out our Slate Coaster laser file designs: Click here!
Choosing the Best Slate for Laser Engraving
Not all slate is created equal, especially when it comes to laser engraving. When you are sourcing your coasters, here are the three critical factors to consider:
- Surface Evenness: This is arguably the most important characteristic. The laser beam is focused to a precise point, and for a consistent engraving, the distance between the laser head and the slate surface must remain constant. Look for coasters that are as flat as possible. A warped, bowed, or uneven slate will result in some parts of your design being sharp and clear, while others are blurry or faint because they were out of focus. Before buying, if possible, lay the slate on a known flat surface and press on the corners. If it wobbles, it has a warp.
- Thickness: For coasters, a thickness between 4mm and 7mm is ideal. This range provides a satisfying, hefty feel without being overly bulky. More importantly, consistency in thickness across a batch of coasters simplifies your workflow, as you won’t need to refocus the laser for every single piece.
- Sourcing Options: You can find blank slate coasters at various places. Large craft stores are convenient for small projects, but their stock can be inconsistent in quality. Online marketplaces like Amazon and Etsy, along with specialized laser material suppliers, are excellent sources for buying in bulk. They often sell products specifically vetted for laser engraving, ensuring better consistency in flatness and composition. While you might see large slate tiles at home improvement stores, these should generally be avoided. They are often uneven, thicker, and may be treated with unknown chemicals that could produce hazardous fumes when lasered.
Preparing Your Slate for Engraving
Once you have your slate, proper preparation is essential to remove any contaminants that could interfere with the laser. A clean, accurately measured coaster is the foundation for a flawless engraving.
- Clean the Slate Surface: Slate, even when new, is often covered in a fine layer of dust from the cutting process, as well as oils from handling. These contaminants can block the laser beam, resulting in a weak or spotty engraving. To clean it, moisten a lint-free or microfiber cloth with a high concentration of isopropyl alcohol (90% or higher is best). Wipe the entire surface of the coaster firmly. The alcohol acts as a powerful degreaser, lifting oils and residue, and it evaporates quickly without leaving any film behind, unlike cleaning with just water, which can leave mineral deposits. Allow it to air dry completely for a minute or two.
- Measure the Thickness Accurately: Precise focus is the key to a sharp, high-contrast mark. Because slate is a natural, non-uniform material, you cannot rely on the thickness stated by the supplier. You must measure each piece yourself. For this task, a simple ruler is not accurate enough. Use a set of digital calipers to get an exact measurement. Measure the thickness in the center of the coaster, as this is typically where your design will be. Note this measurement down; you will enter this value into your laser software to set the material height, which allows the laser head to adjust to the perfect focal distance. Taking a few moments to get this right is the single most important step for achieving a high-quality engraving.
By investing time in sourcing quality material and meticulously cleaning and measuring it, you eliminate the most common variables that lead to poor results. This careful preparation ensures the laser can do its job effectively, transforming a simple piece of stone into a stunning, personalized work of art.
Perfecting Your Laser Engraving Settings
With your slate cleaned and measured, it’s time to dial in the machine for the main event. Finding the perfect slate coaster engraving settings is a critical step that bridges preparation and final output. It’s important to understand that there is no universal setting that works for every machine. The optimal parameters will vary significantly based on your laser’s power and type—a 40W CO2 laser will require vastly different speed and power settings than a 20W diode laser. The beauty of any DIY laser project is this phase of experimentation, where you learn the unique characteristics of your machine and material. The goal with slate is not to ablate or vaporize the material deeply, but rather to heat the surface just enough to fracture and lighten it, creating a permanent, light-gray mark. Pushing too much power will result in a rough, flaked surface that lacks the desired smooth, professional finish.
Conducting a Power and Speed Test Grid
The most reliable method for finding your ideal settings is to run a test grid on a scrap piece of slate—ideally a coaster you can sacrifice for the cause. This process systematically tests various combinations of power and speed, allowing you to visually identify the best result.
- Set Up the Grid: In your laser software, like LightBurn, use the ‘Material Test’ generator. If your software doesn’t have this feature, you can manually create a grid of small squares. Create a grid of, for example, 5 columns and 5 rows.
- Assign Variables: Assign a range of speeds to the X-axis and a range of power levels to the Y-axis. For a diode laser, you might test speeds from 1000mm/min to 3000mm/min and power from 20% to 60%. For a more powerful CO2 laser, you might test speeds from 100mm/s to 300mm/s and power from 15% to 35%. Label each square with its corresponding setting so you can identify it later.
- Ensure Correct Focus: This is where your previous measurements pay off. Input the precise thickness you measured with your calipers into your software’s material height setting. This allows the laser to automatically adjust to the perfect focal distance, which is absolutely crucial for achieving sharp, crisp details. An incorrect focus is the number one cause of blurry or faint engravings.
- Run the Test and Analyze: Engrave the test grid onto your scrap slate. Once complete, examine the squares closely. You are looking for the square that produces the brightest, most consistent, and cleanest light-gray or off-white mark. Some squares may appear brownish (too much power/too slow), while others may be barely visible (too little power/too fast). Choose the setting that provides the best contrast without making the surface feel rough or flaky to the touch. This winning combination is your starting point for all your laser engraved slate coasters from this batch.
If you notice inconsistent coloring within a single test square, this often points back to the material itself. It could mean the surface is not perfectly flat, causing a slight variation in focus across that small area, or it could be a natural variation in the slate’s composition. While you can’t change the stone’s geology, ensuring your coasters are as flat as possible minimizes this issue significantly. By methodically testing and paying close attention to focus, you take the guesswork out of the engraving process and guarantee a high-quality result every time.
Post-Engraving Cleaning and Sealing Techniques
The laser has done its work, leaving behind your intricate design etched into the stone. However, the process isn’t quite finished. This final stage of cleaning and sealing is what elevates your project from a raw engraving to a polished, professional product. This step not only protects your work but dramatically enhances its visual appeal, making the design truly stand out.
The engraving process creates a fine powder of slate dust and residue that settles on and into the newly engraved lines. This dust can obscure the detail and dull the contrast. The first order of business is to clean it thoroughly.
- Initial Dust Removal: Start with a soft-bristled brush, like a clean, dry toothbrush or a soft paintbrush. Gently brush the entire surface of the coaster, paying special attention to the engraved areas. This will lift the majority of the loose dust without scratching the slate or the delicate engraved pattern.
- Final Wipe-Down: After brushing, take a clean, lint-free microfiber cloth and dampen it slightly with water or isopropyl alcohol. Wipe down the entire coaster to pick up any remaining fine dust. Be careful not to use a sopping wet cloth, as this can turn the dust into a slurry that settles back into the crevices. Allow the coaster to air dry completely for a few minutes. You’ll notice the engraving looks clean but perhaps a bit faint against the dark slate. The next step will fix that.
Choosing and Applying a Sealant
Sealing slate coasters after engraving is arguably the most transformative step in the entire process. It serves two functions: it protects the slate from moisture and stains, and more importantly, it deepens the color of the raw slate from a dull gray to a rich black, which makes the light-gray engraved design pop with incredible contrast. You have two excellent options for this, each providing a different finish.
- Food-Safe Mineral Oil: For a natural, enhanced look, food-safe mineral oil is a fantastic choice. It’s inexpensive, easy to apply, and perfectly safe for an item that will come into contact with drinkware. To apply, put a small amount of oil onto a clean, lint-free cloth. A little goes a very long way. Rub the oil evenly over the entire coaster surface, including the edges. You will see an immediate and dramatic change as the slate darkens. Allow the oil to penetrate the stone for 10-15 minutes, then use a separate clean, dry cloth to vigorously buff off all the excess oil. If you leave excess oil on the surface, it will feel greasy. This finish provides a beautiful, satin luster that looks and feels natural, though it may need to be reapplied periodically.
- Clear Acrylic Spray Sealant: For a more permanent and waterproof finish, a clear spray sealant is the way to go. These are available in various finishes, with matte and satin being the most popular choices for slate as they preserve its natural appearance better than a high-gloss finish. To apply, work in a well-ventilated area. Place the coaster on a protected surface and shake the can well. Holding the can 8-12 inches away, apply a very light, even coat in a smooth, sweeping motion. It’s critical to apply thin coats; a heavy coat can pool and look uneven. Let the first coat dry to the touch (typically 15-20 minutes), then apply a second light coat for full coverage. The coaster will need to cure for at least 24 hours before it’s fully hardened and ready for use. This method creates a durable, non-porous surface that is highly resistant to water rings and stains.
Whether you opt for the organic richness of oil or the durable protection of an acrylic spray, this final sealing step is essential. It’s the professional touch that protects your art and makes the contrast between the dark slate and the light engraving truly breathtaking.
Conclusions
You now have the knowledge to create professional-quality laser engraved slate coasters. This rewarding DIY laser project is not only a great way to practice your skills but also to produce beautiful, marketable items. Don’t hesitate to experiment with different designs and settings to develop your unique style. Happy engraving, and enjoy your stunning new coasters!
Frequently Asked Questions
Q: What is the best type of slate for laser engraving coasters?
A: The best slate is flat, even, and between 4mm and 7mm thick. Look for coasters specifically sold for crafting or laser engraving from online suppliers, as they offer better consistency. Avoid large, uneven slate tiles from home improvement stores, which can be warped and produce poor results.
Q: Why is my slate engraving blurry or inconsistent?
A: The most common cause is incorrect focus. Always measure the exact thickness of your slate coaster with digital calipers and enter that value into your laser software. An uneven or warped slate surface can also cause focus variations across the design, leading to blurry and sharp spots on the same piece.
Q: How do I clean slate coasters before engraving?
A: Use a lint-free or microfiber cloth dampened with a high concentration of isopropyl alcohol (90% or higher is ideal). Wipe the surface firmly to remove all dust and natural oils. The alcohol cleans effectively and evaporates quickly without leaving any residue that could interfere with the laser.
Q: Should I seal my engraved slate coasters?
A: Yes, sealing is a crucial final step. It protects the coaster from moisture and stains and, most importantly, dramatically enhances the visual contrast. Sealing darkens the raw slate to a rich black, which makes the light-gray engraved design pop. You can use food-safe mineral oil for a natural, satin finish or a clear acrylic spray (matte or satin) for a more durable, waterproof seal.
Estimated reading time: 7 minutes
Key Takeaways
- Material is Key: Success starts with sourcing the right slate. Choose coasters that are flat, even, and between 4mm-7mm thick. Avoid warped slate to ensure a focused, consistent engraving.
- Preparation is Non-Negotiable: Before engraving, thoroughly clean the slate surface with high-concentration isopropyl alcohol to remove dust and oils. This simple step prevents weak or spotty results.
- Focus for Sharpness: Use digital calipers to measure the exact thickness of each coaster. Inputting this precise measurement into your laser software is the single most important step for achieving a sharp, high-contrast design.
- Test and Refine Settings: Don’t guess your settings. Run a power and speed test grid on a scrap piece to find the ideal combination for your specific laser, aiming for a bright, light-gray mark without flaking the material.
- Finish for a Professional Look: After engraving, clean off the dust and apply a sealant. Food-safe mineral oil or a clear matte/satin acrylic spray will protect the coaster and dramatically enhance the contrast, making your design pop.
Table of Contents
Dive into the world of laser engraving with a perfect beginner-friendly project: custom slate coasters. This guide will walk you through every step, from selecting the right materials to dialing in your machine’s settings and applying the finishing touches. Elevate your home decor or create personalized gifts with this detailed tutorial on making beautiful laser engraved slate coasters.
Sourcing and Preparing Your Slate for Engraving
The journey to a beautifully engraved slate coaster begins long before the laser fires. The quality of your final product is directly tied to the quality of your raw material and the care you take in preparing it. This initial phase of sourcing and preparation is non-negotiable for achieving crisp, professional results. Skipping these steps can lead to inconsistent engravings, wasted materials, and frustration.
Choosing the Best Slate for Laser Engraving
Not all slate is created equal, especially when it comes to laser engraving. When you are sourcing your coasters, here are the three critical factors to consider:
- Surface Evenness: This is arguably the most important characteristic. The laser beam is focused to a precise point, and for a consistent engraving, the distance between the laser head and the slate surface must remain constant. Look for coasters that are as flat as possible. A warped, bowed, or uneven slate will result in some parts of your design being sharp and clear, while others are blurry or faint because they were out of focus. Before buying, if possible, lay the slate on a known flat surface and press on the corners. If it wobbles, it has a warp.
- Thickness: For coasters, a thickness between 4mm and 7mm is ideal. This range provides a satisfying, hefty feel without being overly bulky. More importantly, consistency in thickness across a batch of coasters simplifies your workflow, as you won’t need to refocus the laser for every single piece.
- Sourcing Options: You can find blank slate coasters at various places. Large craft stores are convenient for small projects, but their stock can be inconsistent in quality. Online marketplaces like Amazon and Etsy, along with specialized laser material suppliers, are excellent sources for buying in bulk. They often sell products specifically vetted for laser engraving, ensuring better consistency in flatness and composition. While you might see large slate tiles at home improvement stores, these should generally be avoided. They are often uneven, thicker, and may be treated with unknown chemicals that could produce hazardous fumes when lasered.
Preparing Your Slate for Engraving
Once you have your slate, proper preparation is essential to remove any contaminants that could interfere with the laser. A clean, accurately measured coaster is the foundation for a flawless engraving.
- Clean the Slate Surface: Slate, even when new, is often covered in a fine layer of dust from the cutting process, as well as oils from handling. These contaminants can block the laser beam, resulting in a weak or spotty engraving. To clean it, moisten a lint-free or microfiber cloth with a high concentration of isopropyl alcohol (90% or higher is best). Wipe the entire surface of the coaster firmly. The alcohol acts as a powerful degreaser, lifting oils and residue, and it evaporates quickly without leaving any film behind, unlike cleaning with just water, which can leave mineral deposits. Allow it to air dry completely for a minute or two.
- Measure the Thickness Accurately: Precise focus is the key to a sharp, high-contrast mark. Because slate is a natural, non-uniform material, you cannot rely on the thickness stated by the supplier. You must measure each piece yourself. For this task, a simple ruler is not accurate enough. Use a set of digital calipers to get an exact measurement. Measure the thickness in the center of the coaster, as this is typically where your design will be. Note this measurement down; you will enter this value into your laser software to set the material height, which allows the laser head to adjust to the perfect focal distance. Taking a few moments to get this right is the single most important step for achieving a high-quality engraving.
By investing time in sourcing quality material and meticulously cleaning and measuring it, you eliminate the most common variables that lead to poor results. This careful preparation ensures the laser can do its job effectively, transforming a simple piece of stone into a stunning, personalized work of art.
Perfecting Your Laser Engraving Settings
With your slate cleaned and measured, it’s time to dial in the machine for the main event. Finding the perfect slate coaster engraving settings is a critical step that bridges preparation and final output. It’s important to understand that there is no universal setting that works for every machine. The optimal parameters will vary significantly based on your laser’s power and type—a 40W CO2 laser will require vastly different speed and power settings than a 20W diode laser. The beauty of any DIY laser project is this phase of experimentation, where you learn the unique characteristics of your machine and material. The goal with slate is not to ablate or vaporize the material deeply, but rather to heat the surface just enough to fracture and lighten it, creating a permanent, light-gray mark. Pushing too much power will result in a rough, flaked surface that lacks the desired smooth, professional finish.
Conducting a Power and Speed Test Grid
The most reliable method for finding your ideal settings is to run a test grid on a scrap piece of slate—ideally a coaster you can sacrifice for the cause. This process systematically tests various combinations of power and speed, allowing you to visually identify the best result.
- Set Up the Grid: In your laser software, like LightBurn, use the ‘Material Test’ generator. If your software doesn’t have this feature, you can manually create a grid of small squares. Create a grid of, for example, 5 columns and 5 rows.
- Assign Variables: Assign a range of speeds to the X-axis and a range of power levels to the Y-axis. For a diode laser, you might test speeds from 1000mm/min to 3000mm/min and power from 20% to 60%. For a more powerful CO2 laser, you might test speeds from 100mm/s to 300mm/s and power from 15% to 35%. Label each square with its corresponding setting so you can identify it later.
- Ensure Correct Focus: This is where your previous measurements pay off. Input the precise thickness you measured with your calipers into your software’s material height setting. This allows the laser to automatically adjust to the perfect focal distance, which is absolutely crucial for achieving sharp, crisp details. An incorrect focus is the number one cause of blurry or faint engravings.
- Run the Test and Analyze: Engrave the test grid onto your scrap slate. Once complete, examine the squares closely. You are looking for the square that produces the brightest, most consistent, and cleanest light-gray or off-white mark. Some squares may appear brownish (too much power/too slow), while others may be barely visible (too little power/too fast). Choose the setting that provides the best contrast without making the surface feel rough or flaky to the touch. This winning combination is your starting point for all your laser engraved slate coasters from this batch.
If you notice inconsistent coloring within a single test square, this often points back to the material itself. It could mean the surface is not perfectly flat, causing a slight variation in focus across that small area, or it could be a natural variation in the slate’s composition. While you can’t change the stone’s geology, ensuring your coasters are as flat as possible minimizes this issue significantly. By methodically testing and paying close attention to focus, you take the guesswork out of the engraving process and guarantee a high-quality result every time.
Post-Engraving Cleaning and Sealing Techniques
The laser has done its work, leaving behind your intricate design etched into the stone. However, the process isn’t quite finished. This final stage of cleaning and sealing is what elevates your project from a raw engraving to a polished, professional product. This step not only protects your work but dramatically enhances its visual appeal, making the design truly stand out.
The engraving process creates a fine powder of slate dust and residue that settles on and into the newly engraved lines. This dust can obscure the detail and dull the contrast. The first order of business is to clean it thoroughly.
- Initial Dust Removal: Start with a soft-bristled brush, like a clean, dry toothbrush or a soft paintbrush. Gently brush the entire surface of the coaster, paying special attention to the engraved areas. This will lift the majority of the loose dust without scratching the slate or the delicate engraved pattern.
- Final Wipe-Down: After brushing, take a clean, lint-free microfiber cloth and dampen it slightly with water or isopropyl alcohol. Wipe down the entire coaster to pick up any remaining fine dust. Be careful not to use a sopping wet cloth, as this can turn the dust into a slurry that settles back into the crevices. Allow the coaster to air dry completely for a few minutes. You’ll notice the engraving looks clean but perhaps a bit faint against the dark slate. The next step will fix that.
Choosing and Applying a Sealant
Sealing slate coasters after engraving is arguably the most transformative step in the entire process. It serves two functions: it protects the slate from moisture and stains, and more importantly, it deepens the color of the raw slate from a dull gray to a rich black, which makes the light-gray engraved design pop with incredible contrast. You have two excellent options for this, each providing a different finish.
- Food-Safe Mineral Oil: For a natural, enhanced look, food-safe mineral oil is a fantastic choice. It’s inexpensive, easy to apply, and perfectly safe for an item that will come into contact with drinkware. To apply, put a small amount of oil onto a clean, lint-free cloth. A little goes a very long way. Rub the oil evenly over the entire coaster surface, including the edges. You will see an immediate and dramatic change as the slate darkens. Allow the oil to penetrate the stone for 10-15 minutes, then use a separate clean, dry cloth to vigorously buff off all the excess oil. If you leave excess oil on the surface, it will feel greasy. This finish provides a beautiful, satin luster that looks and feels natural, though it may need to be reapplied periodically.
- Clear Acrylic Spray Sealant: For a more permanent and waterproof finish, a clear spray sealant is the way to go. These are available in various finishes, with matte and satin being the most popular choices for slate as they preserve its natural appearance better than a high-gloss finish. To apply, work in a well-ventilated area. Place the coaster on a protected surface and shake the can well. Holding the can 8-12 inches away, apply a very light, even coat in a smooth, sweeping motion. It’s critical to apply thin coats; a heavy coat can pool and look uneven. Let the first coat dry to the touch (typically 15-20 minutes), then apply a second light coat for full coverage. The coaster will need to cure for at least 24 hours before it’s fully hardened and ready for use. This method creates a durable, non-porous surface that is highly resistant to water rings and stains.
Whether you opt for the organic richness of oil or the durable protection of an acrylic spray, this final sealing step is essential. It’s the professional touch that protects your art and makes the contrast between the dark slate and the light engraving truly breathtaking.
Conclusions
You now have the knowledge to create professional-quality laser engraved slate coasters. This rewarding DIY laser project is not only a great way to practice your skills but also to produce beautiful, marketable items. Don’t hesitate to experiment with different designs and settings to develop your unique style. Happy engraving, and enjoy your stunning new coasters!
Frequently Asked Questions
Q: What is the best type of slate for laser engraving coasters?
A: The best slate is flat, even, and between 4mm and 7mm thick. Look for coasters specifically sold for crafting or laser engraving from online suppliers, as they offer better consistency. Avoid large, uneven slate tiles from home improvement stores, which can be warped and produce poor results.
Q: Why is my slate engraving blurry or inconsistent?
A: The most common cause is incorrect focus. Always measure the exact thickness of your slate coaster with digital calipers and enter that value into your laser software. An uneven or warped slate surface can also cause focus variations across the design, leading to blurry and sharp spots on the same piece.
Q: How do I clean slate coasters before engraving?
A: Use a lint-free or microfiber cloth dampened with a high concentration of isopropyl alcohol (90% or higher is ideal). Wipe the surface firmly to remove all dust and natural oils. The alcohol cleans effectively and evaporates quickly without leaving any residue that could interfere with the laser.
Q: Should I seal my engraved slate coasters?
A: Yes, sealing is a crucial final step. It protects the coaster from moisture and stains and, most importantly, dramatically enhances the visual contrast. Sealing darkens the raw slate to a rich black, which makes the light-gray engraved design pop. You can use food-safe mineral oil for a natural, satin finish or a clear acrylic spray (matte or satin) for a more durable, waterproof seal.
Block "subscribe-popup" not found