Tips and Tricks
A Practical Guide to Laser Engraving on Metal
Apr
Estimated reading time: 7 minutes
Key Takeaways
- Laser Compatibility is Key: Fiber lasers (1064nm) are ideal for directly marking bare metals like stainless steel because their wavelength is easily absorbed, while CO2 and Diode lasers require special marking sprays.
- Different Metals, Different Processes: Marking stainless steel often involves annealing (a heating process creating a black mark without removing material), whereas engraving anodized aluminum involves ablation (vaporizing the colored dye layer).
- Diode Lasers Need Assistance: Due to lower power and the reflectivity of metal, diode lasers cannot mark bare metal directly. The solution is to engrave coated metals or use a metal marking spray to create a permanent, fused bond.
- Surface Preparation is Crucial: For marking sprays to work effectively, the metal surface must be thoroughly cleaned with a solvent like isopropyl alcohol to remove all oils and contaminants, ensuring a strong molecular bond.
- Settings Must Be Tested: There is no universal setting for metal engraving. Always use a test grid on a scrap piece of material to find the optimal balance of power, speed, and resolution for your specific laser and metal before starting your final project.
Table of Contents
- Understanding Laser Compatibility with Different Metals
- Marking Stainless Steel vs. Anodized Aluminum
- Challenges and Solutions for Diode Lasers
- Laser Type Comparison for Metal Engraving
- Using Metal Marking Sprays for Superior Results
- A Step-by-Step Guide to Using Marking Sprays
- Mastering Settings for Perfect Laser Etching on Metal
- Conclusions
- Frequently Asked Questions
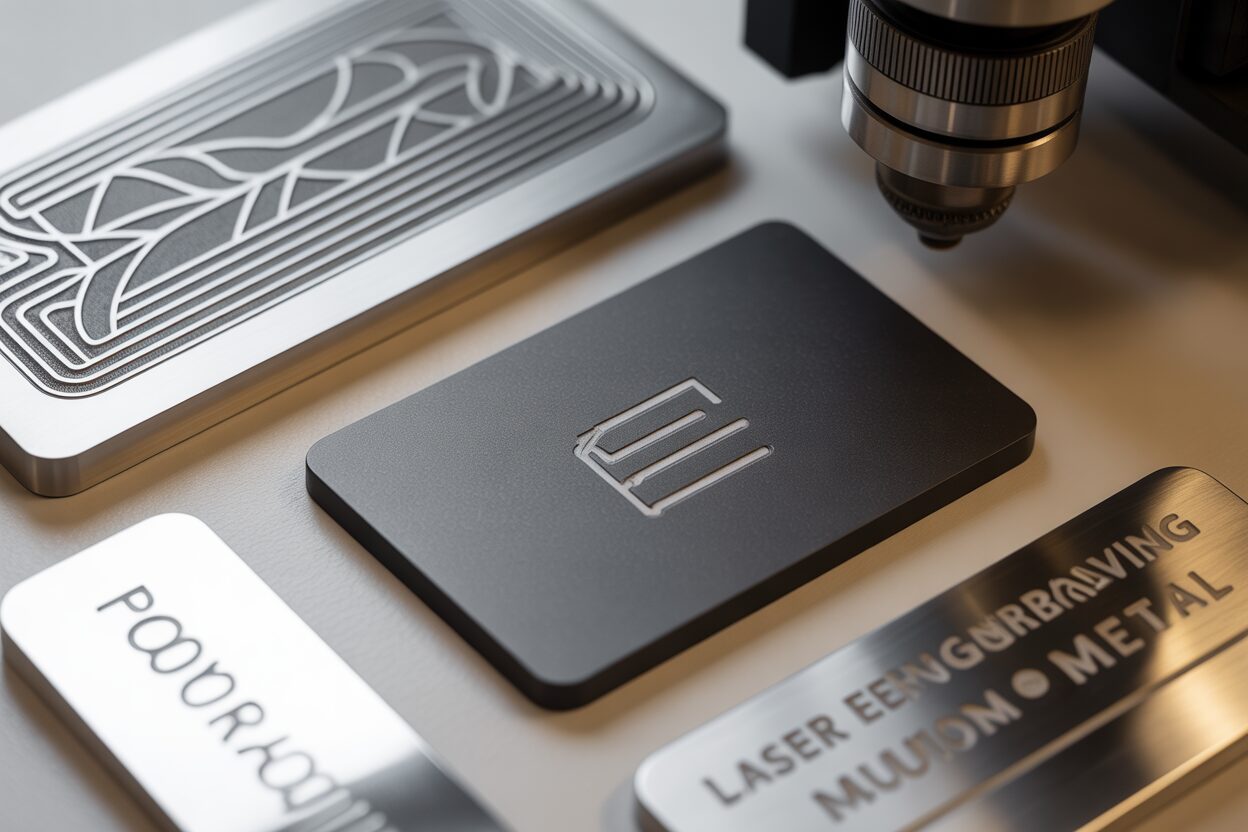
Laser engraving on metal offers a world of creative possibilities, from personalized gifts to custom industrial parts. This guide provides practical, in-depth techniques for achieving high-quality results on various metals. We will explore everything from choosing the right laser for specific materials like stainless steel to mastering the use of marking sprays for diode lasers.
Understanding Laser Compatibility with Different Metals
The effectiveness of a laser for engraving metal is fundamentally tied to its wavelength and the material’s ability to absorb that specific wavelength of light. Metals are naturally reflective, meaning much of a laser’s energy can simply bounce off the surface without doing any work. The key is to use a laser with a wavelength that the target metal absorbs efficiently. This is why different laser technologies excel with different materials and applications. Fiber lasers, with a wavelength of approximately 1064nm, are in a sweet spot for metal absorption. Their infrared light is readily absorbed by most bare metals, converting light energy into heat with great efficiency. This allows them to mark, anneal, or engrave directly onto surfaces like stainless steel, titanium, and brass without any pre-treatment. In contrast, CO2 lasers operate at a much longer wavelength (around 10,600nm), which is highly reflected by bare metals, making them largely ineffective without the use of a special marking compound. Diode lasers, typically operating in the visible blue light spectrum (around 450nm), also face challenges with reflective metals, but their lower power is often a more significant limiting factor than their wavelength.
Marking Stainless Steel vs. Anodized Aluminum
The interaction between a laser and metal is not a one-size-fits-all process. Two excellent examples are laser engraving stainless steel and anodized aluminum laser engraving, which involve entirely different mechanisms. When a fiber laser marks stainless steel, it often does so through a process called annealing. Instead of vaporizing or removing material to create depth, the laser applies controlled heat to the surface. This heat induces oxidation just below the surface, creating a permanent, high-contrast black mark that doesn’t alter the material’s texture. The result is a smooth, durable mark that is part of the metal itself and highly resistant to corrosion. This is ideal for medical instruments, serial numbers, and branding where surface integrity is crucial. Anodized aluminum is a different story. The process doesn’t target the aluminum itself but rather the colored dye within the protective anodized layer. The laser’s energy is absorbed by the dye, causing it to vaporize, or ablate. This removes the color and exposes the whitish or silvery aluminum oxide layer beneath, creating a sharp, clean contrast. Because the target is the dye and not the reflective metal, this process is highly efficient and can be performed effectively not only by fiber lasers but also by lower-power CO2 and diode lasers.
Challenges and Solutions for Diode Lasers
While fiber lasers are the champions of bare metal marking, the accessibility and affordability of diode lasers make them a popular choice for hobbyists and small businesses. However, users quickly discover their limitations when attempting to diode laser engraving metal. A standard blue diode laser simply lacks the power density to overcome the high reflectivity of bare metals like stainless steel or raw aluminum. The beam reflects off the surface, failing to generate enough heat to make a mark. Fortunately, there are effective workarounds. The most common solution is to work with coated metals. A diode laser excels at ablating surface coatings, such as paint on a powder-coated tumbler or the colored layer on anodized aluminum. A second method involves using a laser marking spray or paste. These substances are applied to the bare metal surface and, when heated by the laser, create a permanent chemical bond with the metal, resulting in a dark, durable mark. The laser isn’t engraving the metal but rather fusing the additive to it. This technique allows diode lasers to produce high-quality results on otherwise impossible materials like stainless steel.
Laser Type Comparison for Metal Engraving
| Laser Type | Typical Wavelength | Best For | Challenges & Solutions |
| Fiber Laser | 1064 nm | All bare metals (stainless steel, titanium, aluminum, brass), deep engraving, high-speed industrial marking. | Higher initial cost. Less effective on organic materials like wood or leather. |
| CO2 Laser | 10,600 nm | Anodized, painted, or coated metals. Ineffective on bare metals without a marking compound. | Challenge: Bare metals reflect the beam. Solution: Apply a marking spray (e.g., CerMark) that fuses to the metal when heated. |
| Diode Laser | ~450 nm | Anodized aluminum, powder-coated metals, and marking stainless steel with the aid of a marking spray. | Challenge: Low power and high reflectivity of bare metals. Solutions: Engrave on coated surfaces or use marking sprays/pastes. |
Using Metal Marking Sprays for Superior Results
For laser owners whose machines, like CO2 or diode lasers, cannot directly mark bare metal, a special category of chemical additives provides the perfect solution. These products, known as laser marking sprays, pastes, or inks, enable the creation of permanent, high-contrast marks on a variety of metals, including stainless steel. Popular brands like CerMark, LaserBond, and Enduramark all operate on a similar principle. They are a suspension of glass frit (tiny glass particles) and pigment in a carrier liquid (like ethanol or denatured alcohol). When a thin layer of this substance is applied to a metal surface and heated by a laser beam, a thermal chemical reaction occurs. The intense, focused heat melts the glass frit, which then fuses the pigment directly to the metal’s surface, creating a permanent molecular bond. The resulting mark is not on top of the metal like paint, nor is it an etching into the metal; it is a durable, fused layer that is highly resistant to abrasion, chemicals, and heat. This process is particularly transformative for hobbyists, as a reliable metal marking spray for diode laser systems effectively bridges the gap between affordable equipment and professional-grade results on stainless steel and other metals.
A Step-by-Step Guide to Using Marking Sprays
Achieving a perfect mark requires more than just spraying and firing the laser. A methodical approach ensures a crisp, durable, and professional-looking result every time. The process can be broken down into five critical steps, each one essential for success. Rushing or skipping a step, particularly in preparation or application, is the most common cause of faded, uneven, or non-permanent marks. Following this guide will help you produce consistent, high-quality engravings.
- Step 1: Surface Preparation
The bond created by the marking spray is a molecular one, and any contaminant on the metal surface can inhibit it. The first step is to thoroughly clean the metal object. Using a lint-free cloth and a solvent like isopropyl alcohol or acetone, wipe the entire surface to remove any oils, fingerprints, dust, or manufacturing residue. The goal is to have a completely clean, dry, and sterile surface for the spray to adhere to. - Step 2: Application
Shake the aerosol can vigorously for at least one minute to ensure the glass frit and pigment are evenly suspended. Holding the can 6-8 inches from the surface, apply a thin, even, and opaque coat using smooth, sweeping motions. The ideal coating is just thick enough that you cannot see the reflective metal underneath. A coat that is too thick will require excessive laser power to penetrate and may result in a blurry or cracked mark. A coat that is too thin will produce a faint or translucent mark. - Step 3: Drying
The carrier liquid in the spray must completely evaporate before you begin engraving. Attempting to laser a wet or damp coating will cause the liquid to boil and splatter, ruining the finish. While you can let it air dry (typically 5-10 minutes), you can speed up the process significantly by using a heat gun or hair dryer on a low setting. The coating is ready when it is dry to the touch and has a powdery, matte appearance. - Step 4: The Engraving Process
Since every laser and metal combination is different, you must run a test grid on a scrap piece to find the optimal settings. For a typical 10W-20W metal marking spray for diode laser application, a good starting point is 100% power and a very low speed (e.g., 200-400 mm/min). The goal is to deliver enough focused thermal energy to initiate the bonding process without scorching the surrounding area. A successful mark will be dark, sharp, and uniform in color. If the mark is brownish or light gray, it likely needs more power or a slower speed. - Step 5: Cleanup
Once the engraving is complete and the metal has cooled down, the final step is to remove the excess, unbonded spray. The easiest way is to rinse the object under running water. The unbonded powder will wash away easily, revealing the permanent black mark underneath. A soft cloth or sponge can be used to gently wipe away any stubborn residue. The bonded mark is now a permanent part of the metal and will not wash off.
Mastering Settings for Perfect Laser Etching on Metal
Achieving a clean, professional result when you laser etching metal is a delicate balance of three primary settings: power, speed, and resolution. Understanding how these parameters interact is the key to mastering your machine. Power determines the intensity of the laser beam; higher power delivers more energy to the material. Speed is how fast the laser head moves over the workpiece; slower speeds increase the energy exposure time in any given spot. Finally, resolution, often expressed as DPI (Dots Per Inch) or LPI (Lines Per Inch), dictates the overlap between consecutive passes. For fiber lasers, a fourth variable, frequency (measured in kHz), controls the rate of laser pulses. A higher frequency delivers more pulses per second, which generally results in a smoother finish with less heat buildup. There is no single “correct” setting; the ideal combination depends entirely on the specific metal, the desired effect, and the type of laser being used. Always begin by running a material test grid on a scrap piece to dial in the perfect settings before committing to your final workpiece.
Settings for Stainless Steel
The unique properties of stainless steel allow for a range of marking effects, from a light etch to a rich, permanent black anneal. When performing laser engraving stainless steel with a fiber laser, you can even achieve different colors by manipulating the heat input.
- For a Dark Black Anneal: The goal is to heat the metal without vaporizing it. This requires a combination of low speed, moderate to high power, and a high frequency (e.g., 50-80 kHz on a fiber laser). The slow speed allows the heat to soak in and create a stable oxide layer, resulting in a dark, smooth mark.
- For a Lighter Etch or Brown/Gold Tones: To achieve lighter colors, you need less heat. This is done by significantly increasing the speed while maintaining moderate power. Faster speeds reduce the energy exposure, creating a thinner, lighter-colored oxide layer.
- For Deep Engraving: This requires vaporizing the metal. Use very high power, a slow speed, and a lower frequency (e.g., 20-30 kHz) to deliver powerful, concentrated energy pulses that ablate material. This process often requires multiple passes.
Settings for Anodized Aluminum
Unlike stainless steel, anodized aluminum laser engraving is an ablative process where the laser removes the colored dye layer. The goal is to be precise and avoid damaging the underlying aluminum. Over-powering the laser can melt the substrate, resulting in a rough, pitted surface and reducing the clean contrast. For this reason, the typical approach is to use low power and high speed. You only need enough energy to vaporize the dye. A good starting point is often 15-30% power at a speed of 2000-3000 mm/min. A high DPI (300 or more) will ensure all the color is cleanly removed between scan lines, leaving a bright, white finish. Because the target is the dye, not the metal, this is one of the fastest and most forgiving metal marking processes.
Focus and Troubleshooting
Proper focus is paramount. A perfectly focused beam creates the smallest possible dot size, concentrating the laser’s energy for maximum power density—ideal for fine details or deep cutting. However, for annealing stainless steel, a slightly defocused beam (raising the focus point by 0.5-1mm) can be beneficial. This creates a slightly larger spot size, which spreads the heat more gently, often resulting in a smoother, more consistent black mark without the risk of etching into the surface.
Common Issues and Solutions:
- Incomplete or Faint Mark: The energy density is too low. Solution: Decrease the speed, increase the power, or check your focus to ensure it is precise.
- Melted Edges or Pitting (especially on aluminum): The energy density is too high. Solution: Increase the speed significantly or decrease the power. You are delivering too much heat to the substrate.
- Inconsistent Color on Stainless Steel: The heat application is uneven. Solution: Ensure the surface is perfectly clean and flat. For fiber lasers, try adjusting the frequency; a higher frequency often leads to a more uniform annealed mark. Check for mechanical issues like wobbly belts that could cause speed variations.
Conclusions
You now have the foundational knowledge to successfully tackle laser engraving metal projects. By selecting the appropriate laser, properly preparing your materials, and fine-tuning your settings, you can achieve professional-grade results. Experiment with these techniques on stainless steel and anodized aluminum to unlock your creative potential and produce stunning, durable engravings.
Frequently Asked Questions
Q: Can a diode laser engrave on bare stainless steel?
A: No, not directly. A standard diode laser lacks the power and correct wavelength to mark bare, reflective metals. However, you can achieve excellent, permanent results by first coating the steel with a metal marking spray (like CerMark or LaserBond), which fuses to the metal’s surface when heated by the laser.
Q: What is the main difference between engraving stainless steel and anodized aluminum?
A: Engraving stainless steel is typically an annealing process that uses controlled heat to create a black oxide layer under the surface without removing material. In contrast, engraving anodized aluminum is an ablative process where the laser vaporizes the colored dye on the surface to expose the whitish aluminum oxide layer underneath.
Q: Why is my laser mark on metal faint or incomplete?
A: A faint mark is almost always caused by insufficient energy density. To fix this, you can try three things: decrease the laser’s movement speed, increase the power output, or double-check that your laser beam is perfectly focused on the material’s surface.
Q: Is it necessary to clean the metal before using a marking spray?
A: Yes, it is absolutely critical. The spray creates a molecular bond with the metal, and any surface contaminants like oil, fingerprints, or dust will prevent this bond from forming properly. Always clean the surface thoroughly with a solvent like isopropyl alcohol for a durable, permanent mark.
Block "subscribe-popup" not found