Projects
A Guide to Using Laser Cut Files for Your Next Project
Dec
Estimated reading time: 8 minutes
Key Takeaways
- Laser cut files are vector-based blueprints (SVG, DXF, AI) that provide mathematical instructions to a laser cutter, allowing for precise cuts, scores, and engravings that can be scaled without quality loss.
- You can find a vast array of laser cut files on paid marketplaces like Etsy and Creative Fabrica, which offer professional designs with support, or on free community repositories like Thingiverse and Instructables.
- Successful laser cutting depends on matching your material to the design, especially its thickness for interlocking parts, and always performing a test cut to determine the optimal speed and power settings.
- Understanding and compensating for “kerf” (the material vaporized by the laser) is crucial for ensuring a tight fit in projects with joints and interlocking pieces.
- Safety is paramount; always use proper ventilation, never leave the machine unattended while operating, and perform regular maintenance like cleaning optics to ensure consistent, high-quality results.
Table of Contents
- What Are Laser Cut Files?
- Where to Find Laser Cut Files
- Tips for a Successful Laser Cut Project
- Conclusions
- Frequently Asked Questions
Laser cut files are the foundation of any successful laser engraving or cutting project. In this guide, we’ll explore the different types of laser cut files, where to find them, and how to use them to create beautiful and intricate designs. Whether you’re a beginner or an experienced maker, this guide will help you get the most out of your laser cutter.
What Are Laser Cut Files?
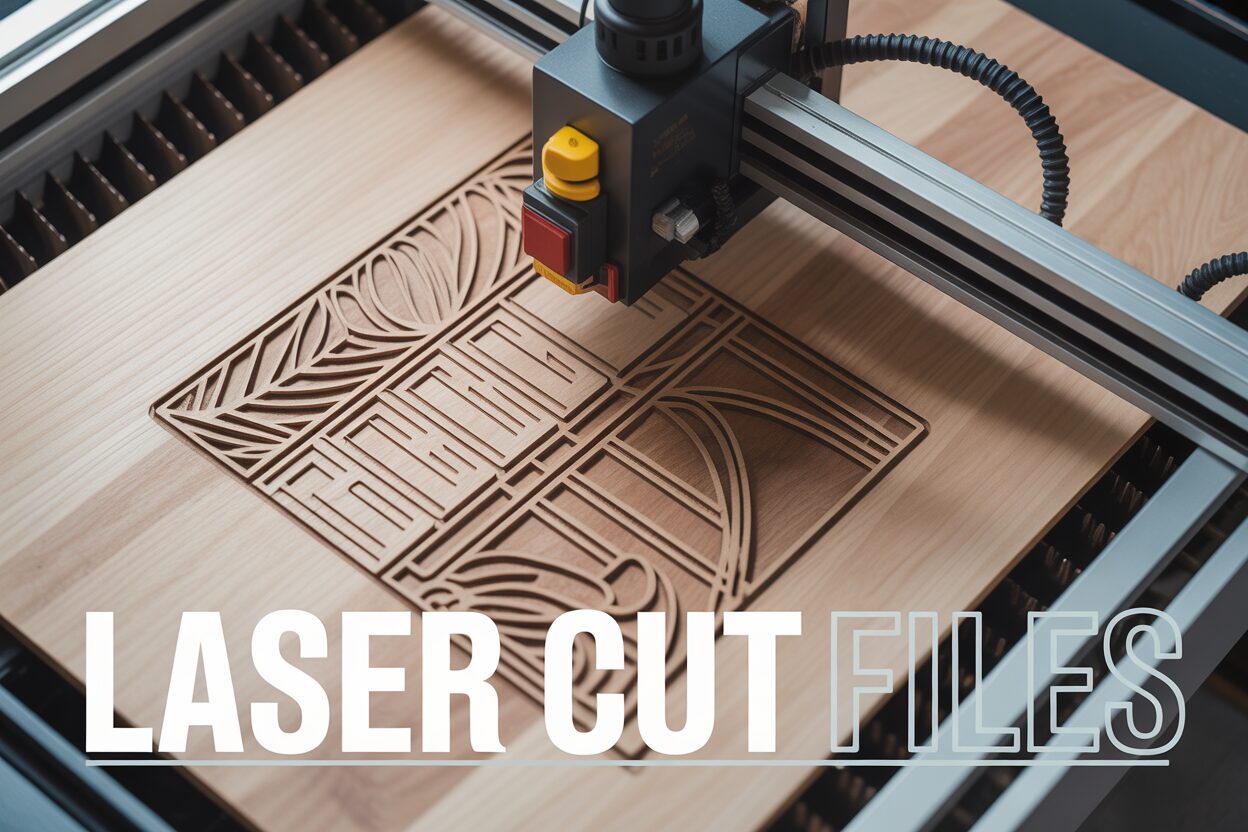
At its core, a laser cut file is a digital blueprint that tells a laser cutting machine exactly what to do. Unlike a standard image file like a JPG or PNG, which is made of pixels, these are vector files. This means they are composed of mathematical paths, lines, and curves. This fundamental difference is what allows you to scale a design to any size without losing a shred of quality or precision. These instructions aren’t just about the shape; a well-designed file dictates every action the laser will take, including where to cut completely through the material, where to score (a partial cut for folding or detail), and where to engrave (etching the surface). Essentially, these specialized laser cut files are the language the machine understands, translating your digital vision into a tangible object.
Understanding Common File Formats
When you start working with laser cutting, you’ll encounter a few common file types. While your laser cutter’s software might have a preference, most will accept the following formats. Understanding their differences is key to a smooth workflow.
- SVG (Scalable Vector Graphics): This is one of the most popular and versatile formats for laser cutting files. As an open-source web standard, it’s supported by nearly all design software, from professional tools like Adobe Illustrator to free alternatives like Inkscape. Pros: SVGs retain specific data like colors and stroke widths, which many laser software programs (like LightBurn and the Glowforge UI) use to automatically assign different operations. For example, you can design your file so that all red lines are cuts and all blue lines are scores, saving you setup time. Cons: Because they are designed for web use, SVGs can sometimes contain extra code or formatting that may confuse older or simpler laser software, requiring a bit of file cleanup before use.
- DXF (Drawing Exchange Format): Developed by Autodesk, the DXF is an industry-standard format, especially in the world of CAD (Computer-Aided Design) and engineering. Pros: It offers excellent geometric precision and is almost universally compatible with every piece of laser software on the market. It is often the most reliable choice for designs that consist purely of lines and arcs. Cons: The DXF format is older and less sophisticated than SVG. It often struggles with complex curves, breaking them down into many tiny straight lines, which can result in a less smooth cut. It also doesn’t reliably store color or layer information in a way that laser software can interpret, meaning you’ll have to manually assign cut, score, and engrave settings after importing the file.
- AI (Adobe Illustrator): This is the native file format for Adobe Illustrator, a leading vector design program. Pros: If you create your design in Illustrator, saving it as an AI file perfectly preserves all your layers, effects, and settings within the Adobe ecosystem. Cons: AI is a proprietary format. While many laser control programs can import AI files, you might run into compatibility issues, particularly with features from newer versions of Illustrator. For this reason, it is almost always recommended to save a copy of your design as an SVG or DXF before sending it to the laser.
These laser cut files are typically created in vector design software. The process involves drawing paths or outlines that define the final object. Designers use different colors to map out the laser’s actions—a common convention is a red hairline stroke for cutting, a blue stroke for scoring, and a black fill for engraving. When you load one of these files into your laser cutter’s software, it reads these vector paths and color codes, converting them into a toolpath that directs the laser head’s movement and power output, precisely executing each step to bring your project to life.
Where to Find Laser Cut Files
Once you understand what laser cut files are, the next exciting step is finding the perfect design for your project. The internet is brimming with resources, offering everything from simple shapes to complex, multi-part assemblies. These resources generally fall into two categories: paid marketplaces, which offer professionally designed files, and free repositories, which are fantastic for experimentation and community-shared projects. For those looking for polished, reliable designs with a high probability of success, paid marketplaces are an excellent starting point. Etsy is a massive hub where thousands of independent designers sell their laser cut svg files. The benefit here is variety and support; you can find niche designs, and sellers are often available to answer questions. Furthermore, these files frequently come with detailed instructions, material recommendations, and even assembly guides, making them incredibly beginner-friendly.
Exploring Design Marketplaces and Subscription Services
Beyond general marketplaces like Etsy, there are websites dedicated entirely to digital assets for crafters. Sites like Creative Fabrica, Design Bundles, and So Fontsy have enormous libraries specifically catering to cutting machines. They offer files for purchase individually, in bundles, or through subscription models that grant you unlimited downloads for a monthly fee. A subscription can be extremely cost-effective if you plan on doing a lot of projects. A key advantage of these platforms is their robust search and filtering systems, allowing you to easily find exactly what you need. When browsing, pay close attention to the included file types. While most will provide SVGs and DXFs, it’s always good to confirm compatibility with your machine’s software. Also, take a moment to read the license agreement. Most paid files come with a commercial license, allowing you to sell the physical items you create, but it’s crucial to verify the specific terms.
Finding High-Quality Free Resources
If you’re on a budget or just want to experiment, there’s a treasure trove of free laser cut files available. Design communities are a great place to start. Thingiverse, originally for 3D printing, has a large and growing collection of laser cutting projects. Instructables is another excellent resource, offering not just the files but complete step-by-step tutorials on how to make the project. The main advantage of these community-driven sites is the spirit of sharing and innovation. However, the quality can be variable, as files are user-submitted and may not have been thoroughly tested. Always read the comments and look at photos of completed “makes” from other users to gauge a file’s quality. Additionally, many laser cutter manufacturers, like Glowforge and Flux, maintain their own catalogs of free and premium designs that are optimized for their machines, providing a reliable source for new owners.
When selecting any file, free or paid, there are a few key things to consider. First, check for what material thickness the design was created. For projects with interlocking parts, like boxes or 3D models, using a material with a different thickness than intended will cause the joints to be too loose or too tight. A well-designed file will specify the required thickness (e.g., “for 3mm plywood”). Second, look for clear imagery of the finished product. If the seller or creator only shows a digital render, be cautious. Photos of a real, physical object prove the design actually works. Finally, always respect the licensing—just because a file is free doesn’t automatically mean it’s for commercial use. Look for Creative Commons licenses or other terms to understand what you’re allowed to do with the final product.
Tips for a Successful Laser Cut Project
With your digital file in hand, the journey to a physical creation begins, and the first crucial decision is your material. The success of many laser cut projects, from intricate jewelry to sturdy organizers, begins with this choice. Different materials behave in unique ways under the laser’s beam. Plywood and MDF are popular for their affordability and rigidity but can leave a charred, smoky edge. Acrylic melts to create a beautifully flame-polished edge but can be more expensive. Leather engraves wonderfully but requires excellent ventilation. Always consider the project’s final use. A design with delicate, thin lines might be too fragile if cut from brittle wood but perfect when made from flexible acrylic. For interlocking designs, especially complex 3d laser cut files like architectural models or puzzle boxes, material thickness is paramount. A file designed for 3mm material will not assemble correctly if you use 3.2mm material. Always measure your actual material with digital calipers before you cut, as the stated thickness is often just a nominal value.
Dialing in Your Settings and The Importance of Testing
Your laser cutter’s power lies in its adjustable settings—primarily speed and power. There is no single “correct” setting; it’s a balance that depends on your specific machine, the material you’re using, and its thickness. A higher power level and slower speed result in a deeper cut, while lower power and higher speed are used for scoring and engraving. Before you commit to cutting your full project, always run a test cut on a small scrap piece of the same material. Most laser software includes tools to create a test grid with various speed and power combinations. This five-minute step can save you hours of frustration and expensive material waste. It allows you to find the “sweet spot”: the lowest power and highest speed that cleanly cuts through the material. This not only produces the cleanest edge with minimal charring but also extends the life of your laser tube. For engraving, a test grid helps you see how different settings produce various shades and depths, allowing you to achieve the exact aesthetic you want.
A common issue you’ll encounter is kerf—the tiny sliver of material that the laser beam vaporizes. While often less than a millimeter wide, this kerf can affect the fit of interlocking parts. If your joints are too loose, your design may need a slight kerf adjustment, which involves minutely offsetting the cut lines in your design software to compensate for the material removed. Troubleshooting other common problems is usually straightforward:
- Cuts not going all the way through: Your power is too low or your speed is too high. Also, check that your laser’s lens and mirrors are clean and that the material is perfectly flat and in focus.
- Excessive burning or flare-ups: Your power is too high or your speed is too low. Ensure your machine’s air assist is on and functioning correctly, as it blows away smoke and debris, reducing flames.
Finally, never underestimate the importance of safety and maintenance. Always ensure your ventilation system is running effectively to remove potentially harmful fumes. Never leave your laser cutter unattended while it is operating, and keep a fire extinguisher suitable for electrical fires nearby. Regular maintenance, such as cleaning your optics and clearing debris from the machine bed, is essential for consistent, high-quality results and the longevity of your equipment.
Conclusions
Now that you have a better understanding of laser cut files, you’re ready to start creating your own amazing projects. From intricate 3D models to beautiful wood engravings, the possibilities are endless. Don’t be afraid to experiment with different designs and materials to find what works best for you. With a little practice, you’ll be creating stunning laser-cut creations in no time.
Frequently Asked Questions
Q: What is the best file format for laser cutting?
A: SVG is often considered the best all-around format because it’s highly versatile and preserves color data, which laser software can use to automatically assign operations like cutting or scoring. However, DXF is an extremely reliable and compatible alternative, especially for precise, line-based designs from CAD software.
Q: Can I use a JPG or PNG file for laser cutting?
A: No, you cannot use standard pixel-based image files like JPG or PNG for cutting or scoring. Laser cutters require vector files (like SVG, DXF, or AI) that are made of mathematical paths. Pixel-based images can only be used for engraving, where the laser etches the image onto the material’s surface.
Q: Why is it important to do a test cut?
A: A test cut on a small scrap of your material is critical for finding the optimal speed and power settings. This five-minute step prevents wasting expensive material, ensures your final project cuts cleanly without excessive charring, and helps extend the life of your laser tube by using the most efficient settings.
Q: What is kerf and why does it matter?
A: Kerf is the small amount of material that is vaporized away by the laser beam during a cut. It matters immensely for projects with interlocking parts, like boxes or 3D models, because it can make the joints too loose. For a precise fit, you may need to adjust your design file to compensate for the kerf.
Block "subscribe-popup" not found