Projects
A Guide to Making Wooden Clocks with Laser Cutting
Sep
Estimated reading time: 6 minutes
Key Takeaways
- The choice of wood—whether Birch Plywood, MDF, or solid wood—is fundamental to your clock’s appearance, durability, and ease of cutting.
- High-quality vector laser cutting files (like SVG or DXF) are essential for precision; beginners should start with simple designs to ensure success.
- Calibrating your laser’s power and speed settings through test cuts is a critical, non-negotiable step for achieving clean, perfect cuts without wasting material.
- Proper assembly, including a “dry fit” and careful gluing, combined with a protective finish like oil or lacquer, transforms your cut pieces into a professional-quality timepiece.
Table of Contents
Discover the rewarding process of creating custom wooden clocks, one of the most popular laser cut projects today. This article walks you through selecting the best wood, using laser cutting files effectively, and assembling a beautiful, functional piece of art for your home or to sell. Let’s begin crafting a timeless piece with precision and creativity.
Choosing the Right Materials and Design Files
The foundation of any beautiful laser-cut clock lies in two key choices: the wood you use and the digital design you follow. These elements work in tandem to define the final aesthetic, complexity, and durability of your timepiece. Selecting the right combination from the start will save you time, prevent frustration, and ensure the finished product is something you’re proud to display.
Choosing Your Wood
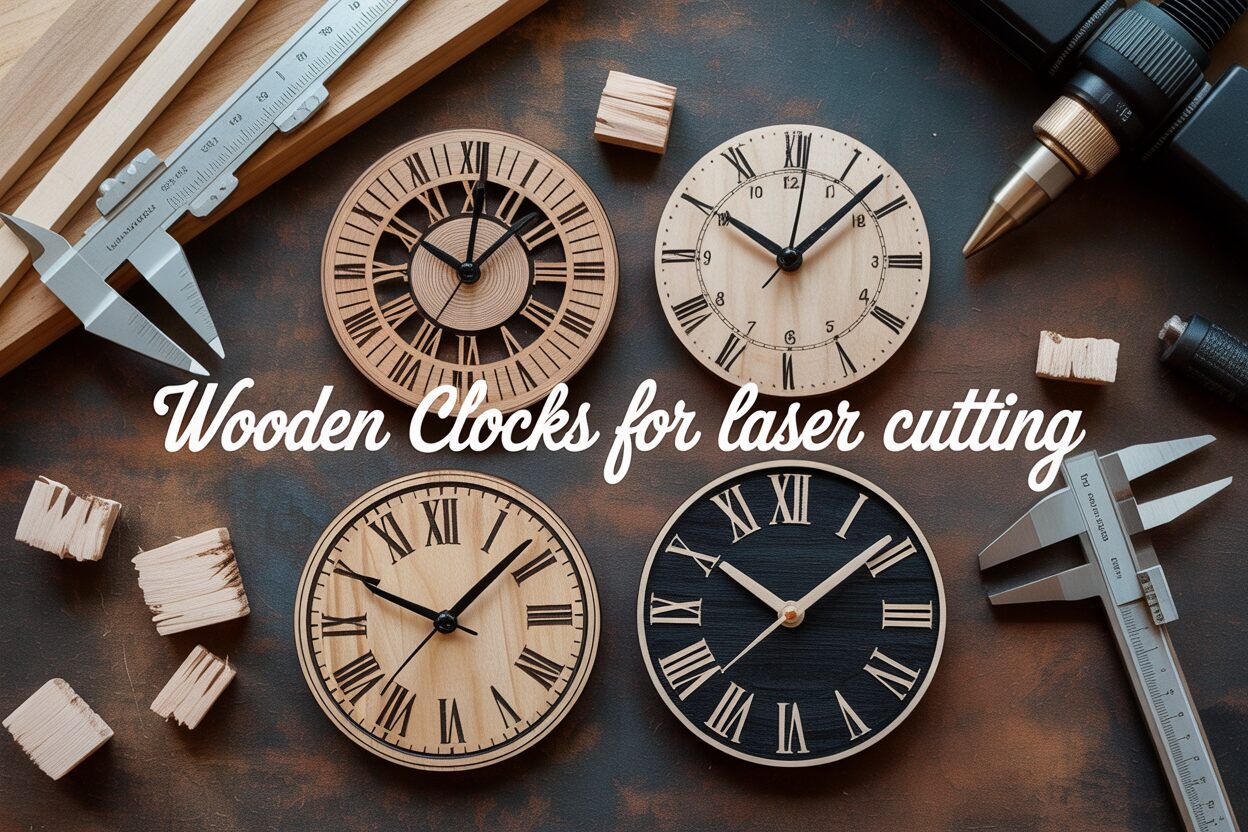
The material you select is more than just a surface; it’s the very body of your clock. Each type of wood has distinct characteristics that affect how it cuts, engraves, and looks. For wooden clocks for laser cutting, three main categories stand out:
- Birch Plywood: Often considered the go-to material for laser cutting, Baltic Birch plywood is a fantastic choice for clockmakers of all levels. Its cross-banded layers of wood veneer create a strong, stable sheet that resists warping. The uniform, light-colored surface is an excellent canvas for detailed engraving, and the edges take on a pleasingly dark, caramelized look when cut. Its primary advantage is consistency; unlike solid wood, it has no grain direction to worry about, resulting in reliable cuts across the entire sheet. A potential downside is the visible layered edge, which may not suit every aesthetic.
- MDF (Medium-Density Fiberboard): MDF is an engineered wood product made from wood fibers, wax, and resin. It is exceptionally uniform, with no grain or knots, making it one of the easiest and most predictable materials to laser cut. It’s also very affordable. However, MDF is not as strong as plywood and can be susceptible to moisture. Its appearance is plain, making it best suited for clocks that will be painted or veneered. Be aware that cutting MDF produces fine dust and fumes, so proper ventilation is crucial.
- Solid Woods: For a premium, classic look, nothing beats solid wood. Woods like walnut, oak, cherry, and maple offer rich colors and beautiful natural grain patterns that make each laser cut wood clock unique. Walnut cuts cleanly and engraves with high contrast, while oak provides a traditional, sturdy feel. The main challenge with solid wood is its inconsistency. The grain direction can affect the cut, and internal tensions can cause warping. It is also more expensive and requires careful finishing (sanding and sealing) to bring out its natural beauty and protect it over time.
Finding and Selecting Your Digital Design
Once you’ve chosen your material, you need a blueprint. These digital blueprints are known as laser cutting files, and they tell your machine exactly where to cut and engrave. The quality of your file is just as important as the quality of your wood. The most common formats are vector files, which use mathematical paths instead of pixels. This allows them to be scaled to any size without losing quality. The two types you’ll encounter most are SVG (Scalable Vector Graphics), which is popular for web and modern design software, and DXF (Drawing Exchange Format), an older but widely supported format from the world of CAD. Both work perfectly for laser cutting.
When searching for a design, consider its complexity. For your first project, look for an easy laser cut file. These designs typically feature fewer, larger pieces, simple shapes, and clear assembly instructions. They focus on the clock’s face and hands, avoiding intricate, multi-layered components. As you gain experience, you can graduate to more complex files. Advanced designs might include intricate fretwork, layered scenes that create a 3D effect, or even functional wooden gear mechanisms that require precise cutting and meticulous assembly. Marketplaces like Etsy are filled with thousands of designs for purchase, while sites like Thingiverse or Vecteezy offer free options. Always check the file’s reviews and ensure it comes with assembly guides, especially for more complicated models.
Laser Cutting Your Clock Components
With your design chosen and wood selected, it’s time for the most exciting step: bringing your clock to life with the laser. This is where digital precision meets natural material. The quality of your cuts will directly impact the ease of assembly and the final appearance of your clock, so careful preparation and calibration of your laser cutter are essential. A few minutes spent on setup will save you from wasting valuable material and time.
Preparing Your Laser for a Perfect Cut
Before you send any file to the machine, a pre-flight check is crucial for ensuring safety and cut quality. First, inspect and clean the laser’s optics, including the lens and mirrors. Even a small amount of dust or residue on the lens can diffuse the laser beam, significantly reducing its cutting power and potentially causing the lens to overheat and crack. A clean lens focuses the beam into a sharp, pinpoint-hot dot, which is vital for clean cuts. Next, verify the machine’s alignment. An aligned beam travels perfectly from the laser tube, through the mirrors, and down through the lens, perpendicular to the cutting bed. If the beam is misaligned, you’ll get angled cuts, which can be a major problem when assembling interlocking parts. Finally, ensure you set the correct focal distance between the lens and the surface of your wood. An out-of-focus beam is wider and less powerful, resulting in incomplete cuts or excessive charring.
Calibrating Power and Speed for Your Wood
The two primary settings you will control are power and speed. Power determines the intensity of the laser beam, while speed controls how fast the laser head moves. These two settings work together: higher power and slower speeds deliver more energy to a specific point, enabling the laser to cut through thicker materials. The goal is to find the perfect balance that cuts cleanly through your wood in a single pass without leaving excessive scorching on the surface or a heavy, charred residue on the edges. There is no universal setting; every machine is different, and even two sheets of the same type of wood can behave differently.
- The Test Cut is Non-Negotiable: Always perform a test cut on a small scrap piece of the exact material you are using for your clock. Cut a small shape, like a one-inch square, to see if it cuts through completely and to assess the edge quality.
- Adjusting for Thickness: A thin 3mm birch plywood might cut cleanly at 60% power and a speed of 15mm/s, while a denser 6mm piece of solid oak might require 85% power and a much slower speed of 5mm/s.
- Engraving vs. Cutting: If your clock face has engraved numbers or patterns, these will require a separate setting with much lower power and higher speed, as the goal is to ablate the surface, not cut through it.
Once you find the optimal settings for a specific material, save them in your laser software’s material library. This will streamline all your future laser cut projects. For a 3d wood design laser cut, where multiple layers must stack perfectly, this consistency is paramount. The precision of each cut determines how well the layers align, and any deviation can compromise the entire three-dimensional effect. A well-calibrated machine, combined with powerful air assist to clear smoke and debris, will ensure every intricate detail is rendered flawlessly.
Assembly and Finishing Touches
Once the laser has finished its work, you are left with a collection of precisely cut wooden pieces. This is where your hands-on craftsmanship begins, transforming a flat-pack kit into a functional work of art. The assembly and finishing stages are what elevate your project from a simple collection of parts to a polished, professional-looking timepiece.
Preparing and Assembling Your Clock
Before you reach for the glue, take a moment to prepare your components. Even with optimal laser settings, some light smoke residue or charring might be present on the surface of the laser cut wood. This can be easily cleaned with a soft cloth lightly dampened with isopropyl alcohol. For an ultra-smooth finish, lightly sand the faces of each piece with fine-grit sandpaper (220-grit or higher) to remove any remaining marks and prepare the surface for finishing. Be gentle to avoid rounding over the sharp, laser-cut edges. Once your parts are clean and smooth, perform a “dry fit” by assembling the entire clock without any glue. This crucial step allows you to understand how the pieces fit together and identify any tight spots that might need a tiny bit of extra sanding. For a 3d wood design laser cut, this is especially important to ensure all the layers align perfectly.
Once you are confident with the fit, you can begin gluing. A quality wood glue, such as PVA glue (like Titebond II), is ideal. Apply a thin, even layer of glue to the joining surfaces. A small brush or cotton swab can help you apply it precisely, which is key to avoiding “squeeze-out”—excess glue that seeps from the joints. If squeeze-out does occur, wipe it away immediately with a damp cloth before it dries. For layered designs, place the pieces together carefully, ensuring perfect alignment. Use clamps or place a heavy, flat object on top of the assembly to ensure strong, even pressure while the glue cures.
Installing the Mechanism and Final Touches
With the body of your clock assembled, it’s time to install its heart: the clock mechanism. These are typically standard quartz movements that are easy to install.
- Feed the threaded shaft of the mechanism through the central hole in your clock face from the back.
- On the front, place the washer over the shaft and then tighten the nut to secure the mechanism firmly in place. Hand-tighten it first, then give it a final snug turn with pliers, being careful not to overtighten and crack the wood.
- Gently press the hour hand onto the shaft’s plastic bushing. It should point directly at the 12.
- Next, align the minute hand to the 12 and press it onto the metal part of the shaft.
- If your kit includes a second hand, it usually screws on or pushes into the very tip of the shaft.
- Before inserting the battery, ensure the hands are parallel to the clock face and to each other, with enough clearance so they won’t collide as they rotate.
The final step is to apply a finish. This not only protects the wood from moisture and dust but also dramatically enhances its natural beauty. For a natural, warm look that makes the grain pop, apply a few coats of Danish oil or Tung oil. For added durability and a slight sheen, a spray-on clear coat of polyurethane or lacquer is an excellent choice. Spray finishes are particularly effective for intricate designs, as they provide even coverage without causing drips or pooling in the detailed cutouts. Applying a finish is the final touch that transforms your project into a lasting, beautiful timepiece.
Conclusions
You now have the knowledge to create stunning wooden clocks using your laser cutter. By choosing the right materials and a quality easy laser cut file, you can produce professional results. This project is a fantastic way to enhance your skills and create personalized decor. Explore more 3d wood design laser cut files to continue your creative journey.
Frequently Asked Questions
Q: What is the best wood for a beginner making a laser-cut clock?
A: Baltic Birch plywood is highly recommended for beginners. Its stability, uniform surface, and consistent cutting behavior make it a forgiving and reliable material to work with.
Q: Do I really need to do a test cut every time?
A: Yes. A test cut is non-negotiable. It allows you to fine-tune the power and speed settings for the specific piece of wood you’re using, preventing incomplete cuts or excessive charring on your final project. This step saves time, material, and frustration.
Q: What file format is best for laser cutting clocks?
A: Vector file formats like SVG (Scalable Vector Graphics) and DXF (Drawing Exchange Format) are the best choices. Both can be scaled to any size without losing quality, ensuring your laser cutter receives precise instructions for cutting and engraving.
Block "subscribe-popup" not found