Tutorials
A Guide to Creating the Perfect Personalized Charcuterie Board
Sep
- Food-Grade Mineral Oil: This is the industry standard for a reason. It is an inert, tasteless, and odorless oil that penetrates deep into the wood fibers. It hydrates the wood from the inside out, preventing it from becoming brittle. It’s easy to apply and readily available.
- Beeswax and Mineral Oil Blends: Often sold as “board cream” or “wood conditioner,” these products offer the best of both worlds. The mineral oil penetrates and moisturizes, while the beeswax creates a water-resistant barrier on the surface. This top coat provides an extra layer of protection and gives the board a beautiful, soft satin sheen and a silky-smooth feel.
Follow these steps for a perfect finish:
- Prepare the Surface: After engraving, make sure the board is completely free of wood dust. Wipe it down thoroughly with a clean, lint-free cloth. If you used masking tape, ensure all adhesive residue is gone.
- Apply the First Coat: Using another clean, soft cloth, apply a generous amount of your chosen oil or board cream to the entire surface of the board—front, back, and all the edges. Use a circular motion to work the finish deep into the wood grain. Pay special attention to the engraved areas, making sure the finish seeps into every detail.
- Let it Penetrate: This is the most important part. You need to give the oil time to soak in. Let the board sit for at least 4-6 hours, but for the very first treatment, leaving it to absorb the oil overnight is ideal. You can stand it on its edge to allow air to circulate around it.
- Buff to a Finish: After the board has absorbed all the oil it can, take a final clean cloth and wipe off any excess from the surface. Buff the wood vigorously. This removes any greasy feeling and, if you’re using a wax blend, it will polish the surface to a beautiful, subtle luster. Your board is now seasoned, sealed, and ready for its delicious debut.
Conclusions
You now have the knowledge to create a stunning personalized charcuterie board that is both beautiful and functional. By selecting the right wood, creating a unique design, and applying a food-safe finish, you can craft a memorable gift or a cherished piece for your home. Embrace your creativity and start your laser engraving project today.
Interested in more Charcuterie Board? Check out our Charcuterie Board laser file designs: Click here!
Frequently Asked Questions
Q: What is the best wood for a beginner to use for a laser-engraved charcuterie board?
A: Maple is an excellent choice for beginners. Its light color and closed-grain structure create a high-contrast, clean engraving, and it’s very forgiving when it comes to dialing in your laser settings. The striking dark burn makes designs pop with clarity.
Q: Can I use a regular JPG or PNG file for my design?
A: While you technically can, it is highly discouraged for crisp lines, text, and graphics. Vector files like SVG or DXF are far superior because they are made of mathematical paths, not pixels. This means they can be scaled to any size without losing quality, ensuring a sharp and professional-looking engraving.
Q: Is it really necessary to apply a finish to my board?
A: Absolutely. Applying a food-safe finish like mineral oil is a crucial final step. It seals the porous wood, preventing bacteria growth, stopping the board from drying out and cracking, and making it much easier to clean. It also beautifully enhances the wood’s natural grain and color, giving it a professional look.
Q: Why did my engraving come out blurry?
A: A blurry or weak engraving is almost always caused by an improperly focused laser. Before running your final job, you must ensure the laser lens is set to the correct focal distance from the surface of your material. Consult your machine’s specific instructions for the proper focusing procedure.
- Power: This setting controls the intensity of the laser beam. Higher power results in a deeper, darker burn.
- Speed: This determines how quickly the laser head moves over the material. A slower speed allows the laser to dwell on one spot for longer, also creating a deeper, darker burn.
These settings work in tandem and vary dramatically depending on the material. Hard maple requires more power or a slower speed than a softer wood like cherry. This is why you must always run a test cut on a scrap piece of the exact same wood before engraving your final board. A test grid with different power and speed combinations will quickly show you the ideal setting for the perfect contrast and depth without burning too deep.
You’ll also choose your operation type. For filling in solid shapes and text, you’ll use Engrave (also called Rastering). For creating thin outlines, you’ll use Score, which is essentially a very low-power vector cut that just marks the surface. Once your settings are dialed in, do a final check of your safety equipment and ventilation. Close the machine’s lid, stay by the machine throughout the entire process, and press start. After the job is complete, wait for the exhaust fan to clear all smoke before opening the lid. Carefully remove your board and peel off the masking tape to reveal your crisp, clean, and beautifully personalized engraving.
Applying a Food-Safe Finish
Your personalized charcuterie board is now engraved, but the project isn’t complete until you’ve applied a final, crucial treatment: a food-safe finish. This step is not merely cosmetic; it is essential for the board’s longevity, beauty, and, most importantly, its safety for serving food. The laser engraving process vaporizes wood, exposing fresh, raw fibers within your design and across the board’s surface. This raw wood is porous, acting like a sponge for moisture, bacteria, and food stains. Applying a finish seals these pores, creating a protective barrier that prevents the wood from drying out and cracking, while also making it much easier to clean and more resistant to contaminants. It also dramatically enhances the wood’s appearance, making the grain pop and deepening the color, transforming your project into a professional-quality, finished piece.
Choosing and Applying Your Finish
The most critical factor in selecting a finish is ensuring it is 100% food-safe. Never use common woodworking finishes like varnish, lacquer, or Danish oil, as they can contain toxic chemicals. The best choices for a charcuterie or cutting board are non-drying oils and waxes that condition the wood without becoming rancid.
- Food-Grade Mineral Oil: This is the industry standard for a reason. It is an inert, tasteless, and odorless oil that penetrates deep into the wood fibers. It hydrates the wood from the inside out, preventing it from becoming brittle. It’s easy to apply and readily available.
- Beeswax and Mineral Oil Blends: Often sold as “board cream” or “wood conditioner,” these products offer the best of both worlds. The mineral oil penetrates and moisturizes, while the beeswax creates a water-resistant barrier on the surface. This top coat provides an extra layer of protection and gives the board a beautiful, soft satin sheen and a silky-smooth feel.
Follow these steps for a perfect finish:
- Prepare the Surface: After engraving, make sure the board is completely free of wood dust. Wipe it down thoroughly with a clean, lint-free cloth. If you used masking tape, ensure all adhesive residue is gone.
- Apply the First Coat: Using another clean, soft cloth, apply a generous amount of your chosen oil or board cream to the entire surface of the board—front, back, and all the edges. Use a circular motion to work the finish deep into the wood grain. Pay special attention to the engraved areas, making sure the finish seeps into every detail.
- Let it Penetrate: This is the most important part. You need to give the oil time to soak in. Let the board sit for at least 4-6 hours, but for the very first treatment, leaving it to absorb the oil overnight is ideal. You can stand it on its edge to allow air to circulate around it.
- Buff to a Finish: After the board has absorbed all the oil it can, take a final clean cloth and wipe off any excess from the surface. Buff the wood vigorously. This removes any greasy feeling and, if you’re using a wax blend, it will polish the surface to a beautiful, subtle luster. Your board is now seasoned, sealed, and ready for its delicious debut.
Conclusions
You now have the knowledge to create a stunning personalized charcuterie board that is both beautiful and functional. By selecting the right wood, creating a unique design, and applying a food-safe finish, you can craft a memorable gift or a cherished piece for your home. Embrace your creativity and start your laser engraving project today.
Frequently Asked Questions
Q: What is the best wood for a beginner to use for a laser-engraved charcuterie board?
A: Maple is an excellent choice for beginners. Its light color and closed-grain structure create a high-contrast, clean engraving, and it’s very forgiving when it comes to dialing in your laser settings. The striking dark burn makes designs pop with clarity.
Q: Can I use a regular JPG or PNG file for my design?
A: While you technically can, it is highly discouraged for crisp lines, text, and graphics. Vector files like SVG or DXF are far superior because they are made of mathematical paths, not pixels. This means they can be scaled to any size without losing quality, ensuring a sharp and professional-looking engraving.
Q: Is it really necessary to apply a finish to my board?
A: Absolutely. Applying a food-safe finish like mineral oil is a crucial final step. It seals the porous wood, preventing bacteria growth, stopping the board from drying out and cracking, and making it much easier to clean. It also beautifully enhances the wood’s natural grain and color, giving it a professional look.
Q: Why did my engraving come out blurry?
A: A blurry or weak engraving is almost always caused by an improperly focused laser. Before running your final job, you must ensure the laser lens is set to the correct focal distance from the surface of your material. Consult your machine’s specific instructions for the proper focusing procedure.
Slate: A Modern and Dramatic Alternative
If you’re aiming for a contemporary and dramatic aesthetic, slate is a fantastic option. This natural stone provides a dark, textured backdrop that makes food arrangements pop. For personalization, slate offers a unique advantage: laser engraving etches the surface to reveal a light gray or almost white layer underneath, resulting in exceptionally crisp, high-contrast designs. This makes it ideal for sharp text, logos, and detailed graphics. Slate is non-porous, so it won’t absorb flavors or odors and is incredibly easy to wipe clean. Its natural ability to stay cool also helps keep cheeses and cured meats fresh. However, slate has its drawbacks. It is brittle and can chip or shatter if dropped. Furthermore, it is extremely hard on knives, so any cutting should be done beforehand; slate is strictly for presentation. The choice between wood and slate ultimately comes down to the style you wish to achieve—the organic warmth of wood versus the sleek, modern elegance of stone.
Designing Your Custom Engraving
With your board material selected, the next step is the most personal and creative part of the process: designing the engraving. This is where you transform a simple piece of wood or slate into a meaningful heirloom or a perfectly tailored gift. Whether you’re aiming for minimalist elegance or a richly detailed masterpiece, a thoughtful approach to design will ensure the final product is both beautiful and functional.
From Idea to Digital File
The journey of your design begins with an idea. What story do you want the board to tell? Popular choices range from the simple to the intricate:
- Text and Monograms: A classic choice for weddings, anniversaries, and housewarmings. A family name, an established date, or a couple’s initials can create a timeless piece. The font you choose is critical; a script font can evoke romance and elegance, while a bold, sans-serif font feels modern and clean.
- Custom Graphics: This could be anything from a family recipe handwritten by a grandmother to a detailed drawing of a home. For complex images, the key is converting them into a format the laser can understand.
- Thematic Designs: Think about the board’s primary use. A design featuring wine grapes and cheese is perfect for a wine lover, while a kitchen conversion chart is both stylish and incredibly practical.
Once you have an idea, you need a digital file. Laser engravers work with specific file types, and understanding the difference is crucial for a quality result. The two main categories are vector and raster. Raster files (like JPG or PNG) are made of pixels, and while they can be used for engraving photos, they can lose quality when resized. For crisp lines, text, and graphics, vector files are the gold standard. Formats like SVG (Scalable Vector Graphic) or DXF (Drawing Exchange Format) are composed of mathematical paths, not pixels. This means they can be scaled to any size without losing a shred of detail, ensuring your engraving has perfectly sharp edges. To achieve a professional finish, using a high-quality vector file is essential. For those who aren’t graphic designers, an extensive selection of pre-made digital files, from intricate Floral Wreath monograms to rustic Farmhouse Animal silhouettes, offers a fantastic way to get a flawless design without the learning curve.
Principles of Board Composition
Where you place your design is just as important as the design itself. Good composition creates balance and enhances the natural beauty of the board. Before you engrave, consider the layout. A common practice is to place the main design in a corner or along one of the edges. This frames the board beautifully while leaving the central area clear for serving food and for any light cutting, which helps preserve the integrity of your artwork. A large, centered design can be a powerful statement piece, but it’s best suited for a board that will be used primarily for display. Consider the board’s shape and any unique features, like a handle or a live edge. The design should feel integrated, not just placed on top. A great tip is to print your design on paper at its actual size and place it on the board. This allows you to visualize the scale and position, making adjustments until the balance feels just right. Remember that negative space—the empty area around your design—is a powerful tool. A design that is too large or cluttered can overwhelm the board; sometimes, a simple, well-placed detail has the biggest impact.
The Laser Engraving Process Step-by-Step
Now that you have your board and a digital design file, it’s time to bring your vision to life. The laser engraving process is a fascinating blend of digital precision and natural material. While it may seem technical, breaking it down into manageable steps makes it an accessible and highly rewarding project. Always begin by consulting your specific laser cutter’s manual, but this guide will walk you through the universal principles of the process.
Preparation and Machine Setup
Your first priority is always safety. Ensure you are in a well-ventilated area, have a fire extinguisher nearby, and wear the appropriate safety glasses designed for your laser’s wavelength. Before placing your board in the machine, give it a final wipe-down with a clean, dry cloth to remove any dust or debris. For an impeccably clean engraving, especially on lighter woods like maple, it’s highly recommended to cover the engraving area with a layer of painter’s tape or specialized laser masking film. This acts as a protective shield, preventing smoke and resin from staining the wood surrounding your design, which can be difficult to clean off later.
Once prepped, place the board inside the laser cutter on the honeycomb bed. Make sure it lies completely flat and is secure; if the board is warped or can shift during the process, your engraving will be inconsistent and out of focus. Use weights or hold-down pins if necessary. Next, you must focus the laser. This is a critical step that ensures the laser beam is at its finest point when it hits the wood’s surface, resulting in sharp, detailed lines. Your machine will have a specific procedure for this, often involving a manual focusing tool or an auto-focus function. An improperly focused laser will produce a blurry, weak engraving.
Dialing in Settings and Running the Job
With the board in place, it’s time to configure the job in your laser software. Import your design file (the SVG or DXF we discussed earlier) and position it precisely where you want it on the board within the software’s workspace. Now you’ll set the two most important variables: power and speed.
- Power: This setting controls the intensity of the laser beam. Higher power results in a deeper, darker burn.
- Speed: This determines how quickly the laser head moves over the material. A slower speed allows the laser to dwell on one spot for longer, also creating a deeper, darker burn.
These settings work in tandem and vary dramatically depending on the material. Hard maple requires more power or a slower speed than a softer wood like cherry. This is why you must always run a test cut on a scrap piece of the exact same wood before engraving your final board. A test grid with different power and speed combinations will quickly show you the ideal setting for the perfect contrast and depth without burning too deep.
You’ll also choose your operation type. For filling in solid shapes and text, you’ll use Engrave (also called Rastering). For creating thin outlines, you’ll use Score, which is essentially a very low-power vector cut that just marks the surface. Once your settings are dialed in, do a final check of your safety equipment and ventilation. Close the machine’s lid, stay by the machine throughout the entire process, and press start. After the job is complete, wait for the exhaust fan to clear all smoke before opening the lid. Carefully remove your board and peel off the masking tape to reveal your crisp, clean, and beautifully personalized engraving.
Applying a Food-Safe Finish
Your personalized charcuterie board is now engraved, but the project isn’t complete until you’ve applied a final, crucial treatment: a food-safe finish. This step is not merely cosmetic; it is essential for the board’s longevity, beauty, and, most importantly, its safety for serving food. The laser engraving process vaporizes wood, exposing fresh, raw fibers within your design and across the board’s surface. This raw wood is porous, acting like a sponge for moisture, bacteria, and food stains. Applying a finish seals these pores, creating a protective barrier that prevents the wood from drying out and cracking, while also making it much easier to clean and more resistant to contaminants. It also dramatically enhances the wood’s appearance, making the grain pop and deepening the color, transforming your project into a professional-quality, finished piece.
Choosing and Applying Your Finish
The most critical factor in selecting a finish is ensuring it is 100% food-safe. Never use common woodworking finishes like varnish, lacquer, or Danish oil, as they can contain toxic chemicals. The best choices for a charcuterie or cutting board are non-drying oils and waxes that condition the wood without becoming rancid.
- Food-Grade Mineral Oil: This is the industry standard for a reason. It is an inert, tasteless, and odorless oil that penetrates deep into the wood fibers. It hydrates the wood from the inside out, preventing it from becoming brittle. It’s easy to apply and readily available.
- Beeswax and Mineral Oil Blends: Often sold as “board cream” or “wood conditioner,” these products offer the best of both worlds. The mineral oil penetrates and moisturizes, while the beeswax creates a water-resistant barrier on the surface. This top coat provides an extra layer of protection and gives the board a beautiful, soft satin sheen and a silky-smooth feel.
Follow these steps for a perfect finish:
- Prepare the Surface: After engraving, make sure the board is completely free of wood dust. Wipe it down thoroughly with a clean, lint-free cloth. If you used masking tape, ensure all adhesive residue is gone.
- Apply the First Coat: Using another clean, soft cloth, apply a generous amount of your chosen oil or board cream to the entire surface of the board—front, back, and all the edges. Use a circular motion to work the finish deep into the wood grain. Pay special attention to the engraved areas, making sure the finish seeps into every detail.
- Let it Penetrate: This is the most important part. You need to give the oil time to soak in. Let the board sit for at least 4-6 hours, but for the very first treatment, leaving it to absorb the oil overnight is ideal. You can stand it on its edge to allow air to circulate around it.
- Buff to a Finish: After the board has absorbed all the oil it can, take a final clean cloth and wipe off any excess from the surface. Buff the wood vigorously. This removes any greasy feeling and, if you’re using a wax blend, it will polish the surface to a beautiful, subtle luster. Your board is now seasoned, sealed, and ready for its delicious debut.
Conclusions
You now have the knowledge to create a stunning personalized charcuterie board that is both beautiful and functional. By selecting the right wood, creating a unique design, and applying a food-safe finish, you can craft a memorable gift or a cherished piece for your home. Embrace your creativity and start your laser engraving project today.
Frequently Asked Questions
Q: What is the best wood for a beginner to use for a laser-engraved charcuterie board?
A: Maple is an excellent choice for beginners. Its light color and closed-grain structure create a high-contrast, clean engraving, and it’s very forgiving when it comes to dialing in your laser settings. The striking dark burn makes designs pop with clarity.
Q: Can I use a regular JPG or PNG file for my design?
A: While you technically can, it is highly discouraged for crisp lines, text, and graphics. Vector files like SVG or DXF are far superior because they are made of mathematical paths, not pixels. This means they can be scaled to any size without losing quality, ensuring a sharp and professional-looking engraving.
Q: Is it really necessary to apply a finish to my board?
A: Absolutely. Applying a food-safe finish like mineral oil is a crucial final step. It seals the porous wood, preventing bacteria growth, stopping the board from drying out and cracking, and making it much easier to clean. It also beautifully enhances the wood’s natural grain and color, giving it a professional look.
Q: Why did my engraving come out blurry?
A: A blurry or weak engraving is almost always caused by an improperly focused laser. Before running your final job, you must ensure the laser lens is set to the correct focal distance from the surface of your material. Consult your machine’s specific instructions for the proper focusing procedure.
- Maple: A perennial favorite, hard maple is prized for its exceptional durability and food-safe, closed-grain structure. This dense grain means fewer pores for bacteria to hide in, making it a hygienic choice. For laser engraving, maple is a dream canvas. Its light, creamy color creates a striking, high-contrast dark burn, allowing intricate details and delicate text to stand out with remarkable clarity. The downside is its subtle grain pattern, which some may find less visually interesting than other woods. However, for a design that needs to be the star of the show, maple’s clean background is perfect.
- Walnut: For a touch of luxury and sophistication, walnut is an unparalleled choice. Its rich, dark chocolate hues and beautiful grain patterns create a statement piece before you even add food. When engraved, walnut produces a subtle, tone-on-tone effect that is understated and elegant. The engraving is less “in your face” than on maple, blending seamlessly with the wood’s natural character. While walnut is a durable hardwood, its more open grain may require more diligent cleaning and oiling to maintain its luster and food safety.
- Cherry: Cherry wood offers a beautiful middle ground. It is known for its smooth, straight grain and warm, reddish-brown color that darkens gracefully over time, developing a rich patina. It provides better engraving contrast than walnut but is warmer and richer than maple. The laser creates a clean, dark engraving that complements the wood’s inviting tones. Cherry is slightly softer than hard maple and walnut, meaning it will show knife marks more readily. This makes it an excellent choice for a board primarily used for serving, where its beauty can be preserved.
Slate: A Modern and Dramatic Alternative
If you’re aiming for a contemporary and dramatic aesthetic, slate is a fantastic option. This natural stone provides a dark, textured backdrop that makes food arrangements pop. For personalization, slate offers a unique advantage: laser engraving etches the surface to reveal a light gray or almost white layer underneath, resulting in exceptionally crisp, high-contrast designs. This makes it ideal for sharp text, logos, and detailed graphics. Slate is non-porous, so it won’t absorb flavors or odors and is incredibly easy to wipe clean. Its natural ability to stay cool also helps keep cheeses and cured meats fresh. However, slate has its drawbacks. It is brittle and can chip or shatter if dropped. Furthermore, it is extremely hard on knives, so any cutting should be done beforehand; slate is strictly for presentation. The choice between wood and slate ultimately comes down to the style you wish to achieve—the organic warmth of wood versus the sleek, modern elegance of stone.
Designing Your Custom Engraving
With your board material selected, the next step is the most personal and creative part of the process: designing the engraving. This is where you transform a simple piece of wood or slate into a meaningful heirloom or a perfectly tailored gift. Whether you’re aiming for minimalist elegance or a richly detailed masterpiece, a thoughtful approach to design will ensure the final product is both beautiful and functional.
From Idea to Digital File
The journey of your design begins with an idea. What story do you want the board to tell? Popular choices range from the simple to the intricate:
- Text and Monograms: A classic choice for weddings, anniversaries, and housewarmings. A family name, an established date, or a couple’s initials can create a timeless piece. The font you choose is critical; a script font can evoke romance and elegance, while a bold, sans-serif font feels modern and clean.
- Custom Graphics: This could be anything from a family recipe handwritten by a grandmother to a detailed drawing of a home. For complex images, the key is converting them into a format the laser can understand.
- Thematic Designs: Think about the board’s primary use. A design featuring wine grapes and cheese is perfect for a wine lover, while a kitchen conversion chart is both stylish and incredibly practical.
Once you have an idea, you need a digital file. Laser engravers work with specific file types, and understanding the difference is crucial for a quality result. The two main categories are vector and raster. Raster files (like JPG or PNG) are made of pixels, and while they can be used for engraving photos, they can lose quality when resized. For crisp lines, text, and graphics, vector files are the gold standard. Formats like SVG (Scalable Vector Graphic) or DXF (Drawing Exchange Format) are composed of mathematical paths, not pixels. This means they can be scaled to any size without losing a shred of detail, ensuring your engraving has perfectly sharp edges. To achieve a professional finish, using a high-quality vector file is essential. For those who aren’t graphic designers, an extensive selection of pre-made digital files, from intricate Floral Wreath monograms to rustic Farmhouse Animal silhouettes, offers a fantastic way to get a flawless design without the learning curve.
Principles of Board Composition
Where you place your design is just as important as the design itself. Good composition creates balance and enhances the natural beauty of the board. Before you engrave, consider the layout. A common practice is to place the main design in a corner or along one of the edges. This frames the board beautifully while leaving the central area clear for serving food and for any light cutting, which helps preserve the integrity of your artwork. A large, centered design can be a powerful statement piece, but it’s best suited for a board that will be used primarily for display. Consider the board’s shape and any unique features, like a handle or a live edge. The design should feel integrated, not just placed on top. A great tip is to print your design on paper at its actual size and place it on the board. This allows you to visualize the scale and position, making adjustments until the balance feels just right. Remember that negative space—the empty area around your design—is a powerful tool. A design that is too large or cluttered can overwhelm the board; sometimes, a simple, well-placed detail has the biggest impact.
The Laser Engraving Process Step-by-Step
Now that you have your board and a digital design file, it’s time to bring your vision to life. The laser engraving process is a fascinating blend of digital precision and natural material. While it may seem technical, breaking it down into manageable steps makes it an accessible and highly rewarding project. Always begin by consulting your specific laser cutter’s manual, but this guide will walk you through the universal principles of the process.
Preparation and Machine Setup
Your first priority is always safety. Ensure you are in a well-ventilated area, have a fire extinguisher nearby, and wear the appropriate safety glasses designed for your laser’s wavelength. Before placing your board in the machine, give it a final wipe-down with a clean, dry cloth to remove any dust or debris. For an impeccably clean engraving, especially on lighter woods like maple, it’s highly recommended to cover the engraving area with a layer of painter’s tape or specialized laser masking film. This acts as a protective shield, preventing smoke and resin from staining the wood surrounding your design, which can be difficult to clean off later.
Once prepped, place the board inside the laser cutter on the honeycomb bed. Make sure it lies completely flat and is secure; if the board is warped or can shift during the process, your engraving will be inconsistent and out of focus. Use weights or hold-down pins if necessary. Next, you must focus the laser. This is a critical step that ensures the laser beam is at its finest point when it hits the wood’s surface, resulting in sharp, detailed lines. Your machine will have a specific procedure for this, often involving a manual focusing tool or an auto-focus function. An improperly focused laser will produce a blurry, weak engraving.
Dialing in Settings and Running the Job
With the board in place, it’s time to configure the job in your laser software. Import your design file (the SVG or DXF we discussed earlier) and position it precisely where you want it on the board within the software’s workspace. Now you’ll set the two most important variables: power and speed.
- Power: This setting controls the intensity of the laser beam. Higher power results in a deeper, darker burn.
- Speed: This determines how quickly the laser head moves over the material. A slower speed allows the laser to dwell on one spot for longer, also creating a deeper, darker burn.
These settings work in tandem and vary dramatically depending on the material. Hard maple requires more power or a slower speed than a softer wood like cherry. This is why you must always run a test cut on a scrap piece of the exact same wood before engraving your final board. A test grid with different power and speed combinations will quickly show you the ideal setting for the perfect contrast and depth without burning too deep.
You’ll also choose your operation type. For filling in solid shapes and text, you’ll use Engrave (also called Rastering). For creating thin outlines, you’ll use Score, which is essentially a very low-power vector cut that just marks the surface. Once your settings are dialed in, do a final check of your safety equipment and ventilation. Close the machine’s lid, stay by the machine throughout the entire process, and press start. After the job is complete, wait for the exhaust fan to clear all smoke before opening the lid. Carefully remove your board and peel off the masking tape to reveal your crisp, clean, and beautifully personalized engraving.
Applying a Food-Safe Finish
Your personalized charcuterie board is now engraved, but the project isn’t complete until you’ve applied a final, crucial treatment: a food-safe finish. This step is not merely cosmetic; it is essential for the board’s longevity, beauty, and, most importantly, its safety for serving food. The laser engraving process vaporizes wood, exposing fresh, raw fibers within your design and across the board’s surface. This raw wood is porous, acting like a sponge for moisture, bacteria, and food stains. Applying a finish seals these pores, creating a protective barrier that prevents the wood from drying out and cracking, while also making it much easier to clean and more resistant to contaminants. It also dramatically enhances the wood’s appearance, making the grain pop and deepening the color, transforming your project into a professional-quality, finished piece.
Choosing and Applying Your Finish
The most critical factor in selecting a finish is ensuring it is 100% food-safe. Never use common woodworking finishes like varnish, lacquer, or Danish oil, as they can contain toxic chemicals. The best choices for a charcuterie or cutting board are non-drying oils and waxes that condition the wood without becoming rancid.
- Food-Grade Mineral Oil: This is the industry standard for a reason. It is an inert, tasteless, and odorless oil that penetrates deep into the wood fibers. It hydrates the wood from the inside out, preventing it from becoming brittle. It’s easy to apply and readily available.
- Beeswax and Mineral Oil Blends: Often sold as “board cream” or “wood conditioner,” these products offer the best of both worlds. The mineral oil penetrates and moisturizes, while the beeswax creates a water-resistant barrier on the surface. This top coat provides an extra layer of protection and gives the board a beautiful, soft satin sheen and a silky-smooth feel.
Follow these steps for a perfect finish:
- Prepare the Surface: After engraving, make sure the board is completely free of wood dust. Wipe it down thoroughly with a clean, lint-free cloth. If you used masking tape, ensure all adhesive residue is gone.
- Apply the First Coat: Using another clean, soft cloth, apply a generous amount of your chosen oil or board cream to the entire surface of the board—front, back, and all the edges. Use a circular motion to work the finish deep into the wood grain. Pay special attention to the engraved areas, making sure the finish seeps into every detail.
- Let it Penetrate: This is the most important part. You need to give the oil time to soak in. Let the board sit for at least 4-6 hours, but for the very first treatment, leaving it to absorb the oil overnight is ideal. You can stand it on its edge to allow air to circulate around it.
- Buff to a Finish: After the board has absorbed all the oil it can, take a final clean cloth and wipe off any excess from the surface. Buff the wood vigorously. This removes any greasy feeling and, if you’re using a wax blend, it will polish the surface to a beautiful, subtle luster. Your board is now seasoned, sealed, and ready for its delicious debut.
Conclusions
You now have the knowledge to create a stunning personalized charcuterie board that is both beautiful and functional. By selecting the right wood, creating a unique design, and applying a food-safe finish, you can craft a memorable gift or a cherished piece for your home. Embrace your creativity and start your laser engraving project today.
Frequently Asked Questions
Q: What is the best wood for a beginner to use for a laser-engraved charcuterie board?
A: Maple is an excellent choice for beginners. Its light color and closed-grain structure create a high-contrast, clean engraving, and it’s very forgiving when it comes to dialing in your laser settings. The striking dark burn makes designs pop with clarity.
Q: Can I use a regular JPG or PNG file for my design?
A: While you technically can, it is highly discouraged for crisp lines, text, and graphics. Vector files like SVG or DXF are far superior because they are made of mathematical paths, not pixels. This means they can be scaled to any size without losing quality, ensuring a sharp and professional-looking engraving.
Q: Is it really necessary to apply a finish to my board?
A: Absolutely. Applying a food-safe finish like mineral oil is a crucial final step. It seals the porous wood, preventing bacteria growth, stopping the board from drying out and cracking, and making it much easier to clean. It also beautifully enhances the wood’s natural grain and color, giving it a professional look.
Q: Why did my engraving come out blurry?
A: A blurry or weak engraving is almost always caused by an improperly focused laser. Before running your final job, you must ensure the laser lens is set to the correct focal distance from the surface of your material. Consult your machine’s specific instructions for the proper focusing procedure.
Estimated reading time: 9 minutes
Key Takeaways
- Material Matters: The choice between woods like maple, walnut, and cherry or a modern alternative like slate significantly impacts the board’s durability, maintenance, and the final look of your engraving.
- Design with Precision: For the sharpest and most professional results, use high-quality vector files (like SVG or DXF) instead of pixel-based images (JPG/PNG). Thoughtful placement of the design is just as important as the design itself.
- Preparation is Crucial: Proper laser engraving involves safety precautions, using masking tape to prevent staining, ensuring the board is flat, and focusing the laser correctly for a crisp image.
- Finish for Safety and Beauty: Applying a food-safe finish, such as mineral oil or a beeswax blend, is a non-negotiable final step. It protects the wood, prevents cracking, ensures food safety, and dramatically enhances the board’s appearance.
Table of Contents
- Selecting the Ideal Material for Your Board
- Designing Your Custom Engraving
- The Laser Engraving Process Step-by-Step
- Applying a Food-Safe Finish
- Conclusions
- Frequently Asked Questions
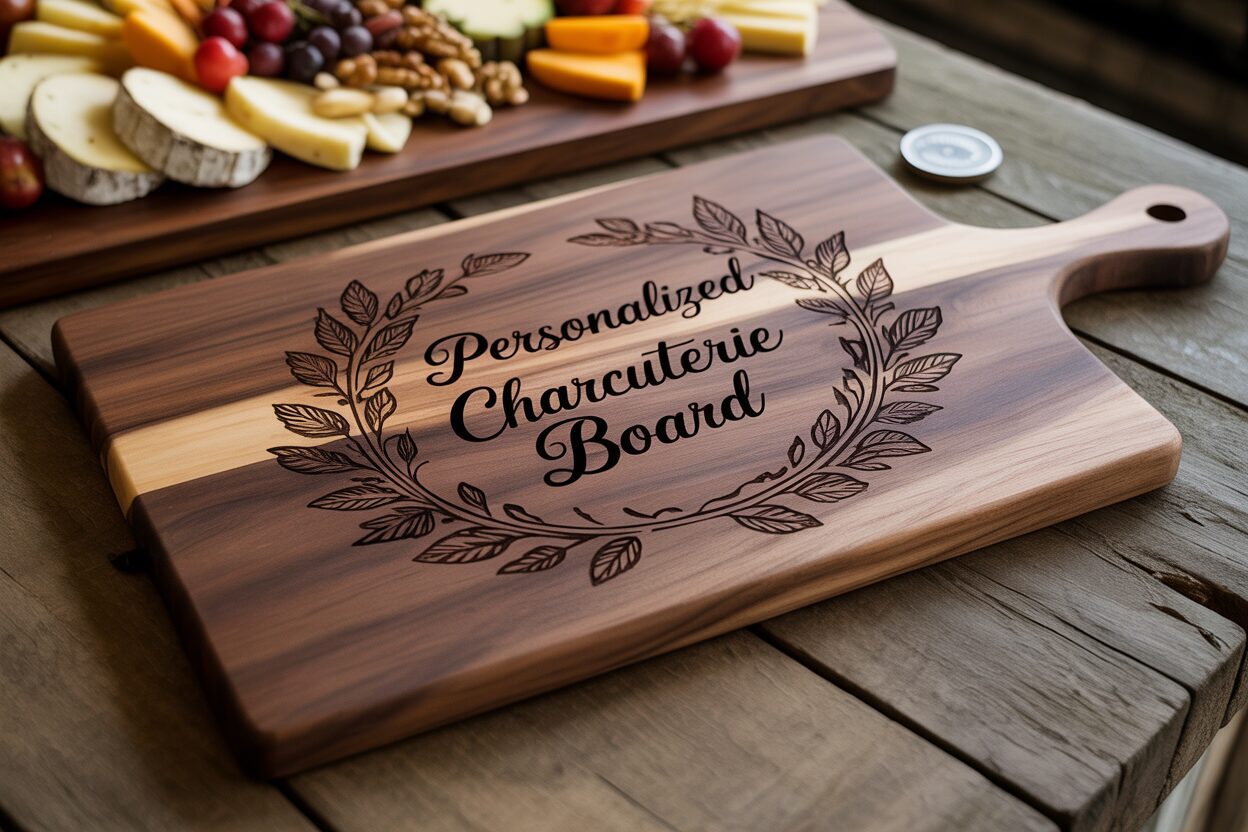
Discover the joy of crafting a one-of-a-kind personalized charcuterie board. This guide will walk you through everything from choosing the best materials to the final touches of laser engraving. We’ll explore how to create a stunning and functional piece that’s perfect for gifting or elevating your own home entertaining, ensuring a beautiful and lasting result.
Selecting the Ideal Material for Your Board
The material you choose for your charcuterie board is more than just a surface; it’s the canvas for your personalized art and the foundation for your culinary presentation. Your selection will directly influence the board’s durability, maintenance, food safety, and, most importantly, how your engraved design appears. Wood is the classic choice, celebrated for its natural beauty and warmth, but modern alternatives like slate offer a different kind of elegance. Understanding the characteristics of each material is the first step toward creating a truly exceptional piece.
The Enduring Appeal of Wood
When selecting a wood for your charcuterie board, three key factors come into play: hardness, grain, and color. Hardness, often measured on the Janka scale, determines the board’s resistance to knife marks and daily wear. The grain—whether it’s tight and closed or wide and open—affects both the board’s porosity and the clarity of the laser engraving. Finally, the wood’s natural color dictates the contrast and overall mood of your final design.
- Maple: A perennial favorite, hard maple is prized for its exceptional durability and food-safe, closed-grain structure. This dense grain means fewer pores for bacteria to hide in, making it a hygienic choice. For laser engraving, maple is a dream canvas. Its light, creamy color creates a striking, high-contrast dark burn, allowing intricate details and delicate text to stand out with remarkable clarity. The downside is its subtle grain pattern, which some may find less visually interesting than other woods. However, for a design that needs to be the star of the show, maple’s clean background is perfect.
- Walnut: For a touch of luxury and sophistication, walnut is an unparalleled choice. Its rich, dark chocolate hues and beautiful grain patterns create a statement piece before you even add food. When engraved, walnut produces a subtle, tone-on-tone effect that is understated and elegant. The engraving is less “in your face” than on maple, blending seamlessly with the wood’s natural character. While walnut is a durable hardwood, its more open grain may require more diligent cleaning and oiling to maintain its luster and food safety.
- Cherry: Cherry wood offers a beautiful middle ground. It is known for its smooth, straight grain and warm, reddish-brown color that darkens gracefully over time, developing a rich patina. It provides better engraving contrast than walnut but is warmer and richer than maple. The laser creates a clean, dark engraving that complements the wood’s inviting tones. Cherry is slightly softer than hard maple and walnut, meaning it will show knife marks more readily. This makes it an excellent choice for a board primarily used for serving, where its beauty can be preserved.
Slate: A Modern and Dramatic Alternative
If you’re aiming for a contemporary and dramatic aesthetic, slate is a fantastic option. This natural stone provides a dark, textured backdrop that makes food arrangements pop. For personalization, slate offers a unique advantage: laser engraving etches the surface to reveal a light gray or almost white layer underneath, resulting in exceptionally crisp, high-contrast designs. This makes it ideal for sharp text, logos, and detailed graphics. Slate is non-porous, so it won’t absorb flavors or odors and is incredibly easy to wipe clean. Its natural ability to stay cool also helps keep cheeses and cured meats fresh. However, slate has its drawbacks. It is brittle and can chip or shatter if dropped. Furthermore, it is extremely hard on knives, so any cutting should be done beforehand; slate is strictly for presentation. The choice between wood and slate ultimately comes down to the style you wish to achieve—the organic warmth of wood versus the sleek, modern elegance of stone.
Designing Your Custom Engraving
With your board material selected, the next step is the most personal and creative part of the process: designing the engraving. This is where you transform a simple piece of wood or slate into a meaningful heirloom or a perfectly tailored gift. Whether you’re aiming for minimalist elegance or a richly detailed masterpiece, a thoughtful approach to design will ensure the final product is both beautiful and functional.
From Idea to Digital File
The journey of your design begins with an idea. What story do you want the board to tell? Popular choices range from the simple to the intricate:
- Text and Monograms: A classic choice for weddings, anniversaries, and housewarmings. A family name, an established date, or a couple’s initials can create a timeless piece. The font you choose is critical; a script font can evoke romance and elegance, while a bold, sans-serif font feels modern and clean.
- Custom Graphics: This could be anything from a family recipe handwritten by a grandmother to a detailed drawing of a home. For complex images, the key is converting them into a format the laser can understand.
- Thematic Designs: Think about the board’s primary use. A design featuring wine grapes and cheese is perfect for a wine lover, while a kitchen conversion chart is both stylish and incredibly practical.
Once you have an idea, you need a digital file. Laser engravers work with specific file types, and understanding the difference is crucial for a quality result. The two main categories are vector and raster. Raster files (like JPG or PNG) are made of pixels, and while they can be used for engraving photos, they can lose quality when resized. For crisp lines, text, and graphics, vector files are the gold standard. Formats like SVG (Scalable Vector Graphic) or DXF (Drawing Exchange Format) are composed of mathematical paths, not pixels. This means they can be scaled to any size without losing a shred of detail, ensuring your engraving has perfectly sharp edges. To achieve a professional finish, using a high-quality vector file is essential. For those who aren’t graphic designers, an extensive selection of pre-made digital files, from intricate Floral Wreath monograms to rustic Farmhouse Animal silhouettes, offers a fantastic way to get a flawless design without the learning curve.
Principles of Board Composition
Where you place your design is just as important as the design itself. Good composition creates balance and enhances the natural beauty of the board. Before you engrave, consider the layout. A common practice is to place the main design in a corner or along one of the edges. This frames the board beautifully while leaving the central area clear for serving food and for any light cutting, which helps preserve the integrity of your artwork. A large, centered design can be a powerful statement piece, but it’s best suited for a board that will be used primarily for display. Consider the board’s shape and any unique features, like a handle or a live edge. The design should feel integrated, not just placed on top. A great tip is to print your design on paper at its actual size and place it on the board. This allows you to visualize the scale and position, making adjustments until the balance feels just right. Remember that negative space—the empty area around your design—is a powerful tool. A design that is too large or cluttered can overwhelm the board; sometimes, a simple, well-placed detail has the biggest impact.
The Laser Engraving Process Step-by-Step
Now that you have your board and a digital design file, it’s time to bring your vision to life. The laser engraving process is a fascinating blend of digital precision and natural material. While it may seem technical, breaking it down into manageable steps makes it an accessible and highly rewarding project. Always begin by consulting your specific laser cutter’s manual, but this guide will walk you through the universal principles of the process.
Preparation and Machine Setup
Your first priority is always safety. Ensure you are in a well-ventilated area, have a fire extinguisher nearby, and wear the appropriate safety glasses designed for your laser’s wavelength. Before placing your board in the machine, give it a final wipe-down with a clean, dry cloth to remove any dust or debris. For an impeccably clean engraving, especially on lighter woods like maple, it’s highly recommended to cover the engraving area with a layer of painter’s tape or specialized laser masking film. This acts as a protective shield, preventing smoke and resin from staining the wood surrounding your design, which can be difficult to clean off later.
Once prepped, place the board inside the laser cutter on the honeycomb bed. Make sure it lies completely flat and is secure; if the board is warped or can shift during the process, your engraving will be inconsistent and out of focus. Use weights or hold-down pins if necessary. Next, you must focus the laser. This is a critical step that ensures the laser beam is at its finest point when it hits the wood’s surface, resulting in sharp, detailed lines. Your machine will have a specific procedure for this, often involving a manual focusing tool or an auto-focus function. An improperly focused laser will produce a blurry, weak engraving.
Dialing in Settings and Running the Job
With the board in place, it’s time to configure the job in your laser software. Import your design file (the SVG or DXF we discussed earlier) and position it precisely where you want it on the board within the software’s workspace. Now you’ll set the two most important variables: power and speed.
- Power: This setting controls the intensity of the laser beam. Higher power results in a deeper, darker burn.
- Speed: This determines how quickly the laser head moves over the material. A slower speed allows the laser to dwell on one spot for longer, also creating a deeper, darker burn.
These settings work in tandem and vary dramatically depending on the material. Hard maple requires more power or a slower speed than a softer wood like cherry. This is why you must always run a test cut on a scrap piece of the exact same wood before engraving your final board. A test grid with different power and speed combinations will quickly show you the ideal setting for the perfect contrast and depth without burning too deep.
You’ll also choose your operation type. For filling in solid shapes and text, you’ll use Engrave (also called Rastering). For creating thin outlines, you’ll use Score, which is essentially a very low-power vector cut that just marks the surface. Once your settings are dialed in, do a final check of your safety equipment and ventilation. Close the machine’s lid, stay by the machine throughout the entire process, and press start. After the job is complete, wait for the exhaust fan to clear all smoke before opening the lid. Carefully remove your board and peel off the masking tape to reveal your crisp, clean, and beautifully personalized engraving.
Applying a Food-Safe Finish
Your personalized charcuterie board is now engraved, but the project isn’t complete until you’ve applied a final, crucial treatment: a food-safe finish. This step is not merely cosmetic; it is essential for the board’s longevity, beauty, and, most importantly, its safety for serving food. The laser engraving process vaporizes wood, exposing fresh, raw fibers within your design and across the board’s surface. This raw wood is porous, acting like a sponge for moisture, bacteria, and food stains. Applying a finish seals these pores, creating a protective barrier that prevents the wood from drying out and cracking, while also making it much easier to clean and more resistant to contaminants. It also dramatically enhances the wood’s appearance, making the grain pop and deepening the color, transforming your project into a professional-quality, finished piece.
Choosing and Applying Your Finish
The most critical factor in selecting a finish is ensuring it is 100% food-safe. Never use common woodworking finishes like varnish, lacquer, or Danish oil, as they can contain toxic chemicals. The best choices for a charcuterie or cutting board are non-drying oils and waxes that condition the wood without becoming rancid.
- Food-Grade Mineral Oil: This is the industry standard for a reason. It is an inert, tasteless, and odorless oil that penetrates deep into the wood fibers. It hydrates the wood from the inside out, preventing it from becoming brittle. It’s easy to apply and readily available.
- Beeswax and Mineral Oil Blends: Often sold as “board cream” or “wood conditioner,” these products offer the best of both worlds. The mineral oil penetrates and moisturizes, while the beeswax creates a water-resistant barrier on the surface. This top coat provides an extra layer of protection and gives the board a beautiful, soft satin sheen and a silky-smooth feel.
Follow these steps for a perfect finish:
- Prepare the Surface: After engraving, make sure the board is completely free of wood dust. Wipe it down thoroughly with a clean, lint-free cloth. If you used masking tape, ensure all adhesive residue is gone.
- Apply the First Coat: Using another clean, soft cloth, apply a generous amount of your chosen oil or board cream to the entire surface of the board—front, back, and all the edges. Use a circular motion to work the finish deep into the wood grain. Pay special attention to the engraved areas, making sure the finish seeps into every detail.
- Let it Penetrate: This is the most important part. You need to give the oil time to soak in. Let the board sit for at least 4-6 hours, but for the very first treatment, leaving it to absorb the oil overnight is ideal. You can stand it on its edge to allow air to circulate around it.
- Buff to a Finish: After the board has absorbed all the oil it can, take a final clean cloth and wipe off any excess from the surface. Buff the wood vigorously. This removes any greasy feeling and, if you’re using a wax blend, it will polish the surface to a beautiful, subtle luster. Your board is now seasoned, sealed, and ready for its delicious debut.
Conclusions
You now have the knowledge to create a stunning personalized charcuterie board that is both beautiful and functional. By selecting the right wood, creating a unique design, and applying a food-safe finish, you can craft a memorable gift or a cherished piece for your home. Embrace your creativity and start your laser engraving project today.
Frequently Asked Questions
Q: What is the best wood for a beginner to use for a laser-engraved charcuterie board?
A: Maple is an excellent choice for beginners. Its light color and closed-grain structure create a high-contrast, clean engraving, and it’s very forgiving when it comes to dialing in your laser settings. The striking dark burn makes designs pop with clarity.
Q: Can I use a regular JPG or PNG file for my design?
A: While you technically can, it is highly discouraged for crisp lines, text, and graphics. Vector files like SVG or DXF are far superior because they are made of mathematical paths, not pixels. This means they can be scaled to any size without losing quality, ensuring a sharp and professional-looking engraving.
Q: Is it really necessary to apply a finish to my board?
A: Absolutely. Applying a food-safe finish like mineral oil is a crucial final step. It seals the porous wood, preventing bacteria growth, stopping the board from drying out and cracking, and making it much easier to clean. It also beautifully enhances the wood’s natural grain and color, giving it a professional look.
Q: Why did my engraving come out blurry?
A: A blurry or weak engraving is almost always caused by an improperly focused laser. Before running your final job, you must ensure the laser lens is set to the correct focal distance from the surface of your material. Consult your machine’s specific instructions for the proper focusing procedure.
Block "subscribe-popup" not found