Tutorials
A Guide to Creating Stunning Multilayer Laser Cut Wood Art
Aug
Estimated reading time: 7 minutes
Key Takeaways
- A high-quality multilayer laser cut file (like SVG, AI, or DXF) is the essential blueprint for your project, with each layer designed to be cut and stacked to create depth.
- Your choice of material significantly impacts the final look; Baltic Birch plywood is recommended for its stability and void-free core, while MDF is excellent for painted projects.
- Proper wood preparation is non-negotiable: always check for flatness, measure the true thickness with calipers, and use masking tape to prevent scorch marks for a clean, professional finish.
- For the most dramatic 3D effect, paint or stain each individual layer before assembly. This creates crisp color separations and enhances the visual depth of the artwork.
Table of Contents
- Understanding and Choosing Your Design File
- Selecting the Right Wood and Preparing It for Cutting
- Laser Cutting, Assembly, and Finishing Techniques
- Conclusions
- Frequently Asked Questions
Dive into the captivating world of 3D wood art. This guide will show you how to use a multilayer laser cut file to create stunning, intricate pieces. We’ll cover everything from choosing the right materials and design files to the final assembly, empowering you to craft beautiful art for your home or to sell.
Understanding and Choosing Your Design File
The foundation of any multilayer wood art project is the digital design file. Unlike a simple image, a multilayer laser cut file is a specialized vector-based blueprint that contains all the individual pieces needed to create your 3D artwork. Think of it not as a single picture, but as a set of digital stencils, where each stencil represents a distinct layer of wood. When physically cut and stacked in the correct order, these layers combine to create stunning depth, shadow, and dimension. These files are typically provided in formats like SVG, AI, DXF, or EPS, which laser cutting software can read as precise paths for the laser to follow. Each line in the file corresponds to a specific action—a cut, a score, or an engrave—transforming a flat design into a tangible, textured object.
The Anatomy of a Layered File
The magic of the 3D effect comes from how these files are structured. A well-designed file organizes each layer separately. The bottom layer is often a solid backing piece, providing a foundation and a background color. Each subsequent layer placed on top is designed with strategic cutouts that reveal portions of the layer beneath it. This progressive revealing of underlying layers is what builds the visual depth. For example, in a mountain scene, the back layer might be the sky, the next might be distant mountains, followed by closer, more detailed mountains, and finally a layer of trees in the foreground. Designers often color-code the lines within the file to make the process easier. A common convention is to use red for cut lines, blue for score lines (light surface marks for detail), and black for engraving. This not only helps you visualize the final piece but also allows you to assign different power and speed settings to each color in your laser software.
Where to Find High-Quality Designs
Finding the perfect design is an exciting part of the process. The internet is filled with incredible files for every taste and skill level. Here are some of the best places to look:
- Online Marketplaces: Websites like Etsy are a treasure trove for layered laser cut files. You can find thousands of unique designs from independent artists all over the world. Marketplaces like Creative Fabrica and Design Bundles are also excellent sources, often offering bundles and subscription deals.
- Specialized Designer Stores: Many talented designers sell files directly from their own websites. Buying directly from a creator often ensures you get a high-quality, well-tested file and sometimes even direct support if you run into issues.
- Free Repositories: While tempting, be cautious with free files from general design-sharing sites. They are sometimes poorly designed, not optimized for layering, or may lack clear instructions, leading to frustration and wasted material. Always check the usage rights and quality before cutting.
What to Look for in a Good File
Not all design files are created equal. A high-quality file will save you time, material, and headaches. When choosing your design, look for the following characteristics:
- Clear Instructions: The best files come with a supplementary PDF guide. This should include a picture of the finished product, an exploded view showing the assembly order, and sometimes even painting and material suggestions.
- Well-Organized Layers: The digital file itself should be clean and easy to navigate. Each layer should be a separate, grouped object, making it simple to select and cut one at a time. Files that are a jumble of ungrouped lines can be a nightmare to work with.
- Software Compatibility: Ensure the download includes common vector formats like SVG, DXF, and AI to guarantee it will open correctly in your software of choice, such as LightBurn or CorelDRAW.
- Thoughtful Design: Look at the details. Are there extremely thin, fragile parts that might easily break? A good designer accounts for the physical limitations of wood. Reading reviews and looking at photos from other customers who have made the piece is an invaluable quality check.
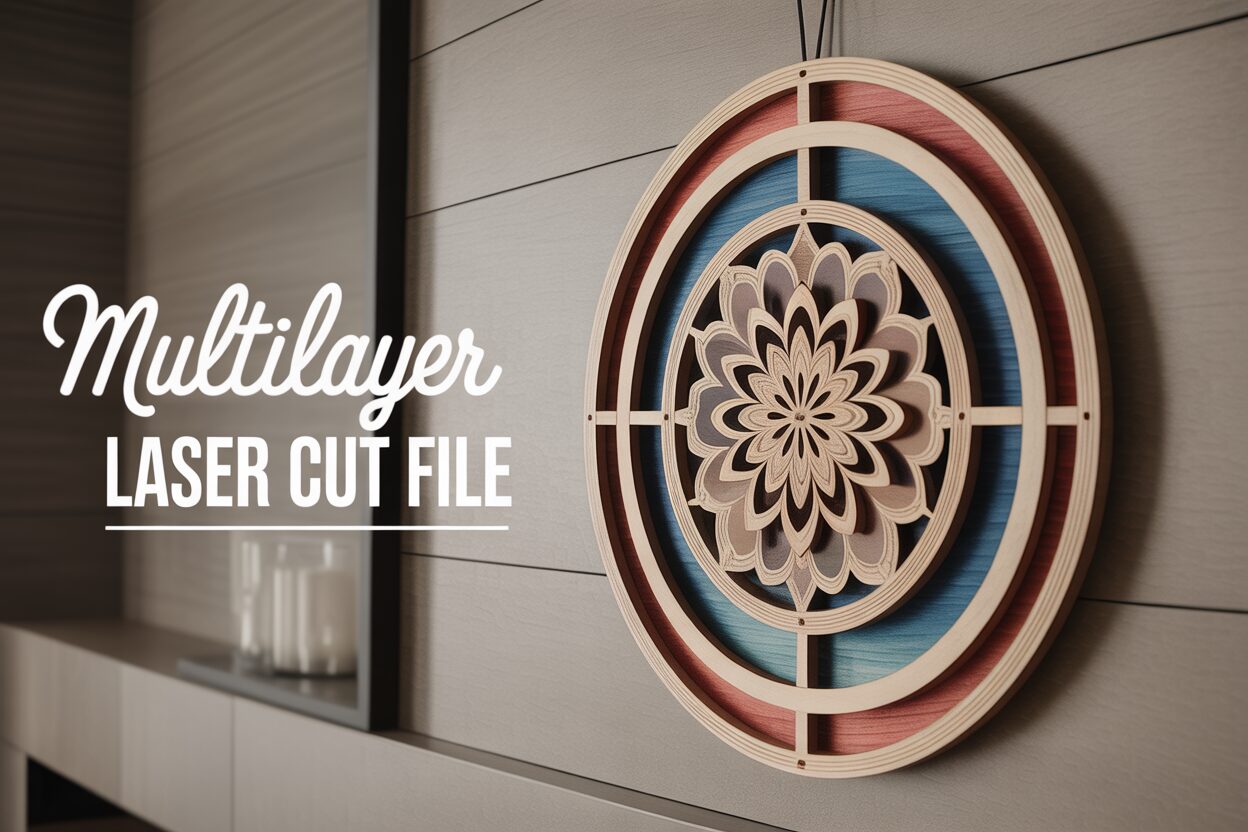
One of the most popular and visually striking themes in layered art is the mandala. A multi layer mandala laser design leverages symmetry and intricate, repeating patterns to create a hypnotic sense of depth. Each layer typically introduces a new level of detail, with the cutouts aligning perfectly to draw the eye toward the center. This theme is fantastic for beginners and experts alike, as the geometric precision is forgiving during assembly and the final result is always breathtaking. Other popular themes include detailed animal portraits, sweeping landscapes, celestial scenes, and intricate geometric patterns that play with light and shadow.
Selecting the Right Wood and Preparing It for Cutting
The digital file provides the map, but your choice of wood is the very earth from which your art will rise. The material you select is just as critical as the design itself, influencing not only the cutting process but the entire aesthetic of your finished 3d wood design laser cut piece. Different woods have unique characteristics, and understanding them is key to achieving your desired result.
The most common and highly recommended material for multilayered projects is Baltic Birch plywood. Unlike standard plywood from a big-box store, Baltic Birch is known for its void-free core, meaning there are no hidden gaps inside that can disrupt the laser beam and cause incomplete cuts. It’s strong, stable, and has a pleasant, subtle grain that can be left natural, stained, or painted. It provides a perfect balance of structural integrity and aesthetic appeal. Another popular option, especially for projects that will be fully painted, is MDF (Medium-Density Fiberboard). MDF has no grain and is completely uniform in density, which means the laser cuts through it like butter, leaving a perfectly smooth edge. It’s also very flat and cost-effective. However, it’s not as strong as plywood and the dust created during cutting is very fine and requires good ventilation. For a more premium look, you can use solid woods like basswood, cherry, or walnut. These offer unparalleled beauty with their natural colors and grain patterns. The downside is that they are more expensive, can be prone to warping, and the varying density within the grain can sometimes require fine-tuning your laser settings for a consistent cut.
Preparing Your Material for a Perfect Cut
Proper preparation is a non-negotiable step that separates amateur results from professional-quality art. Before you cut a single piece, you must prepare your wood.
- Check for Flatness: The laser’s focus is set to a precise distance from the material. If your wood is warped or bowed, some areas will be in focus while others will be out of focus, resulting in incomplete cuts and charred edges. Lay each sheet on a perfectly flat surface to check for any bowing. If a sheet is slightly warped, you can sometimes flatten it by placing heavy, flat objects on it for a day or two. If it’s severely warped, it’s best not to use it.
- Mask the Surface: When the laser vaporizes wood, it leaves behind a smoky residue and burn marks, often called “scorch” or “halos,” around the cut lines. To prevent this, cover the entire surface of your wood with a low-to-medium tack masking tape or specialized laser paper mask. The laser will cut through the tape and the wood, and when you’re done, you simply peel the tape off, taking all the scorch marks with it. This single step will save you hours of sanding.
- Measure the True Thickness: Wood thickness is rarely exact. A sheet advertised as 3mm (or 1/8 inch) could actually be 2.8mm or 3.2mm. This tiny difference can be critical for designs with interlocking slots or tabs. Use a digital caliper to get a precise measurement of your material’s thickness. Knowing the exact thickness allows you to adjust your laser focus perfectly and, if necessary, slightly modify the design file for a snug fit.
The impact of these choices is profound. A laser cut mandala wall art piece made from stained Baltic Birch will have a warm, organic feel, with the layers of grain adding their own subtle patterns to the design. The same piece cut from painted MDF can be a bold, modern statement with crisp colors and flawless surfaces.
Laser Cutting, Assembly, and Finishing Techniques
With your prepared wood sheet ready and your design file chosen, it’s time to bring your project to life. This stage merges the digital and physical worlds, requiring both precision in the software and a careful hand during assembly.
From Digital File to Physical Pieces
First, import your laser cut layered files into your laser control software, like LightBurn. You will see all the layers of your design, often stacked on top of each other. The immediate goal is to separate these layers and prepare them for cutting one at a time. Most designers provide a file with each layer laid out individually, ready to cut. If not, you will need to separate them yourself. A critical pro-tip is to control the cutting order. In your software’s layer panel, assign different colors to different types of cuts. Best practice is to cut the most intricate, internal details of a piece first, and the final outside perimeter last. This ensures the main piece remains stable in the wood sheet while the small details are cut, preventing any shifting that could ruin alignment. For a typical 40-60W laser cutting 3mm Baltic Birch, a starting point for power settings might be 100% power at a speed of 5-8 mm/s. However, these settings vary wildly between machines and materials, so always perform a test cut on a scrap piece of the same material to dial in your settings for a clean, single-pass cut.
The Art of Assembly
Once the laser has finished, the real magic begins. Carefully remove the wood sheet from the laser bed. Gently press the cut pieces out from the back. Be extra cautious with delicate, intricate parts. Before you touch any glue, do a “dry fit.” Peel the protective masking tape off all your pieces and stack them in the correct order, referencing the guide that came with your file. This ensures everything was cut correctly and you understand the assembly sequence. For gluing, you have a few options:
- Wood Glue (like Titebond): This creates a very strong, permanent bond. It has a longer working time, giving you a few minutes to perfectly align the layers before it sets. Apply a thin, even layer using a small brush or a glue roller.
- CA Glue (Super Glue): For faster assembly, CA glue with an activator spray is an option. It bonds almost instantly, which is great for locking pieces in place but leaves no room for error in alignment. Use it sparingly.
Apply your chosen adhesive, focusing on areas with good surface contact. Avoid over-applying, as “squeeze-out” can be difficult to clean up. Press the layers together firmly and, if using wood glue, place a heavy, flat object on top while it cures to ensure a tight, seamless bond.
Finishing for Maximum Impact
Your finishing choices will define the final character of your artwork. The most effective technique for multilayer art is to paint or stain each layer before assembly. This creates crisp, clean color separations between each level, dramatically enhancing the 3D effect. Imagine a forest scene where the back layer is stained a dark walnut, the middle mountains a lighter oak, and the foreground trees are left as natural birch. The contrast is what makes the piece pop. You can use acrylic craft paints, wood stains, or even spray paints for a uniform finish. Once each piece is painted and fully dry, you can proceed with the gluing and assembly. For a final layer of protection and a professional sheen, you can apply a clear coat of spray lacquer or polyurethane after the entire piece is assembled and the glue has cured. This will seal the wood and make your masterpiece last for years to come.
Conclusions
You now have the knowledge to create your own breathtaking multilayered wood art. By following these steps and using a quality multilayer laser cut file, you can produce professional-grade decor. Don’t be afraid to experiment with different woods and finishes to develop your unique style and bring your creative visions to life.
Frequently Asked Questions
Q: What is a multilayer laser cut file?
A: It is a specialized vector file (such as SVG, AI, or DXF) containing individual layers designed to be cut out of a material like wood. When these layers are stacked in the correct order, they combine to create a three-dimensional art piece with depth and shadows.
Q: What is the best wood for multilayer laser art?
A: Baltic Birch plywood is highly recommended due to its strength, stability, and void-free core which ensures clean cuts. For projects that will be fully painted, MDF is an excellent and cost-effective alternative because of its completely uniform surface.
Q: How do I prevent burn marks (scorch) on my wood?
A: The most effective method is to cover the entire surface of your wood with a low-to-medium tack masking tape before you begin cutting. The laser cuts through the tape, and once you are done, you can peel it off, removing all the smoke residue and scorch marks along with it.
Q: Should I paint my project before or after I assemble it?
A: For the best and most professional result, you should paint or stain each layer individually before you glue them together. This technique creates sharp, clean color lines between each layer, which dramatically enhances the 3D effect of the final piece.
Block "subscribe-popup" not found