Projects
A Guide to Creating Stunning Layered Wood Art
Sep
Estimated reading time: 7 minutes
Key Takeaways
- Layered wood art is a technique that uses a laser cutter to create three-dimensional art by stacking precisely cut layers of wood, adding depth and shadow to a design.
- Essential tools include a diode laser cutter, suitable wood like Baltic Birch Plywood or MDF, a quality PVA wood glue, and a protective finish such as acrylic paint or clear varnish.
- The process involves sourcing a vector design (SVG, DXF), calibrating the laser’s power and speed for clean cuts, finishing each layer individually, and then carefully gluing the stack together for a cohesive final piece.
- Beginners can achieve professional results by starting with pre-made, tested designs, which allows them to focus on mastering the hands-on skills of cutting, finishing, and assembly.
Table of Contents
- What Is Layered Wood Art
- Choosing Your Materials and Tools
- The Creative Process Step by Step
- Conclusions
- Frequently Asked Questions
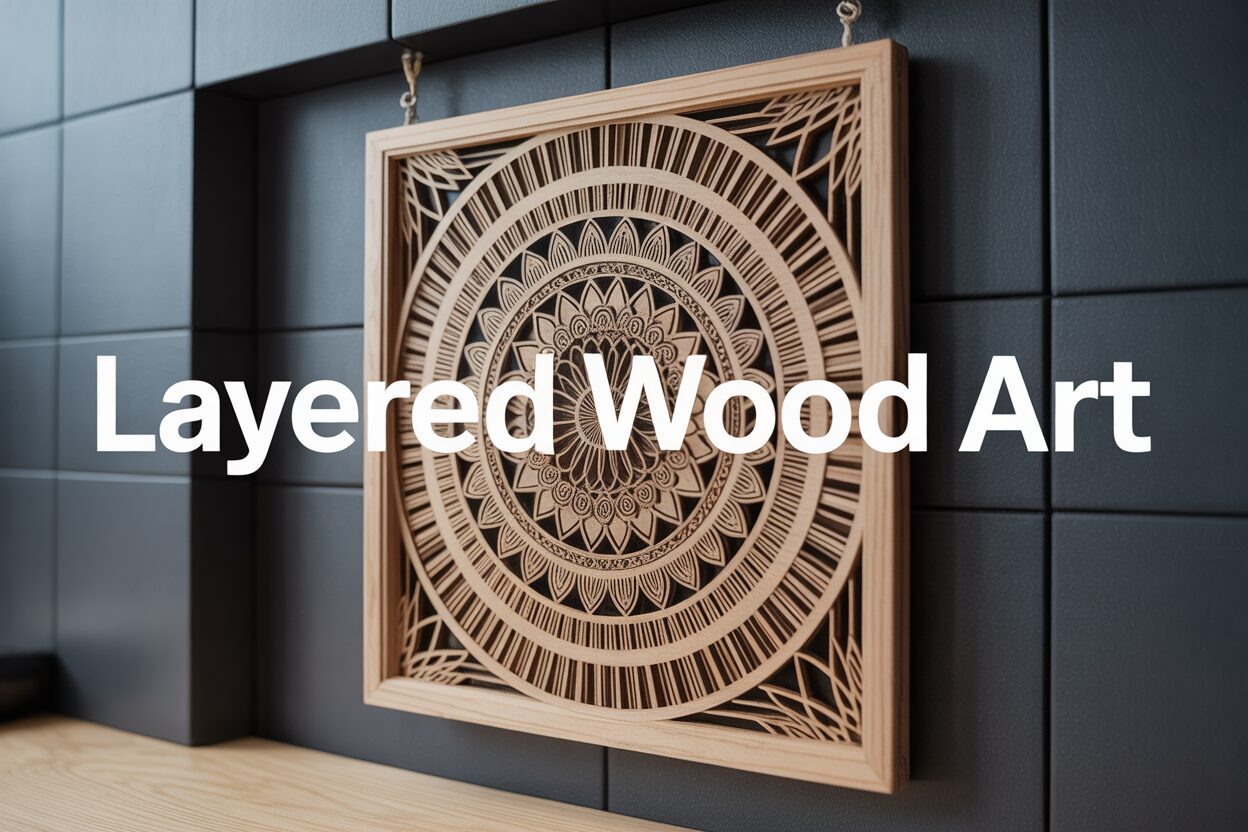
Dive into the captivating world of layered wood art, a technique that uses a laser cutter to create stunning three-dimensional pieces. This popular form of laser cut wall art adds depth and intricacy to any space. In this guide, we’ll explore the tools, materials, and steps to help you master this craft and begin your own amazing DIY wood art projects.
What Is Layered Wood Art
At its core, layered wood art is a captivating form of sculptural relief that transforms flat sheets of wood into intricate, three-dimensional artworks. Imagine a topographical map, where each contour line represents a different elevation. Layered wood art operates on a similar principle. It involves designing, cutting, and stacking multiple layers of wood, each slightly different in shape and size, to build up an image with tangible depth and texture. The interplay of light and shadow across these stacked layers brings the piece to life, creating a visual experience that a flat print or painting simply cannot replicate. Each layer is a crucial part of the whole; the bottom layer might form a solid background or a broad silhouette, while subsequent layers are progressively smaller, adding finer details, highlights, and a sense of perspective. This method allows artists to craft everything from sweeping mountain landscapes and detailed animal mandalas to complex geometric patterns and abstract compositions, all from simple, uniform materials.
From Flat Panel to Sculptural Masterpiece
The transformation from a two-dimensional design to a three-dimensional object is where the true artistry lies. The process is a unique blend of digital design and physical craftsmanship. An artist doesn’t just draw a single picture; they must deconstruct a scene or concept into distinct strata. Thinking in layers is paramount. The foreground elements are typically cut from the top layers, while background elements reside in the lower layers. The space between each sheet of wood, often created by the material’s own thickness, is just as important as the wood itself. This negative space creates deep shadows that define edges and make details pop, enhancing the overall 3d wood wall art effect. For example, in a forest scene, the foremost trees would be on the top layer, a distant mountain range on the bottom layer, and layers of hills and smaller trees would be sandwiched in between, creating a powerful illusion of parallax and distance. The final assembly, where these precisely cut pieces are painted or stained and then stacked, is a deeply satisfying process as the flat, individual components converge into a single, cohesive, and dynamic sculpture.
The surge in popularity of layered wood art is inextricably linked to the increasing accessibility of precision-cutting technologies, particularly CNC laser cutters. This technology has democratized the ability to create incredibly intricate and perfectly repeatable cuts that would be nearly impossible to achieve by hand. As a result, a vibrant community of makers, artists, and hobbyists has emerged, pushing the boundaries of what can be created. Online marketplaces and social media are filled with stunning examples of laser cut wall art, showcasing the versatility of the medium. This digital-to-physical workflow allows for limitless creativity; a design can be endlessly tweaked and refined on a computer before a single piece of wood is cut. This modern approach has turned a conceptually simple technique—stacking materials—into a sophisticated and highly sought-after art form, enabling creators to produce professional-quality decorative pieces for homes and businesses alike.
Choosing Your Materials and Tools
Embarking on your first DIY wood art project begins with gathering the right tools and materials. While the list isn’t long, each item plays a critical role in the final outcome. The quality of your materials will directly influence the quality of your art, from the crispness of the cut lines to the vibrancy of the finish. The foundational elements are a reliable laser cutter, a suitable type of wood, a strong adhesive, and a protective finish. Making informed choices at this stage will set you up for a smooth and rewarding creative process, preventing common frustrations and ensuring your finished piece looks professional and lasts for years to come.
The Heart of Your Workshop: The Laser Cutter
The wood laser cutter is the star of the show. For beginners, the market can seem daunting, but you can narrow your focus to a few key features. Most entry-level and hobbyist machines are diode lasers. They are more affordable and safer than their more powerful CO2 counterparts and are perfectly capable of cutting the thin materials typically used in layered art (usually 3mm or 1/8 inch). When choosing a machine, first consider its work area or bed size. This determines the maximum dimensions of a single piece you can cut. A larger bed offers more flexibility for creating substantial wall art, but also requires more space. Next, look at the laser power, measured in watts (W). A higher optical output wattage (e.g., 10W or 20W) will cut through wood faster and cleaner than a lower-wattage laser, reducing charring on the edges. Finally, ensure the machine is compatible with user-friendly software like LightBurn, which is the industry standard for hobbyists and provides immense control over the cutting process.
Selecting Your Canvas: The Wood
The type of wood you choose is just as important as the design itself. Each variety has distinct characteristics that affect cutting, finishing, and the final aesthetic. Here are the top choices for layered art:
- Baltic Birch Plywood: This is arguably the most popular choice. It’s strong, stable, and has a beautiful, clean edge that displays the layered nature of the plywood. It takes both paint and stain exceptionally well, allowing its subtle grain to show through. Look for high-grade versions (like B/BB) which have fewer internal voids or surface patches.
- MDF (Medium-Density Fiberboard): MDF is a budget-friendly option made from compressed wood fibers. Its main advantage is its perfectly uniform and smooth surface, which provides an ideal canvas for painting. However, it doesn’t have a natural wood grain, its cut edges can look fuzzy, and it produces very fine dust when cut. It does not take stain well and is significantly heavier than plywood.
- Basswood: A type of solid hardwood, basswood is very light in both weight and color. It’s soft and has a fine, minimal grain, making it incredibly easy for lower-power lasers to cut through cleanly. It’s an excellent choice for intricate, delicate designs. Its main drawback is that it’s generally more expensive and softer than plywood, making it more susceptible to dents.
Adhesives, Assembly, and Finishing Touches
Once your layers are cut, you’ll need to assemble them. The go-to adhesive is a quality PVA wood glue, such as Titebond II or III. These glues create a bond that is stronger than the wood itself and are easy to clean up with a damp cloth before they dry. Apply a thin, even layer of glue to each piece to prevent “squeeze-out,” which can mar the finish. To ensure a tight, flat bond while the glue dries, use clamps. Spring clamps are great for smaller pieces, while bar clamps are better for larger projects. Always use a piece of scrap wood between the clamp and your artwork to distribute pressure evenly and prevent denting. The final step is finishing. You can leave the wood raw for a natural look, but a finish will protect it. Acrylic paints are perfect for adding vibrant color, while wood stains can be used to create contrast between layers while enhancing the grain. To seal and protect the entire piece, apply a few coats of a clear varnish, like spray-on polyurethane, which is available in matte, satin, or gloss sheens.
The Creative Process Step by Step
With your design ready and materials in hand, it’s time to bring your vision to life. This is the hands-on part of the process where digital plans become a tangible piece of layered wood art. Following a methodical, step-by-step approach is key to achieving a clean, professional result. Rushing through any of these stages, particularly the preparation and assembly, can compromise the final quality. From calibrating your laser to the final press of the glued layers, each action contributes to the structural integrity and aesthetic appeal of your artwork. Let’s walk through the process from file to finished product.
Step 1: Sourcing and Preparing Your Design
Your journey begins with a digital design file, typically in a vector format like SVG, DXF, or AI. You have two main paths to get this file. The first is to purchase pre-made laser cut wood designs from online marketplaces. This is an excellent starting point for beginners, as these files are professionally designed, tested, and optimized for layering, allowing you to focus on the hands-on skills of cutting and finishing. The second path is to create your own design from scratch using vector graphics software like Adobe Illustrator, Inkscape (a free alternative), or Affinity Designer. This offers ultimate creative freedom but requires learning the principles of vector design and how to deconstruct an image into logical, cuttable layers. Regardless of the source, always inspect the file before cutting. Make sure all layers are distinct, closed shapes and are arranged efficiently on a digital canvas that matches your wood sheet size to minimize material waste.
Step 2: Setting Up the Laser and Cutting
Before you press ‘start’, calibrating your wood laser cutter for your specific material is the single most important step for achieving clean cuts. Every type of wood, and even different batches of the same wood, will behave differently. The goal is to find the perfect balance of power and speed. Use a small scrap piece of your chosen wood to run a “material test” or “test grid,” a file that cuts a series of squares at varying power and speed settings. You are looking for the setting that cuts completely through the wood in a single pass with the least amount of charring or “burning” on the edges. A good starting point for 3mm birch plywood on a 10W diode laser might be around 10 mm/s at 100% power, but your test will reveal the ideal numbers. Once calibrated, secure your wood sheet to the laser bed to ensure it is perfectly flat, focus the laser to the correct height, and begin the cutting process.
Step 3: Post-Processing and Finishing the Layers
After the laser has finished, your layers will be covered in a light layer of smoke residue and the edges may have some dark char. Cleaning is essential. Use a soft cloth lightly dampened with isopropyl alcohol or a simple baby wipe to gently clean the surface and edges of each piece, taking care not to snag any delicate details. Next, give each layer a light sanding with fine-grit sandpaper (220-grit is ideal). This removes any remaining residue from the surface and prepares the wood to accept paint or stain evenly. Now is the time to add color. It is vastly easier and cleaner to paint or stain each layer before assembly. You can use spray paints for quick, even coverage or apply acrylic paints with a brush for more control. For a natural look, use different shades of wood stain to create contrast between the layers. Allow all pieces to dry completely before moving to the final step.
Step 4: Assembly and Gluing
The final assembly transforms your stack of flat pieces into a cohesive 3d wood wall art masterpiece. Begin with a “dry fit”—stack all the layers without glue to ensure everything aligns perfectly. The easiest way to guarantee alignment during gluing is to use small offcuts from your wood sheet as registration guides. Place the largest, bottom layer down. Then, place a few small scrap pieces against two of its perpendicular edges to create a corner jig. Now, you can place each subsequent layer into that corner, ensuring they are all perfectly aligned. Apply a thin, even coat of wood glue to the back of the layer you are adding. A small brush or roller can help spread the glue evenly. Avoid using too much glue, as it will “squeeze out” and be difficult to clean up. Press each layer firmly into place. Once all layers are stacked, place a heavy, flat object (like a few large books) on top while the glue cures for at least a few hours, or use clamps for the strongest possible bond.
Conclusions
You now have the knowledge to create your own breathtaking layered wood art. From selecting designs to the final assembly, the process is a rewarding journey of creativity. We encourage you to experiment with different woods and finishes to develop your unique style. Start your next project today and bring your artistic visions to life with your wood laser cutter.
Frequently Asked Questions
Q: What is the best type of wood for a beginner making layered art?
A: Baltic Birch Plywood is highly recommended for beginners. It’s strong, stable, cuts cleanly, and is very receptive to both paint and stain, making it a versatile and forgiving material to work with.
Q: Do I need an expensive laser cutter to get started?
A: No, you don’t. Entry-level diode lasers are affordable and more than capable of cutting the thin materials (typically 3mm or 1/8 inch) used in most layered wood art projects. They are a great starting point for hobbyists.
Q: Should I paint my project before or after I glue the layers together?
A: It is significantly easier and cleaner to paint or stain each individual layer *before* assembling them. This allows for crisp color separation between layers and prevents you from accidentally getting paint on adjacent parts.
Q: How do I prevent the layers from sliding around while gluing?
A: After a “dry fit” to check alignment, place your bottom layer down and use small scrap pieces of wood against two edges to create a corner jig. As you glue and stack each subsequent layer, you can press it firmly into that corner to ensure perfect alignment throughout the stack.
Block "subscribe-popup" not found