Tutorials
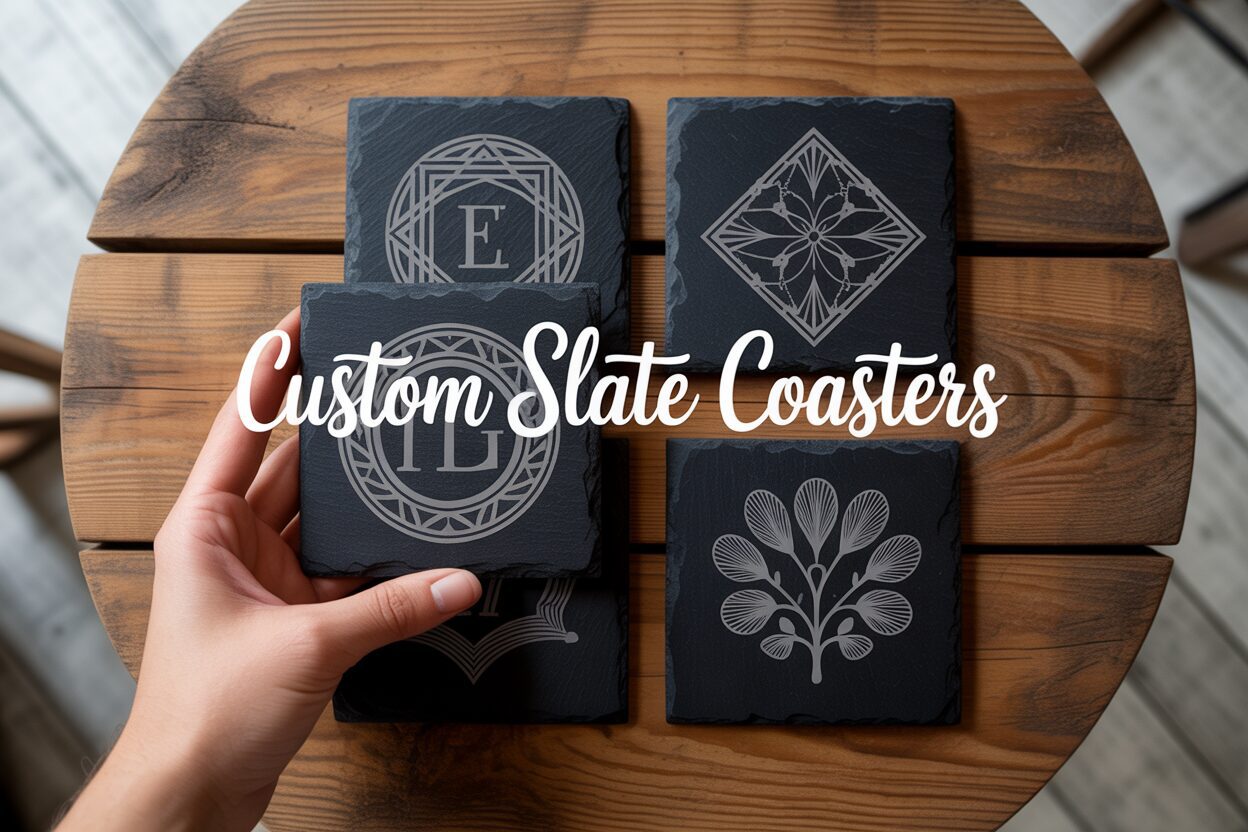
A Guide to Creating Custom Slate Coasters with Laser Engraving
Nov
Estimated reading time: 7 minutes
Key Takeaways
- Material Selection is Crucial: For crisp engravings, choose slate coasters with a smooth, uniform surface, consistent thickness, and high material quality, avoiding natural clefts or impurities.
- Preparation is Non-Negotiable: Always clean slate blanks with isopropyl alcohol before engraving to remove oils and dust, ensuring a clean, high-contrast result.
- Design for Contrast: Use high-resolution (300+ DPI) or vector (SVG) files that are pure black and white. Avoid fine lines and delicate fonts, as they can get lost on the slate’s natural texture.
- Test Your Settings: Every laser and slate batch is different. Use a material test grid to find the optimal balance of power, speed, and resolution for the brightest mark without causing flaking.
- Finish for a Professional Look: After engraving and cleaning, seal the coaster with food-safe mineral oil to dramatically enhance contrast, protect the stone, and give it a rich, finished appearance.
Table of Contents
- Selecting and Preparing Your Slate for Engraving
- Creating and Optimizing Slate Coaster Designs
- Fine-Tuning Your Laser Engraving Slate Settings
- The Engraving Process and Professional Finishing
- Conclusions
- Frequently Asked Questions
Elevate your home decor or create the perfect gift with custom slate coasters. This tutorial walks you through the entire process of making beautifully engraved slate coasters using your laser engraver. We’ll explore creative designs, optimal machine settings, and finishing techniques to help you master this popular and profitable project, turning you into a DIY slate coasters expert.
Selecting and Preparing Your Slate for Engraving
The foundation of a stunning laser-engraved coaster is the raw material itself. Choosing the right slate is just as critical as perfecting your design or laser settings. A poor-quality or improperly prepared slate will yield disappointing results, no matter how skilled you are with the laser. Let’s explore how to select the best blanks and prepare them for a flawless engraving.
When sourcing your coasters, three key factors should guide your decision: surface uniformity, thickness, and material quality. Surface uniformity is paramount. Natural slate often has a “cleft” or riven texture, which, while beautiful, is problematic for laser engraving. The laser’s power is focused at a precise distance; an uneven surface means parts of your design will be in focus while others will be blurry or faint. For crisp, consistent results, always seek out slate coasters with a honed or smooth finish. Inspect them for significant dips, bumps, or flaking layers. While a perfectly flat surface is rare, the goal is to minimize topographical variation across the engraving area. Secondly, consider the thickness. Coasters within a single batch should be as uniform in thickness as possible. If one coaster is 4mm thick and the next is 7mm, you will have to manually refocus the laser for each piece, drastically slowing down your workflow and introducing opportunities for error. Consistent thickness allows you to set your focus once for an entire production run. Finally, evaluate the material quality. High-quality slate has a deep, uniform color and is free from impurities like pyrite (fool’s gold). These metallic flecks can reflect the laser beam, cause pitting, or react unpredictably, marring your final design. A good piece of slate will engrave to a clean, light gray or off-white color, creating a striking contrast.
You can source blank slate coasters from a variety of places, depending on your needs.
- Online Marketplaces: Websites like Amazon, Etsy, and Alibaba are excellent sources, especially for bulk orders. Search for terms like “blank slate coasters for engraving” or “honed slate coasters” to find suppliers who cater specifically to crafters.
- Craft Stores: Large craft retailers often carry packs of blank slate coasters, which is perfect for smaller projects or for testing before committing to a larger purchase.
- Wholesale Suppliers: If you are starting a business, look for restaurant or promotional product wholesale suppliers. They often provide higher quality, more consistent products at a better price for large quantities.
The Crucial Preparation Steps
Once you have selected your slate, you cannot simply place it in the laser and press start. Preparation is a non-negotiable step for achieving professional-grade results. Slate blanks are often coated in mineral oil by the manufacturer to give them a dark, lustrous appearance. They also accumulate dust and natural oils from handling. Any of these contaminants will interfere with the laser, causing an inconsistent, splotchy engraving. The solution is simple: cleaning with isopropyl alcohol (IPA). Use a high concentration, preferably 90% or higher, as it evaporates quickly and leaves no residue. Apply a generous amount of IPA to a lint-free cloth, such as a microfiber towel, and wipe down the entire surface of the coaster with firm pressure. You will likely see dark residue come off onto the cloth—this is proof that you are removing the slate dust and oils effectively. The most important part of this process is to allow the slate to dry completely. Engraving a damp surface will turn the moisture into steam, which can interfere with the laser beam and potentially cloud your laser’s lens. Fortunately, IPA evaporates in just a minute or two. Once dry, handle the coasters only by their edges to avoid re-contaminating the pristine surface with fingerprints. This simple cleaning routine ensures the laser interacts directly and cleanly with the slate, creating the sharp, high-contrast mark you’re looking for.
Creating and Optimizing Slate Coaster Designs
The digital blueprint of your design is the single most important factor in achieving a crisp, professional engraving. The choice of file format and the design’s characteristics must be tailored specifically to the medium of slate. For laser engraving, vector files are almost always the superior choice. Formats like SVG (Scalable Vector Graphics) and AI (Adobe Illustrator) are ideal because they define images using mathematical paths, not pixels. This means you can scale your design to any size without any loss of quality, ensuring that every line and curve remains perfectly sharp. If you must use a raster (pixel-based) image, such as a PNG, it is absolutely essential that it be high-resolution—at least 300 DPI (dots per inch) at the final coaster size. A low-resolution image will result in a pixelated, blurry engraving. PNGs are preferable to JPEGs because they support transparent backgrounds, which makes isolating your design much easier.
When it comes to sourcing your artwork, you have two primary paths: creating your own or using pre-made designs. For those looking to make truly unique personalized slate coasters, creating your own is incredibly rewarding. Software like Adobe Illustrator (professional) or Inkscape (free) are powerful tools for creating vector graphics from scratch. This allows you to design custom monograms, incorporate specific dates for a wedding gift, or turn a company logo into a stunning piece of corporate swag. The process of making diy slate coasters from your own artwork offers ultimate creative control. Alternatively, if you’re not a designer, the internet is full of high-quality, pre-made files. Websites like Etsy, Creative Fabrica, and Vecteezy offer vast libraries of designs, many created specifically for laser cutting and engraving. Just be sure to check the licensing terms to ensure you have the rights for commercial use if you plan to sell your coasters.
Designing for the Medium: Slate-Specific Considerations
Not every design that looks good on a screen will translate well to slate. This natural stone has its own distinct personality and limitations that you must design around. The most critical principle is contrast. Laser engraving on slate is essentially a binary process: the laser ablates the surface, turning it a light gray or off-white, or it leaves it untouched and dark. There is no subtle shading. Therefore, your design file should be pure black and white. Grayscale images will be interpreted by the laser software through a process called dithering, which uses patterns of dots to simulate shades of gray, but for the cleanest result, stick to solid shapes and lines. Secondly, you must avoid overly fine details. Slate’s natural, slightly uneven texture can cause very thin lines or tiny text to break up or become lost entirely. As a rule of thumb, ensure your lines have a tangible thickness and that text is bold and large enough to be legible. A delicate, wispy font might look elegant on paper but will become an illegible mess on a riven stone surface. Think bold, clear, and impactful. This consideration is key when designing personalized slate coasters with names or dates, as legibility is paramount.
Fine-Tuning Your Laser Engraving Slate Settings
Dialing in the perfect laser engraving slate settings is less of a rigid formula and more of a scientific art. Every laser is slightly different, and even slate from the same supplier can vary from batch to batch. Understanding the core variables—power, speed, and resolution—is the key to consistently achieving a beautiful, high-contrast mark. Think of these three settings as a balancing act. Power determines the intensity of the laser beam’s energy. Speed dictates how fast the laser head moves across the material, and therefore how long that energy is applied to any single point. Finally, Resolution, often measured in Lines Per Inch (LPI) or Dots Per Inch (DPI), controls the overlap between each pass of the laser. A low power setting at a slow speed can produce the same result as a high power setting at a fast speed. The goal is to find the combination that efficiently ablates the surface layer of the slate, turning it a light gray or white, without blasting too deep and causing the material to flake or become brittle.
Recommended Starting Points and The Power of Testing
While every machine is unique, we can establish a reliable starting range. It is crucial to remember that these are baselines for experimentation, not absolute rules. Always begin with lower power and higher speed to avoid damaging your material.
- For Diode Lasers (5W-20W Optical Power): These lasers have less power, so they require slower speeds. A good starting point for a 10W diode laser is a speed of around 1500-2500 mm/min at 80-90% power. For resolution, start with an LPI of around 254-300. The engraving process with a diode will be slower, but it is entirely capable of producing fantastic results.
- For CO2 Lasers (40W+): CO2 lasers are much more powerful and efficient on slate. Their settings will involve significantly higher speeds and lower power percentages. For a 40-60W machine, begin with a speed of 200-300 mm/s (note the units are seconds, not minutes) and a power setting of only 12-20%. Overpowering with a CO2 laser is a common mistake that leads to a melted, glassy appearance rather than a crisp mark.
The single most effective method for perfecting your settings is to run a material test grid. Most laser software (like LightBurn) has a built-in feature to create one. This function engraves a series of small squares on a scrap piece of slate, with each square having a unique combination of speed and power. Once the test is complete, examine the grid closely. Some squares may be too faint, while others might be dark, burned, or flaky to the touch. Your goal is to find the square that produces the brightest, most uniform white or light gray mark with zero flaking when you run your fingernail over it. This “sweet spot” is the key to producing professional-quality engraved slate coasters every single time. Once you find these ideal settings for your specific laser and slate batch, save them in your software library for easy access on future projects.
The Engraving Process and Professional Finishing
With your slate cleaned, your design perfected, and your laser settings dialed in, you are ready for the most exciting part: bringing your creation to life. The physical engraving process requires precision and care to ensure the digital design translates perfectly onto the stone. The first and most critical step is focusing the laser. An out-of-focus beam will be wider and less powerful, resulting in a blurry, faint engraving. Use your laser’s specific focusing tool, whether it’s a fixed-focus block, a sensor, or an auto-focus function, to set the correct distance between the laser nozzle and the surface of the slate. Next, place your coaster in the laser bed and secure it so it cannot shift during the engraving. To guarantee perfect placement of your design, use your software’s “frame” or “trace” function. This will run the laser head around the outer boundary of your design with the beam on at a very low power (or just with the red dot pointer), showing you exactly where the engraving will occur. Adjust the coaster’s position until the frame is perfectly centered, then you’re ready to go. Turn on your air assist and ventilation, close the lid, and run the job.
Post-Processing for a Professional Finish
Once the laser has finished its work, the process isn’t quite over. The raw engraved coaster will look good, but a few simple finishing steps will elevate it to a professional-quality product. When you remove the coaster from the machine, you will see a fine layer of light gray dust covering the engraved areas. This is the pulverized slate that was ablated by the laser. Your first task is to clean this off. Take a soft brush (an old toothbrush works wonderfully) or a damp, lint-free cloth and gently wipe the surface. This removes all the loose debris, leaving behind only the clean, etched stone. Be gentle to avoid scratching the slate or damaging the crisp edges of your design.
Now for the final touch that makes all the difference: sealing the slate. This step dramatically enhances the contrast of your design, protects the stone, and gives your custom slate coasters a deep, rich, finished appearance. The most common and effective method is to use food-safe mineral oil. Since coasters will come into contact with beverages, using a non-toxic finish is essential. Apply a small amount of mineral oil to a clean cloth and wipe it over the entire surface of the coaster. You will immediately see the dark, un-engraved slate deepen in color, making the light gray engraving “pop” with incredible contrast. Let the oil soak in for 10-15 minutes, then take another clean, dry cloth and buff off any excess. This simple step not only makes the design more vibrant but also helps to condition the slate and give it a slight resistance to water spots. The result is a set of stunning, durable, and professionally finished engraved slate coasters ready for use or sale.
Conclusions
You now have the knowledge to create stunning personalized slate coasters for any occasion. By experimenting with different slate coaster designs and perfecting your laser engraving settings, you can produce professional-quality pieces. Don’t hesitate to start your own project and enjoy the satisfaction of bringing your unique creations to life on slate.
Interested in more Slate Coaster? Check out our Slate Coaster laser file designs: Click here!
Frequently Asked Questions
Q: What is the best type of slate for laser engraving?
A: Look for slate coasters with a honed or smooth finish, uniform thickness, and consistent color, free from metallic impurities like pyrite. An uneven, riven texture will result in a blurry or inconsistent engraving.
Q: Why do I need to clean slate coasters before engraving?
A: Slate blanks often have a coating of mineral oil, plus accumulated dust or fingerprints from handling. Cleaning them with a high concentration of isopropyl alcohol ensures the laser interacts directly with the stone, preventing a splotchy, uneven, or weak engraving.
Q: What are the best laser settings for slate coasters?
A: Settings vary significantly by machine. For a 10W diode laser, start around 1500-2500 mm/min at 80-90% power. For a 40W+ CO2 laser, start much faster at 200-300 mm/s with only 12-20% power. The best method is to always run a material test grid on a scrap piece to find the perfect settings for your specific laser and slate.
Q: How do I make the engraving on my slate coaster stand out?
A: After cleaning off the engraving dust, apply a coat of food-safe mineral oil. This deepens the dark color of the un-engraved slate, which dramatically increases the contrast and makes the light gray etched design “pop” for a professional, finished look.
Block "subscribe-popup" not found