Projects
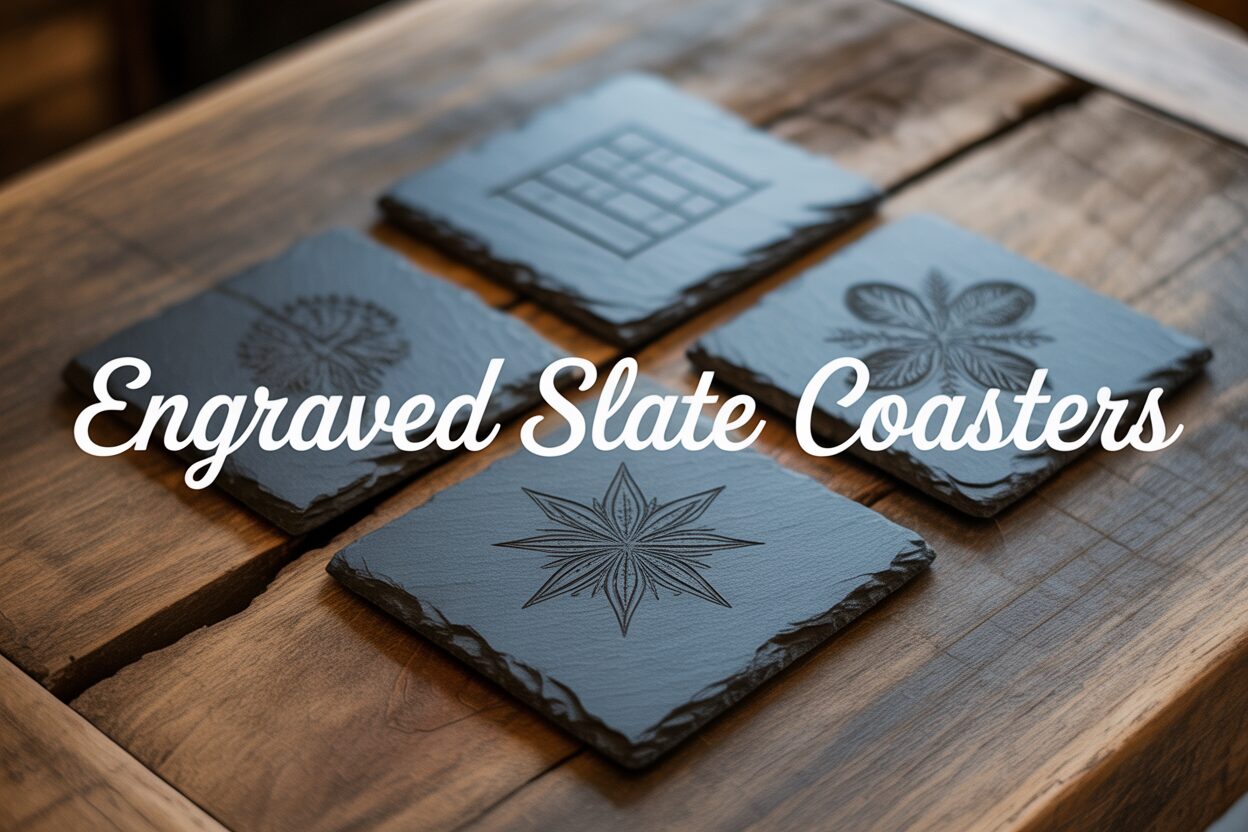
A Guide to Creating Beautiful Engraved Slate Coasters
Oct
Estimated reading time: 10 minutes
Key Takeaways
- Always Start with Unsealed Slate: For the cleanest, sharpest, and highest-contrast engraving, you must use natural, unsealed slate. Engraving pre-sealed slate produces toxic fumes, a sticky residue, and a blurry result.
- Artwork Preparation is Critical: Use high-resolution (300+ DPI) raster images for photos and convert all text to paths in vector files (like SVG) to avoid formatting errors. Prepare photos by converting them to grayscale, boosting contrast, and sharpening details.
- Test Your Settings: Laser settings (power, speed, DPI) vary by machine. Always perform a test run on a spare piece of slate to find the optimal balance that creates a bright gray mark without overheating the stone.
- Focus is Non-Negotiable: A perfectly focused laser is the key to a crisp design. You must check and set the focus for every single coaster due to slight variations in natural stone thickness.
- Finish for a Professional Look: After engraving, clean the coaster with water and then apply a food-safe mineral oil. This final step dramatically darkens the slate, makes the light-gray engraving “pop,” and protects the coaster from stains.
Table of Contents
- Selecting the Perfect Slate Coasters for Engraving
- Preparing Your Artwork for Slate Engraving
- Mastering Laser Engraving Techniques for Slate
- Finishing and Protecting Your Engraved Slate Coasters
- Conclusions
- Frequently Asked Questions
Discover the art of creating stunning engraved slate coasters. This guide will walk you through the entire process, from selecting the right materials to mastering the laser engraving settings. Whether you’re making personalized gifts or starting a new business venture, you’ll find all the information you need to produce high-quality, custom slate coasters that are sure to impress.
Selecting the Perfect Slate Coasters for Engraving
The foundation of a stunning engraved coaster is the raw material itself. While it may seem like all slate is created equal, the quality of your blank coasters will have the single greatest impact on the final result. Choosing wisely at this stage will save you time, frustration, and material, ensuring your laser engraving efforts produce the crisp, high-contrast results you envision. Let’s break down the key characteristics to look for when selecting the perfect slate for your project.
Material Quality and Surface Texture
The ideal slate for engraving is dense, uniform, and free from impurities like pyrite (fool’s gold), which can resist the laser and cause inconsistent spots in your design. Low-quality slate tends to be more brittle and may flake or chip easily, both during shipping and under the heat of the laser. When you handle a quality slate coaster, it should feel substantial and solid. The texture of the surface is another critical consideration. You will generally encounter two types: riven and smooth. Riven slate has a natural, slightly uneven, and layered texture that results from the way the stone is split. While this can provide a beautiful rustic look, it presents a challenge for engraving. The varying heights across the surface mean that some parts of your design may be slightly out of focus for the laser, leading to softer lines and less detail. For beginners or for projects with intricate text and fine details, a smooth, honed surface is highly recommended. A flatter surface ensures a consistent focal distance for the laser beam, resulting in a uniformly sharp and clear engraving across the entire design.
Interested in more Slate Coaster? Check out our Slate Coaster laser file designs: Click here!
Natural vs. Sealed Slate: The Engraver’s Choice
This is perhaps the most important decision you’ll make when sourcing your blanks. Slate coasters are sold in two primary states: natural (unsealed) and sealed. Natural slate is raw stone. It is porous, has a lighter gray, matte appearance, and may feel slightly chalky to the touch. Sealed slate has been treated with a sealant, often a food-safe acrylic, to make it water-resistant and give it a darker, semi-gloss finish. For laser engraving, you should always choose natural, unsealed slate. The engraving process works by ablating, or vaporizing, the top layer of the stone, which creates the characteristic light gray, high-contrast mark. When you try to engrave a sealed coaster, the laser first has to burn through the chemical sealant. This can produce noxious fumes, leave a sticky, difficult-to-clean residue on the coaster, and often results in a blurry, discolored, and low-contrast engraving. You will achieve a much cleaner, sharper, and more professional result by engraving the raw slate first and then applying a food-safe sealant afterward to protect the coaster and enhance the contrast of your design.
Sourcing and Inspecting Your Blanks
High-quality slate coaster blanks can be found from a variety of sources. Suppliers that cater specifically to laser cutting and engraving communities are often a great place to start, as they typically vet their materials for consistency and quality. Online marketplaces like Etsy and Amazon also offer a wide selection, but be sure to read reviews carefully to ensure you are buying unsealed slate. Even home goods stores can be a source, but you must verify that the coasters are not pre-sealed. Once your blanks arrive, take a moment to inspect them before starting your project. Look for the following:
- Uniformity: Are the coasters consistent in thickness and size? Significant variations can affect your laser setup from one coaster to the next.
- Integrity: Check for major chips on the edges or cracks running across the surface. While natural stone has imperfections, large flaws can ruin a piece.
- Flatness: Lay the coaster on a flat surface. A significant wobble indicates a warped piece that will be difficult to engrave evenly.
- Finish: Confirm they are unsealed. The surface should look dull and matte. If you’re unsure, place a small drop of water on the back; on unsealed slate, it will slowly begin to absorb and darken the spot.
Taking the time to source and inspect your materials properly is a non-negotiable step in creating beautiful custom slate coasters that look professional and are built to last.
Preparing Your Artwork for Slate Engraving
Once you have sourced your perfect slate blanks, the next crucial step is preparing your digital artwork. The quality of your design file is just as important as the quality of the slate; a low-resolution or poorly formatted image will result in a disappointing engraving, no matter how good your laser is. For slate engraving, your artwork will fall into one of two categories: vector or raster. Vector files, like SVG (Scalable Vector Graphics), are made of mathematical paths and are ideal for text, logos, and line art. They can be scaled to any size without losing quality. Raster files, like PNG or JPG, are made of pixels and are used for photographs. For raster images, high resolution is non-negotiable. Aim for a resolution of at least 300 DPI (dots per inch) at the final coaster size to avoid a blurry, pixelated result.
Preparing Photographic Images for Slate
Engraving photographs on slate requires a specific preparation process because the laser operates in a binary fashion—it either fires or it doesn’t. It cannot create true grayscale shades. To simulate tones, we use a technique called dithering, which converts the image into a pattern of fine dots. Your laser software (like LightBurn) will have built-in dithering algorithms, with options like Jarvis or Floyd-Steinberg being popular choices for their ability to produce realistic-looking results. Before you dither, however, you must prepare the photo. Start with a clear, well-lit photograph; images with deep shadows or poor lighting will not engrave well.
- Convert to Grayscale: First, convert your color photo to black and white. This removes color data and allows you to focus purely on light and shadow.
- Boost Contrast: Slate is a dark material, and the engraving is a light gray. To get a dynamic result, you need high contrast in your image. Use your photo editor’s Levels or Curves tools to make the whites brighter and the blacks deeper, which will make the subject “pop” against the background.
- Sharpen the Image: Apply a sharpening filter (like an Unsharp Mask) to enhance the fine details. This helps the dithering algorithm create a crisper pattern, leading to a more defined engraving.
After these adjustments, you can import the image into your laser software and apply the dithering pattern. It’s often wise to run a test on a spare piece of slate to see which dithering algorithm gives you the best result for your specific image.
Creating Vector Designs for Personalization
For creating personalized slate coasters with names, dates, monograms, or logos, vector is the superior format. Using vector design software like Adobe Illustrator or the free alternative Inkscape, you can create perfectly clean lines and shapes. When designing, keep the medium in mind. Extremely thin lines or tiny, delicate fonts may get lost or chip away on the natural texture of the slate. Opt for fonts that are bold and clear. A good rule of thumb is to ensure all design elements, especially text serifs or line art, have a minimum thickness. Before exporting your final SVG file, it is critical to convert all text to paths or curves. This process turns the text from an editable font into a fixed vector shape, ensuring that the design will look exactly the same in your laser software, even if that computer doesn’t have the specific font installed. This single step prevents countless potential formatting errors and is a professional best practice for all laser engraving projects.
Mastering Laser Engraving Techniques for Slate
With your artwork prepared and your slate coasters ready, it’s time to bring your design to life at the laser. This is where art meets science; achieving that perfect, high-contrast mark on slate is a matter of dialing in the right settings for your specific machine. While settings will vary between different types of lasers (diode vs. CO2) and their wattages, the principles remain the same. The goal is to ablate the very top surface of the slate, turning it a light gray, without applying so much power that you overheat and melt the surrounding stone, which results in a blurry or glassy finish.
Optimal Laser Settings: The Power, Speed, and DPI Trio
The three primary settings you will control are power, speed, and DPI (or line interval). Think of them as a balancing act:
- Power: This determines the intensity of the laser beam. For slate, you don’t need maximum power. In fact, too much power is the most common mistake, leading to a less distinct engraving. You’re looking for just enough energy to change the color of the slate. For a 10W diode laser, a good starting point might be 20-30% power, while a 50W CO2 laser might start as low as 10-15%.
- Speed: This is how fast the laser head moves across the material. A slower speed delivers more energy to a single spot, similar to increasing power. A faster speed is less intense. For slate, a moderate speed often yields the best results. For example, on a diode laser, a speed of 2000-3000 mm/min is a common starting range.
- DPI (Dots Per Inch) / Line Interval: This setting dictates the resolution of your engraving by controlling how close together each engraved line is. A higher DPI (smaller line interval) creates a more solid, filled-in appearance, which is excellent for photos. A lower DPI will be faster but may leave visible lines. A good starting point for detailed work is around 250-300 DPI.
The most critical part of this process is understanding that these settings are interconnected. If your engraving is too light, you can either increase the power slightly or decrease the speed.
The Non-Negotiable Step: Laser Focusing
No combination of settings will save you if your laser is out of focus. Focusing the laser concentrates the beam to its smallest and most powerful point. An unfocused beam is wider and weaker, resulting in a fuzzy, soft, and indistinct engraving with no sharp edges. Every laser machine has its own method for focusing, whether it’s a manual adjustment with a fixed-focus block or an automatic sensor. Because natural slate can have slight variations in thickness, you must check your focus for every single coaster you place in the machine. A difference of even a single millimeter can be the difference between a crisp masterpiece and a blurry failure. This single step is arguably the most important part of the machine setup.
Choosing Your Engraving Technique and Performing a Test Run
Your laser software will allow you to engrave in two main modes: raster and vector. Raster engraving moves back and forth like an inkjet printer, firing the laser to create pixels. This is the method used for photographs and filled-in shapes. Vector engraving, sometimes called scoring, follows the lines of your vector design. This is perfect for outlining text or creating simple line art, and it’s significantly faster than rastering. You can even combine both in a single project. Before you commit your final design to a good slate coaster, always perform a test run. The best way to do this is to create a test grid on a spare coaster or the back of one of your pieces. This grid can contain a series of small squares, each with a different combination of speed and power settings. Engrave the grid, clean it off, and examine the results. Look for the square that gives you the brightest, most consistent light-gray mark with the sharpest detail. These are your golden settings. Investing five minutes in a test run will save you from potentially ruining your entire batch of coasters.
Finishing and Protecting Your Engraved Slate Coasters
Once the laser has finished its work and the smoke has cleared, your coaster is engraved, but it is not yet complete. The final steps of cleaning and finishing are what transform a raw engraving into a polished, professional product. This stage is crucial for both the aesthetic appeal and the long-term durability of your custom slate coasters, enhancing the visual contrast of your design and protecting it from daily use.
Cleaning Your Freshly Engraved Coaster
The laser engraving process ablates the surface of the slate, leaving behind a very fine, light gray dust and residue. Your first step is to clean this off thoroughly. Do not be alarmed if the engraving looks a bit faint or dusty at first; its true beauty will be revealed after cleaning and sealing.
- Initial Dust Removal: Start by gently brushing the surface with a soft-bristled brush (like a paintbrush or a soft toothbrush) to remove the majority of the loose dust. You can also use a can of compressed air to blow the dust out of the fine crevices of your design.
- Washing: Next, wash the coaster under cool running water. Use a soft cloth or your fingers to gently wipe the surface. Avoid using abrasive sponges or harsh scrubbing, which could potentially scratch or chip the delicate details of the engraving. A mild dish soap can be used if there is any stubborn residue, but for most projects, water is sufficient.
- Drying: Thoroughly dry the coaster with a soft, lint-free cloth. It is essential that the coaster is completely dry before you proceed to the next step, as any trapped moisture can interfere with the sealant. Let it air dry for at least an hour after patting it dry to be certain.
To Seal or Not to Seal: Enhancing and Protecting Your Work
After cleaning, you have a decision to make. While you can leave the engraved slate coasters in their natural, unsealed state, applying a sealant is highly recommended for several reasons. The primary benefit is the dramatic enhancement of contrast. Applying a sealant, like mineral oil, will darken the gray slate to a rich, near-black color, which makes the light gray engraving “pop” with incredible clarity. Secondly, sealing protects the coaster. Natural slate is porous and can absorb oils from fingerprints or stain from spills. A food-safe sealant creates a barrier that makes the coaster water-resistant and easier to clean. The only real con is a matter of aesthetic preference; sealing will give the coaster a satin or semi-gloss finish, whereas leaving it unsealed preserves its natural, matte look.
Applying Sealant for a Professional Finish
For coasters, it is imperative to use a sealant that is rated as food-safe. The most popular and effective choice is food-grade mineral oil, the same kind used for wooden cutting boards. It’s inexpensive, easy to apply, and brings out the slate’s natural beauty.
- Step 1: Preparation. Ensure your coaster is completely clean and dry. Place it on a protected surface, like a piece of cardboard or craft paper.
- Step 2: Application. Apply a small amount of food-safe mineral oil onto a clean, lint-free cloth (a microfiber cloth works perfectly).
- Step 3: Wiping it On. Gently wipe a thin, even coat of oil over the entire top surface and the edges of the coaster. Work the oil into the engraved areas as well. You will immediately see the slate darken and the contrast of your design intensify.
- Step 4: Let it Penetrate. Allow the oil to sit and soak into the slate for about 15-20 minutes.
- Step 5: Buffing it Off. This is the most critical step. Take a separate, clean, dry, lint-free cloth and thoroughly buff the entire coaster. Your goal is to remove all excess surface oil. If you leave excess oil, the coaster will feel greasy and sticky. After buffing, the surface should feel smooth and dry to the touch, not oily.
- Step 6: Curing. Let the finished coaster cure for at least 24 hours before use. This allows the oil to fully set. The result is a beautiful, protected, and vibrant coaster ready to be used or gifted.
Conclusions
You now have the knowledge to create your own beautiful engraved slate coasters. With the right materials, a creative design, and careful attention to laser settings, you can produce professional-quality results. Don’t be afraid to experiment with different designs and techniques to develop your unique style. The world of laser engraving is vast and full of creative possibilities.
Frequently Asked Questions
Q: Why can’t I use sealed slate coasters for laser engraving?
A: You should never use sealed slate because the laser first has to burn through the chemical sealant. This process creates noxious fumes, leaves a sticky residue that is hard to clean, and results in a blurry, low-contrast engraving. Always engrave on natural, unsealed slate first, then apply a sealant afterward.
Q: What are the best starting laser settings for slate?
A: Settings vary greatly between machines. However, a good starting principle is to use lower power and moderate speed. For a 10W diode laser, try around 20-30% power at 2000-3000 mm/min. For a 50W CO2 laser, start as low as 10-15% power. The best way to find your ideal settings is to run a test grid with different power/speed combinations on a scrap piece.
Q: How do I get the best results when engraving a photo on slate?
A: Photo engraving on slate requires three key preparation steps before sending it to your laser software: 1) Convert the image to grayscale, 2) significantly boost the contrast to make whites brighter and blacks deeper, and 3) apply a sharpening filter to enhance details. This preparation ensures the dithering process in your laser software creates a crisp, clear result.
Q: Do I have to seal my engraved slate coasters?
A: While not strictly mandatory, sealing is highly recommended. Applying a food-safe mineral oil dramatically enhances the contrast by darkening the slate, which makes the light gray engraving “pop.” It also protects the porous slate from stains and fingerprints, making the coaster more durable and easier to clean.
Block "subscribe-popup" not found