Projects
A Guide to Crafting 3D Art with Multilayer Laser Cut Files
Aug
Estimated reading time: 6 minutes
Key Takeaways
- Understanding Multilayer Files: The core of 3D laser art is the multilayer file, which deconstructs a 3D object into 2D slices that are cut and stacked to create depth and dimension.
- Material Selection is Crucial: The choice of material significantly impacts the final look and feel. Baltic birch plywood is a stable all-rounder, MDF is ideal for painted projects, and hardwoods offer a premium, natural finish.
- Quality Matters: A high-quality digital file with clean vector paths, logical layering, and clear instructions is essential for a successful and frustration-free project.
- Process is Key: Success lies in a methodical process: always perform a test cut to perfect your laser settings, dry-fit all pieces before gluing, and apply finishes carefully for a professional look.
Table of Contents
- The Magic of Multilayer Designs
- From Flat Silhouettes to Richly Detailed Art
- Selecting the Perfect Design and Materials
- Evaluating Your Digital Blueprint: What Makes a Good File?
- From Digital File to Physical Masterpiece
- Setting Up and Executing the Cut
- The Assembly Stage: Bringing the Layers Together
- Applying the Finishing Touches
- Conclusions
- Frequently Asked Questions
Dive into the captivating world of 3D laser art, a craft that adds incredible depth and dimension to wooden decor. This article will guide you through the process, from choosing the perfect multilayer laser cut file to assembling a beautiful piece of art. Discover how easy it is to create professional-looking projects with the right techniques and designs.
The Magic of Multilayer Designs
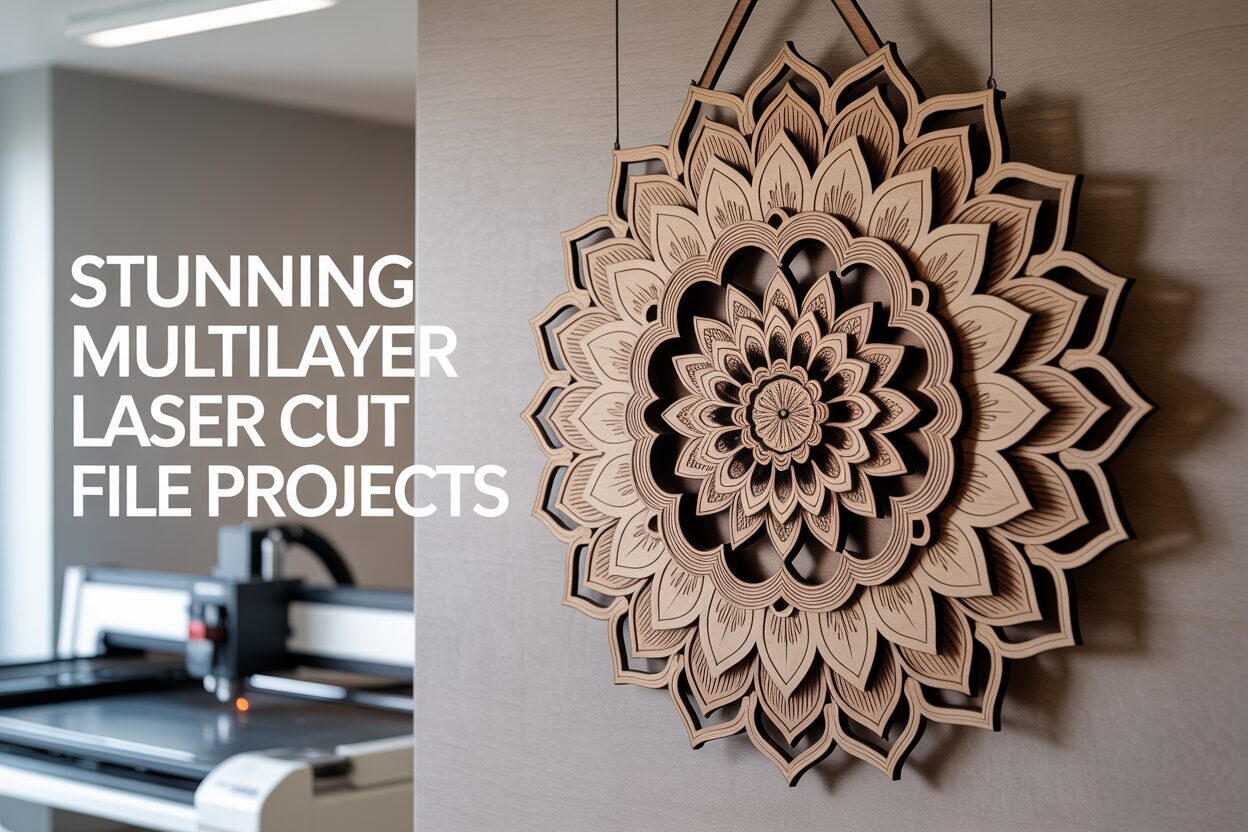
At the heart of every breathtaking piece of 3D laser-cut art lies a deceptively simple concept: the multilayer laser cut file. Imagine a digital blueprint, not for a single flat object, but for a sculpture deconstructed into a series of two-dimensional slices. Each slice, or layer, is a distinct shape designed to be cut individually from a sheet of material like plywood or acrylic. When these flat, precisely cut pieces are reassembled in a specific order, they stack upon one another to create an illusion of depth, texture, and form. This is the fundamental magic of the process—transforming a stack of flat cutouts into a cohesive, three-dimensional masterpiece. A well-designed file might contain anywhere from three or four layers for a simple ornament to dozens for a highly intricate piece of laser cut wall art, where each successive layer adds a new level of detail, shadow, and perspective.
Interested in more Ornament? Check out our Ornament laser file designs: Click here!
From Flat Silhouettes to Richly Detailed Art
The distinction between a standard, single-layer design and layered laser cut files is the difference between a photograph and a sculpture. A single-layer cut produces a silhouette or an etching—beautiful in its own right, but fundamentally two-dimensional. It’s a single outline cut from one piece of material. A multilayer design, however, embraces the Z-axis. Consider a design of a mountain landscape. In a single-layer cut, the mountains, trees, and sun would all exist on the same plane. In a multilayer version, the sun might be the rearmost layer, followed by distant mountains, then a layer of closer, more detailed hills, and finally a foreground layer with individual trees. When stacked, the physical space between these layers creates natural shadows that shift with the light, giving the piece a dynamic quality and a tangible sense of depth that a flat design simply cannot replicate. This technique is what allows artists to create complex mandalas with cascading geometric patterns or animal portraits where fur, feathers, and facial features are rendered with astonishing realism through careful layering.
To bring these intricate designs from a computer screen to your laser cutter, they are saved in specific vector file formats. The two most common formats you will encounter for a wood projects cnc file are SVG and DXF.
- SVG (Scalable Vector Graphics): This is the modern standard for laser cutting files. As a vector format, an SVG can be scaled to any size without losing resolution, ensuring your cuts are always crisp and clean. SVGs can also store additional data, such as colors. Designers often use different colors to designate different layers or operations (e.g., red for cut lines, blue for score lines, black for engraving), which makes the file intuitive to work with in laser control software.
- DXF (Drawing Exchange Format): An older but incredibly reliable format, DXF was originally developed by Autodesk for its AutoCAD software. It is a universal language for 2D and 3D design data and is compatible with nearly every CNC machine and laser cutter on the market. While it lacks some of the modern features of SVG, its simplicity and widespread support make it a go-to choice for ensuring compatibility.
Both formats are supported by popular laser software like LightBurn, LaserGRBL, and RDWorks, ensuring that no matter which multilayer laser cut file you choose, it will be ready to become your next stunning project.
Selecting the Perfect Design and Materials
The digital file provides the blueprint, but the material you choose gives your project its soul. The interplay between an intricate design and the right wood is what elevates a project from a simple craft to a work of art. The choice of material affects not only the final aesthetic but also the ease of cutting and assembly. For multilayered projects, consistency and stability are paramount. You need a material that cuts cleanly, holds fine detail, and won’t warp when layered and glued.
Let’s explore some of the most popular choices for multilayered laser cutting designs:
- Baltic Birch Plywood: Often considered the gold standard for laser cutting, Baltic birch is prized for its strength and stability. Unlike standard plywood, it features a void-free core, ensuring a clean, consistent edge when cut. Its pale, uniform surface is a perfect canvas for paints and stains, allowing you to create vibrant, colorful layers. For large pieces of laser cut wall art, its structural integrity prevents sagging or warping over time, making it an exceptionally reliable choice.
- MDF (Medium-Density Fiberboard): If your project is destined for a full paint finish, MDF is an excellent and economical option. It has no wood grain, providing an incredibly smooth surface that takes paint beautifully. It cuts with remarkable consistency, but it produces a lot of fine dust and its edges are porous, often requiring a sealer before painting. It is heavier and less strong than plywood, making it better suited for smaller, decorative items rather than large, structural pieces.
- Cherry, Walnut, or Maple Hardwood: For a premium, natural finish, nothing beats solid hardwood. Woods like cherry, with its warm reddish hues, or walnut, with its deep, rich brown, can create stunning heirloom-quality pieces without any paint or stain. However, hardwoods are more expensive and can be trickier to cut. You must pay close attention to grain direction and potential knots, and they typically require higher laser power and slower speeds, increasing the risk of charring on the edges. They are best used for projects where the natural beauty of the wood is the main feature.
Evaluating Your Digital Blueprint: What Makes a Good File?
Just as important as the physical material is the quality of the digital file itself. Not all 3d laser cut files are created equal. A poorly designed file can lead to frustration, wasted material, and a disappointing result. When selecting a design, look for several key indicators of quality. First, inspect the vector paths. The lines should be clean, closed, and free of unnecessary nodes or overlapping segments. Messy vectors can confuse the laser, resulting in jagged edges or incomplete cuts. Second, evaluate the layering logic. A well-crafted file will have layers that are clearly organized and named, often accompanied by a PDF assembly guide or a numbered diagram. This foresight from the designer makes the assembly process intuitive. Look for designs where the layers build upon each other in a way that creates logical depth and avoids overly fragile, unsupported pieces. Finally, consider the complexity against your own capabilities. A design with hundreds of tiny, intricate pieces might look stunning, but it will be a significant challenge to cut, weed, and assemble perfectly. Start with projects that have fewer, larger layers to build your confidence and skills before tackling a highly complex masterpiece. Always check the file description for recommended material thickness and ensure your laser cutter is capable of cleanly cutting it.
From Digital File to Physical Masterpiece
With your design chosen and materials in hand, it’s time to bridge the gap between the digital and the physical. This stage is where precision and patience pay off, transforming flat sheets of wood into a structured, three-dimensional form. The process can be broken down into three key phases: cutting, assembly, and finishing.
Setting Up and Executing the Cut
Your first step is to import the multilayer laser cut file into your laser cutter’s control software, such as LightBurn or RDWorks. If the designer has color-coded the layers in the SVG file, you can easily assign different cutting parameters to each color. Before you cut your final material, always perform a test cut on a small scrap piece. This allows you to dial in the perfect settings for your specific material, as even different sheets from the same batch of wood can vary slightly. You are aiming for a setting that cuts cleanly through the material in a single pass with minimal charring on the edges. A good starting point for 3mm Baltic birch plywood might be 10-15 mm/s speed at 50-60% power on a 60W CO2 laser, but this will vary widely between machines. Once your settings are dialed in, arrange the parts on your virtual workspace to maximize material usage. Secure your wood sheet on the laser bed, ensure your laser is properly focused, and begin the cutting process.
The Assembly Stage: Bringing the Layers Together
Once all the layers are cut, your workspace will be filled with a collection of intricate wooden pieces. The first order of business is cleaning. Laser cutting can leave a slight smoky residue on the surface and edges. A light sanding with fine-grit sandpaper (220-grit or higher) or a quick wipe with an alcohol-soaked cloth can remove this residue, preparing the surface for glue and finishing. Next comes the most critical pre-assembly step: the dry fit. Stack all the pieces in their correct order without any glue. This allows you to confirm that everything fits perfectly and helps you memorize the assembly sequence. It’s far better to discover a tight spot or an upside-down layer now than when wet glue is involved.
For adhesion, a quality wood glue like Titebond II is an excellent choice, offering a strong bond and a reasonable working time. Apply a thin, even layer of glue to each surface—too much will squeeze out and create a mess, while too little will result in a weak bond. A small brush or a glue bottle with a fine tip applicator can provide precise control. Carefully place each layer, using the outer edges and key features as alignment guides. For complex designs, some files may include tiny registration marks that you can use to line up layers perfectly. Once stacked, apply gentle, even pressure using clamps or heavy books to ensure a tight bond with no gaps while the glue cures.
Applying the Finishing Touches
The final step is to protect and enhance your newly assembled 3d laser cut artwork. The finish you choose will define its final look and durability. Many creators prefer to paint or stain the individual layers before assembly. This technique prevents paint from seeping between layers and allows for crisp, clean color transitions. If you go this route, be sure to mask off the areas that will be glued, as paint and stain can interfere with the wood glue’s ability to bond. If you prefer a monolithic look or a single-color finish, you can paint or stain after assembly. Once your colors are applied and dry, a final protective clear coat is highly recommended. A few light coats of a spray-on polyurethane or lacquer in a matte, satin, or gloss finish will seal the wood, protect it from moisture and UV damage, and give your masterpiece a professional, polished look that will last for years.
Conclusions
You now have the knowledge to create your own stunning 3D wooden art. By selecting a quality multilayer laser cut file and carefully following the steps for cutting and assembly, you can produce intricate pieces that are sure to impress. Don’t be afraid to experiment with different woods and finishes to make each creation uniquely yours and elevate your craft.
Frequently Asked Questions
Q: What are the best file formats for multilayer laser cutting?
A: The two most common and reliable formats are SVG (Scalable Vector Graphics) and DXF (Drawing Exchange Format). SVG is a modern standard that can store additional data like colors for different operations, while DXF is an older but universally compatible format supported by nearly all CNC and laser software.
Q: What is the best wood for a detailed laser cut wall art piece?
A: Baltic birch plywood is often considered the best choice for detailed wall art. Its void-free core ensures clean cuts, and its strength and stability prevent warping over time, making it ideal for larger, intricate projects.
Q: Should I paint my project before or after assembling the layers?
A: Both methods work, but painting individual layers before assembly is often preferred. This allows for crisp, clean color separations between layers and prevents paint from seeping into the gaps. Just remember to mask the areas that will be glued together.
Q: Why is a test cut so important?
A: A test cut on a scrap piece of your material is crucial because it allows you to fine-tune your laser’s speed and power settings. This ensures a clean cut through the material in a single pass with minimal charring, preventing wasted material and achieving the best possible result for your final project.
Block "subscribe-popup" not found